
Jib Crane Troubleshooting Guide
Introduction
A jib crane fault during production is not a maintenance problem. It is a production problem. Every minute the crane is down, work stops. Parts pile up. Operators wait. In a busy fabrication shop or assembly line, even a 30-minute unplanned outage causes measurable throughput loss.
The good news: most jib crane faults are predictable. They follow recognizable patterns. The rotation gets stiff before it fails. The brake drifts before it stops holding. The hoist stops responding before it burns out. Knowing the symptoms, causes, and fixes for the most common failures turns an emergency repair into a planned intervention.
This guide covers the 10 most common jib crane faults. We organize them by system: rotation, hoist and lifting, and structure. For each fault we describe the symptom, list the likely causes in order of probability, and provide a step-by-step diagnostic and repair procedure.
Part 1: Safety Preparation Before Any Troubleshooting
Never begin fault investigation without completing these steps first.
LOTO Lockout/Tagout
De-energize the crane before touching any component. Follow your facility’s LOTO procedure (OSHA 29 CFR 1910.147). Lock the main disconnect. Tag the pendant control. Verify zero energy by pressing the up button — the hoist must not respond.
Do not rely on the pendant emergency stop alone. A failed contactor can bypass the stop function. The main disconnect lock is the only reliable isolation.
Tools to Have Ready
Bring these tools to the crane before starting:
Multimeter: for voltage and continuity checks on the control circuit.
Vernier calipers: for measuring brake lining thickness and chain wear.
Dial indicator (with magnetic base): for measuring slewing bearing axial clearance.
Grease gun: for lubrication-related faults.
Torque wrench: for bolt torque verification.
Camera or smartphone: to document fault conditions before disassembly.
Document the Fault First
Take photos of the fault condition before touching anything. Note the fault history: When did it start? Is it consistent or intermittent? Did anything change before the fault appeared (new loads, new operator, recent maintenance)?
This documentation saves diagnostic time. It also supports warranty claims and ASME B30.12 maintenance records.
Part 2: Rotation System Faults — Five Common Problems
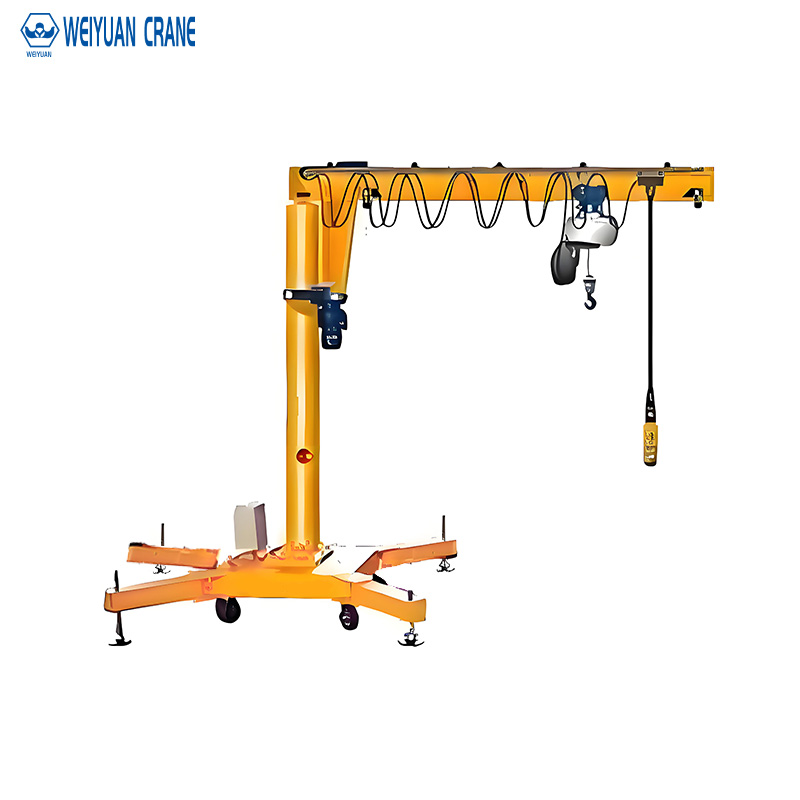
Fault 1: Boom Rotation Is Stiff or Seized
Symptom: The boom requires unusually high push force to rotate. In severe cases, it will not rotate at all.
Causes in order of probability:
Cause A — Slewing bearing lubrication failure: The grease in the bearing raceway has been depleted, contaminated with water or metal particles, or has hardened due to extended service without re-lubrication. This is the most common cause of rotation stiffness.
Cause B — Slewing bearing axial clearance exceeded: The bearing has worn beyond its design clearance. The rolling elements are binding rather than rolling freely.
Cause C — Mounting bolt looseness or failure: One or more of the slewing bearing’s mounting bolts has loosened or fractured. This allows the bearing rings to shift under load and bind during rotation.
Step-by-step diagnosis and fix:
Step 1: Re-lubricate the bearing first. Apply NLGI Grade 2 lithium grease through the bearing’s grease fitting while slowly rotating the boom. Continue until fresh grease appears at the seal lip.
Step 2: If stiffness persists after lubrication, measure axial clearance. Mount a dial indicator on the mast structure with the tip contacting the underside of the boom mounting flange. Apply upward force at the boom tip. Record the indicator reading. Compare to the manufacturer’s maximum allowable clearance.
Step 3: Check all mounting bolts for torque. Use a calibrated torque wrench. Compare applied torque to the manufacturer’s specification. Replace any bolt that shows reduced torque resistance (indicating thread damage) or visible deformation.
Step 4: If clearance exceeds the rejection limit and lubrication does not restore smooth operation, schedule slewing bearing replacement. Do not continue operating a crane with a seized or excessively worn bearing.
Fault 2: Periodic Clicking or Grinding Noise During Rotation
Symptom: A clicking, crunching, or grinding sound that repeats at a regular interval as the boom rotates. The interval corresponds to one revolution or a fraction of one revolution.
Cause: Rolling element surface damage. Pitting or spalling has developed on one or more rolling elements or on the bearing raceway. The damaged area passes through the load zone with each revolution, creating a repeatable noise event.
Step-by-step diagnosis:
Step 1: Identify the noise frequency. Count the clicks per full boom rotation. One click per revolution suggests a single damaged rolling element or a single raceway pit. Rapid continuous grinding suggests widespread raceway damage.
Step 2: Apply fresh grease. If the noise reduces temporarily after lubrication, the damage is in an early stage. Plan bearing replacement within the next maintenance window.
Step 3: If the noise does not reduce after lubrication, or if the grinding is continuous, tag the crane for bearing replacement before next use. Progressive raceway spalling can lead to bearing seizure with no additional warning.
Fault 3: Boom Drifts After Release (No Holding Position)
Symptom: The boom swings freely after the operator releases it. It does not stay in the position where it was left.
Cause: Jib cranes are designed to hold position through friction at the slewing bearing interface and through the bearing’s internal resistance. If the bearing has been over-lubricated or if the bearing preload has been reduced by wear, this friction drops below the level needed to hold the boom against unbalanced loads or air currents.
Fix: For cranes without a separate rotation brake, this condition indicates the bearing has worn beyond the point where it provides adequate resistance. Bearing replacement or adjustment of the slewing mechanism preload (where adjustable) is required.
For cranes with a separate rotation locking mechanism, check the lock engagement mechanism for wear or damage.
Fault 4: Visible Vertical Wobble at the Boom Tip

Symptom: The boom tip moves noticeably up and down as loads are applied and released. The movement is visible at the end of the boom and is more pronounced with longer booms and heavier loads.
Cause: Slewing bearing axial clearance has exceeded the rejection limit. The bearing’s internal geometry no longer constrains the boom to a stable horizontal plane.
Diagnosis: Measure axial clearance as described in Fault 1, Step 2. Compare to the manufacturer’s published rejection criterion. Typical rejection limits: 0.5 to 1.5mm for light cranes; 1.0 to 3.0mm for heavier cranes. Obtain the specific value from your crane’s documentation.
Fix: If clearance exceeds the rejection limit, replace the slewing bearing before next use. Operating with excessive axial clearance imposes dynamic bending loads on the mast connection that were not part of the design basis.
Fault 5: Grease Leaking from the Slewing Bearing Seal
Symptom: Grease is visible around the slewing bearing seal lips. Grease may be accumulating on the mast or dripping to the floor.
Causes:
Cause A — Over-lubrication: The most common cause. Applying too much grease at one time pressurizes the bearing cavity and forces grease past the seal lip.
Cause B — Seal lip wear or aging: The elastomeric seal has hardened, cracked, or worn to the point where it no longer contains the bearing grease.
Fix for Cause A: Wipe away escaped grease. Do not add more grease until the next scheduled lubrication interval. In future, apply grease slowly while rotating the boom — stop as soon as fresh grease appears at the seal, regardless of how much grease was applied.
Fix for Cause B: Clean the escaped grease. Monitor bearing condition at accelerated inspection intervals. A seal that has lost its integrity will allow contamination to enter the bearing. Plan bearing replacement at the next maintenance window.
Part 3: Hoist and Lifting System Faults — Three Common Problems
Fault 6: Hoist Does Not Respond When Controls Are Pressed
Symptom: The hoist motor does not start. No movement, no sound from the motor, or only a click from the contactor with no motor movement.
This fault has a logical diagnostic sequence. Work through the control circuit from the input end to the motor.
Step 1: Check the emergency stop. Press and release the emergency stop button. Many cranes fail to restart because the emergency stop was bumped and not reset. Turn the button clockwise to release if it is a twist-release type.
Step 2: Check the upper limit switch. If the hook is at its highest position, the upper limit switch may have cut power to prevent two-blocking. Lower the hook manually by pressing the “down” button. If the hoist responds in the down direction only, the upper limit switch has triggered correctly. Verify the limit switch cam position and adjust if the switch is triggering before the hook reaches its design upper limit.
Step 3: Check control circuit voltage. With the crane energized and LOTO removed for diagnostic purposes only: measure voltage across the contactor coil terminals. The voltage should equal the control circuit voltage (typically 24V DC or 110V AC). No voltage at the coil terminals indicates an open circuit upstream — check the control transformer, fuses, and safety relay outputs.
Step 4: Check contactor operation. Apply voltage directly to the contactor coil and verify that the main contacts close. If the contacts do not close with coil voltage applied, the contactor has failed and requires replacement.
Step 5: Check motor supply. If the contactor closes but the motor does not run, measure voltage at the motor terminals with the contactor energized. Missing phase or low voltage at the motor terminals indicates a wiring fault between the contactor and the motor.
Fault 7: Hoist Brake Drifting — Hook Descends After Release
Symptom: After the operator releases the “down” or “up” control, the hook continues to descend slowly. The descent may be very slow (millimeters per minute) or fast enough to be immediately visible.
This is a safety-critical fault. Tag the crane out of service immediately. Do not continue lifting operations until the brake is repaired and tested.
Causes in order of probability:
Cause A — Brake lining worn below minimum thickness: The electromagnetic disc brake’s friction lining has worn to the point where the spring-applied clamping force no longer generates adequate holding torque.
Cause B — Oil or grease contamination of the brake disc: Lubricant from an adjacent gearbox seal failure has contaminated the brake friction surfaces, reducing the coefficient of friction.
Cause C — Brake spring fatigue: The disc springs (Belleville washers) that provide the braking clamping force have fatigued and lost their spring rate, reducing braking force.
Diagnosis and repair:
Step 1: Measure brake lining thickness. Compare to the manufacturer’s minimum thickness specification. Rejection criterion is typically 50% of original thickness. Replace if at or below minimum.
Step 2: Inspect the brake disc for oil or grease contamination. Any oil film on the friction surfaces requires: removal of the contamination source (repair the leaking seal), cleaning of the disc with brake cleaner, and replacement of the lining (contaminated lining cannot be cleaned back to specification).
Step 3: Measure brake spring free length and compare to the manufacturer’s new spring dimension. Springs that have lost more than 10% of their free length require replacement.
After any brake repair: perform a static load test at 100% rated capacity. Suspend the load 300mm off the floor. Hold for 10 minutes. Zero hook drift is the acceptance criterion.
Fault 8: Upper Limit Switch Does Not Trip
Symptom: The hook can be raised past its design upper limit without the hoist cutting power. The hook block contacts the hoist body (two-blocking condition) or the hoist does not stop at the expected upper limit position.
This is a safety-critical fault. Two-blocking — the hook block contacting the hoist — can break the rope or chain, drop the load, or damage the hoist structure.
Cause A — Limit switch contact has fused closed: The switch contacts have welded together due to arcing. The switch no longer opens when the cam actuates it.
Cause B — Cam position has shifted: The adjustable cam on the limit switch spindle has rotated out of position. The cam no longer actuates the switch at the correct hook position.
Diagnosis:
Step 1: With the crane isolated (LOTO), manually actuate the limit switch mechanism by pressing the cam lever by hand. Measure continuity across the limit switch contacts with a multimeter. The contacts should open when the lever is pressed. If they remain closed (zero resistance), the contacts have fused and the switch requires replacement.
Step 2: If the contacts open correctly during manual actuation, the cam position needs adjustment. Lower the hook to its maximum design upper limit position manually. Adjust the cam position until the switch activates at this hook position.
After repair: test the upper limit function at slow speed with no load before returning the crane to service.
Part 4: Structure and Mounting System Faults — Two Common Problems
Fault 9: Mast Base Tilting or Foundation Movement
Symptom: The mast is no longer vertical. A plumb line or level shows the mast has tilted. The tilt may be visible to the naked eye or measured at only 2 to 3mm per meter of mast height.
Causes:
Cause A — Foundation anchor bolt looseness: Vibration and dynamic loading from crane operation has loosened one or more of the foundation anchor bolts.
Cause B — Foundation concrete cracking: The concrete foundation has developed structural cracks, reducing its effective section and allowing the mast base plate to shift under lateral loading.
Cause C — Foundation settlement: The soil beneath the foundation has settled, causing the foundation to tilt.
Immediate action: Tag the crane out of service. A tilted mast imposes asymmetric loads on the slewing bearing and creates conditions that are outside the crane’s structural design basis.
Diagnosis:
Step 1: Check anchor bolt torque. Use a calibrated torque wrench on each bolt. Compare to the manufacturer’s specified installation torque. Any bolt showing significantly lower torque resistance requires investigation — the bolt may have stretched or the foundation concrete around it may have cracked.
Step 2: Inspect the foundation for visible cracking. Hairline cracks in non-structural concrete are normal. Cracks wider than 1mm, cracks that pass through the anchor bolt zone, or cracks that show relative movement between the two sides require structural engineer evaluation.
Step 3: Commission a licensed structural engineer to assess the foundation condition and soil bearing capacity if Cause B or C is suspected. Do not attempt to re-level the mast by shimming without a structural assessment of the foundation’s remaining capacity.
Fault 10: Wall or Column Mounting Point Cracking or Deformation
Symptom: Visible cracks in the wall or concrete at the upper mounting bracket location. The mounting bracket is visibly tilted or has moved from its installed position.
This is a structural emergency. Stop all crane operations immediately. Establish an exclusion zone around the crane.
Cause: The mounting structure was either insufficient for the crane’s actual load (specified incorrectly or the wall was not assessed by a structural engineer before installation) or fatigue cracking has developed at a stress concentration in the mounting hardware or the wall structure after years of cyclic loading.
Action:
Step 1: Isolate the area. No personnel under or near the crane.
Step 2: Photograph the full extent of the visible damage. Document every crack, every deformed component, and every displaced element.
Step 3: Commission a licensed structural engineer — not a crane technician — to assess the mounting structure before any repair or reinstallation proceeds. The engineer must assess: remaining structural capacity of the wall or column, cause of the failure, and required remediation scope.
Step 4: Do not reinstall the crane on the same mounting structure without the structural engineer’s written confirmation of adequacy after repair.
Part 5: Preventive Measures — Stopping Faults Before They Start
The 10 faults above share a common feature: almost all of them provide warning signs before they become failures. Catching them early requires a structured inspection routine.
Pre-Shift Inspection (5 Items — 5 Minutes)
Check these five items before every shift:
- Slewing bearing rotation: Swing the boom by hand. Note any stiffness, grinding, or unusual resistance compared to normal.
- Hook and safety latch: Verify the latch closes fully and springs back when released.
- Wire rope or chain: Visual check for visible damage, kinking, or unusual wear.
- Brake test: Raise the unloaded hook 300mm. Release the control. The hook must not drift.
- Upper limit switch: Raise the empty hook to the upper limit. The hoist must cut power before the hook block contacts the hoist body.
Any pre-shift item that fails: tag the crane OUT OF SERVICE. Do not operate it until the fault is resolved.
Lubrication Schedule by Duty Class
Slewing bearing grease intervals:
- FEM M3 (light, occasional): every 3 months
- FEM M4 (standard production): every 1 to 2 months
- FEM M5 (heavy production): every month
- Outdoor or marine environment: reduce all intervals by 50%
Wire rope lubrication: every 6 months for indoor cranes; every 3 months for outdoor or humid environments.
Hoist gearbox oil: annual inspection; change per manufacturer’s interval (typically every 2 to 3 years in normal service).
ASME B30.12 Quick Reference — Rejection Criteria
Component | Rejection Criterion
Wire rope | 2+ broken wires in any 6-rope-diameter length; diameter reduced to 67% of nominal
Load chain | Any visible crack; bar diameter worn to 90% of nominal; 11-link elongation exceeds 2%
Hook | Throat opening increased by 15% of nominal; any visible crack; safety latch missing or non-functional
Brake | Lining at or below manufacturer’s minimum thickness; any contamination on friction surfaces
Frequently Asked Questions
Q: Can I continue operating a jib crane if only minor rotation stiffness is noticed?
A: No. Rotation stiffness is the first symptom of slewing bearing degradation. Continuing to operate accelerates the wear and increases the risk of a sudden seizure under load. At the first sign of increased rotation resistance, re-lubricate and measure axial clearance. If clearance is within limits after lubrication, schedule a more thorough inspection at the next maintenance opportunity. If clearance is at or beyond the rejection limit, tag out immediately.
Q: How long does jib crane slewing bearing replacement take?
A: For most standard industrial jib cranes (1 to 5 tons), a prepared two-person maintenance team can complete a slewing bearing replacement in 4 to 8 hours. This includes rigging the boom for safe support during the bearing swap, removing and installing the bearing, torquing all mounting bolts to specification, and performing the post-installation functional test and load test per ASME B30.12.
Q: After fixing brake drift, is a load test required before returning the crane to service?
A: Yes. ASME B30.12 requires that any significant repair to a crane’s load-carrying components — including the hoist brake — be followed by a functional test before return to service. For brake repairs, the minimum test is a static hold test: suspend 100% rated capacity 300mm off the floor for 10 minutes with zero hook drift as the acceptance criterion. Document the test date, load, duration, and result in the crane’s maintenance record.