


Jib Crane Types & Selection Guide
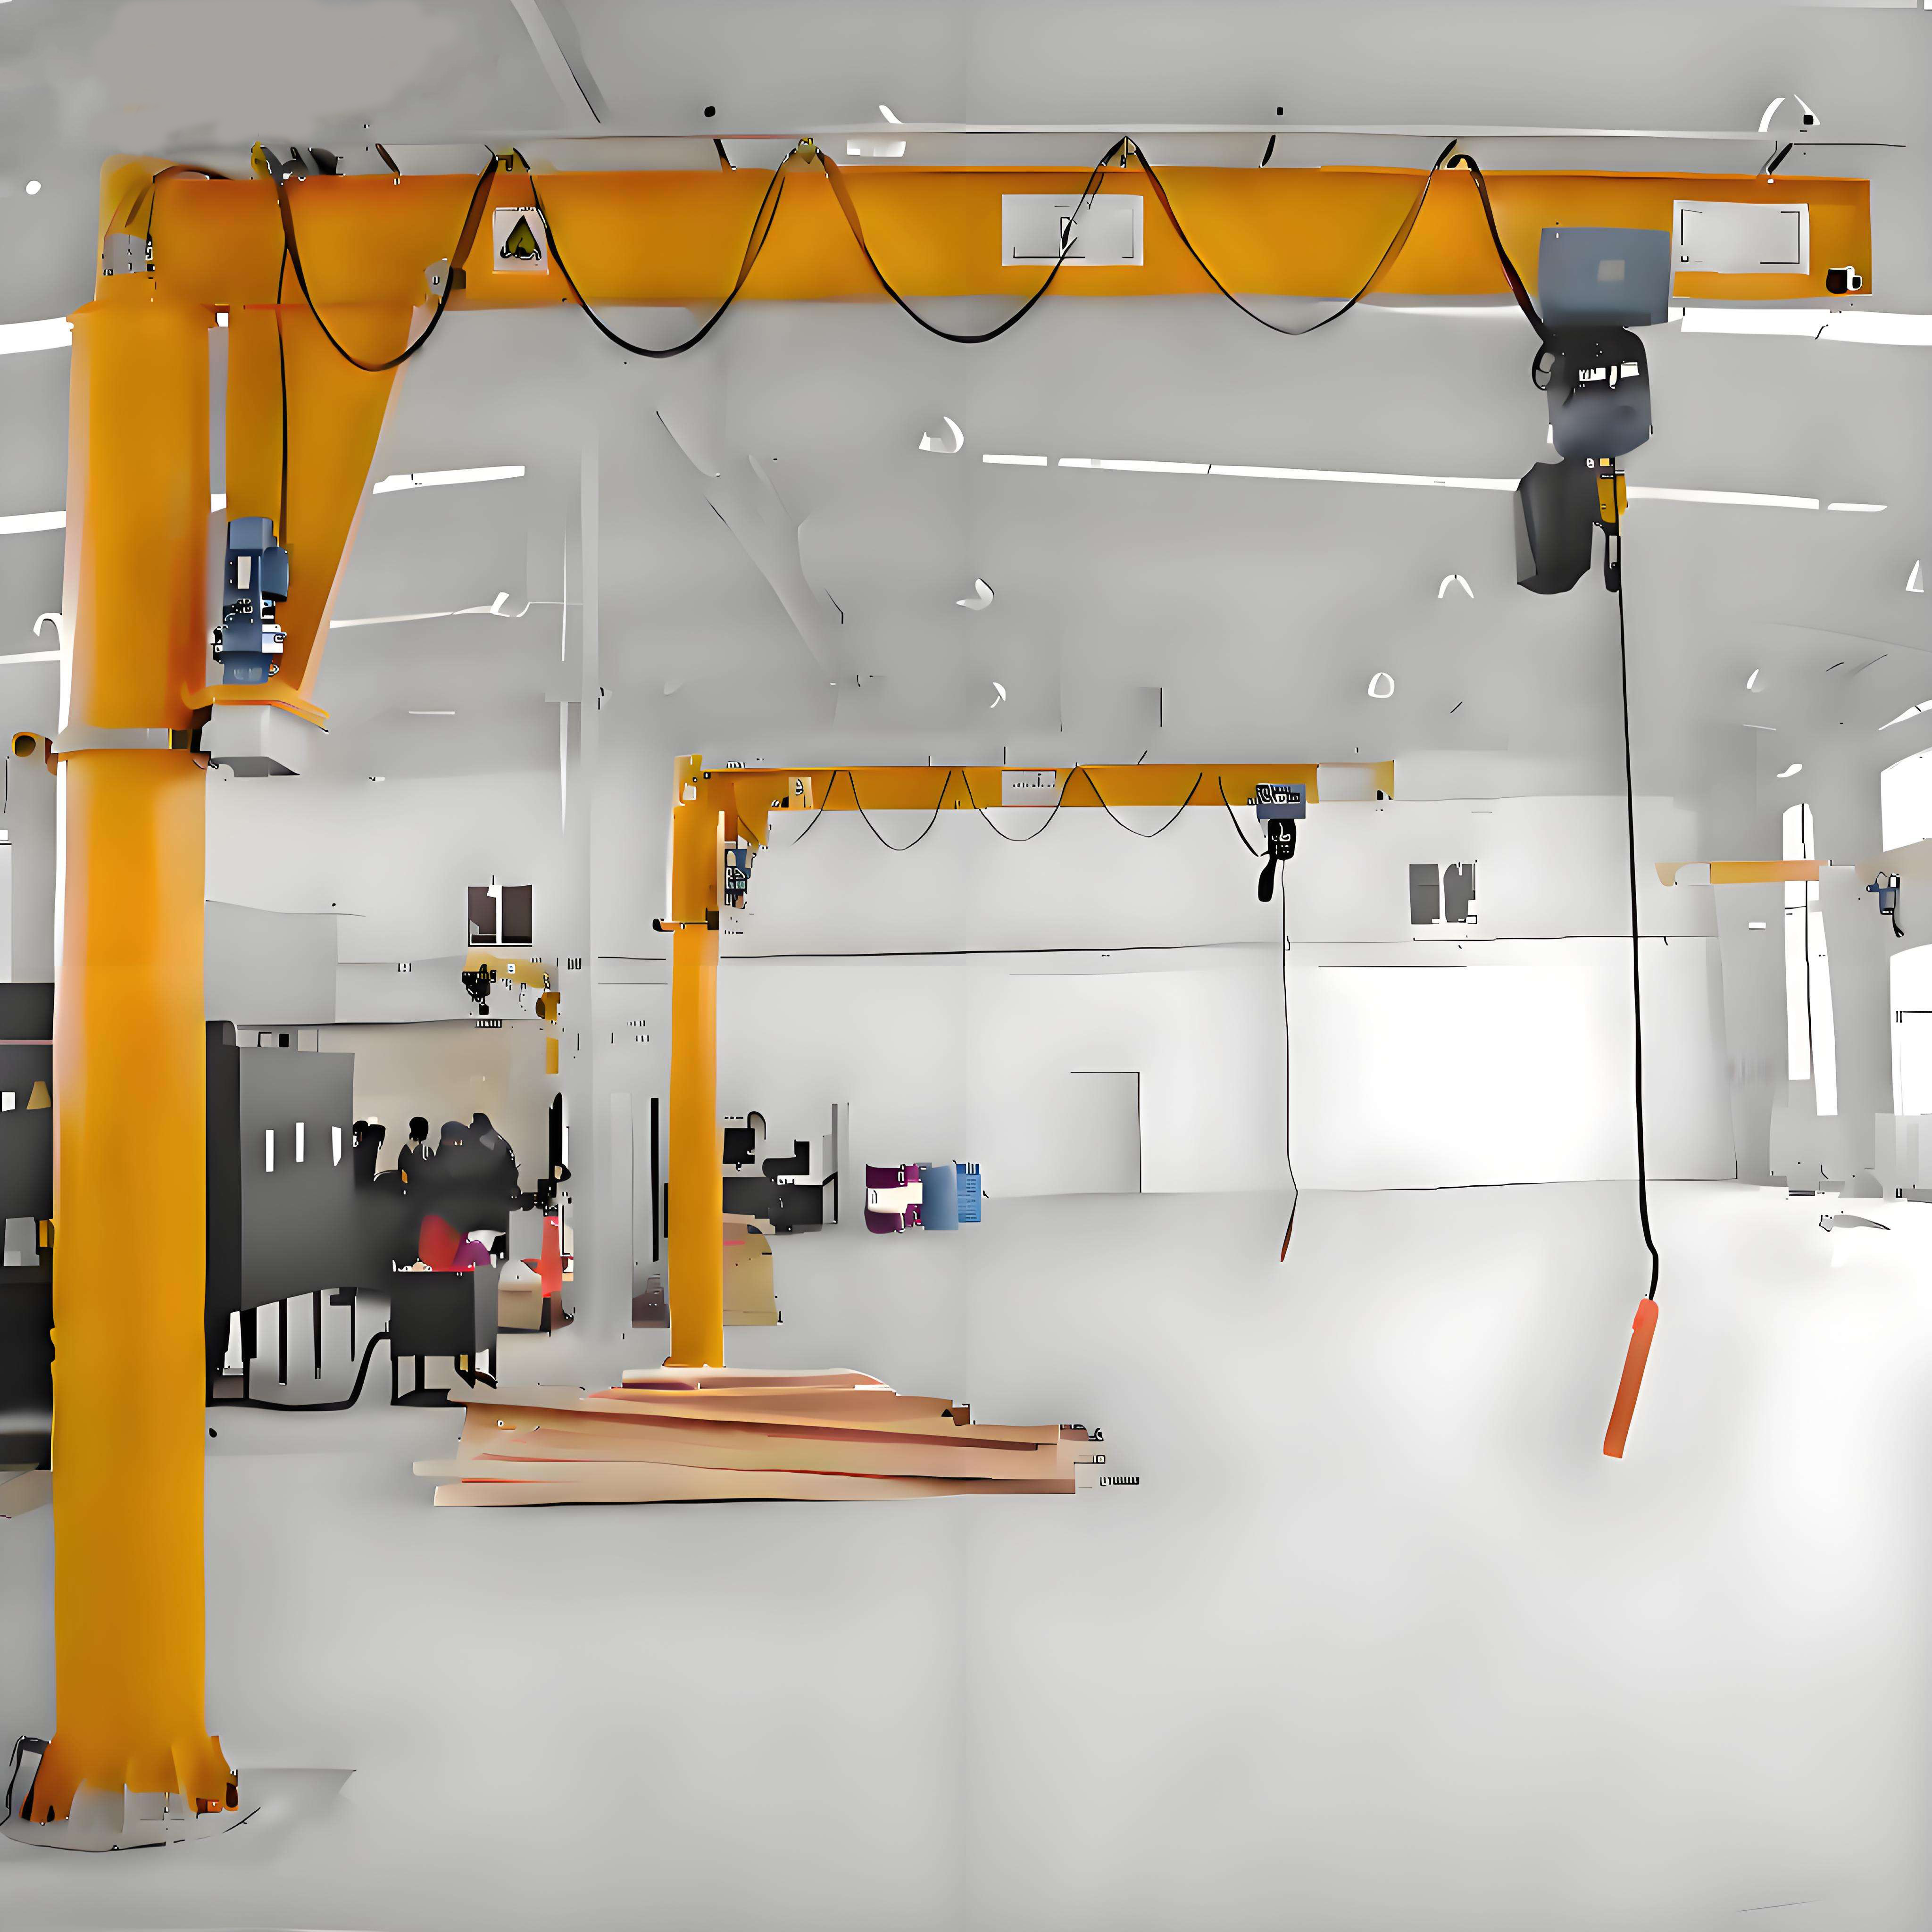
Introduction
A machine shop I visited had bolted a 500 kg wall-mounted jib crane to what looked like a solid wall. The crane worked fine on day one. The problem was the wall — a lightweight concrete block partition that had never been designed to carry a horizontal pull-out force. Every time the operator swung a load out to the end of the boom, the crane tried to peel the top anchors straight out of the block.
For a few months the anchors held, more or less. Then hairline cracks spidered out from the top bracket, the crane started drooping at the tip, and one morning the whole assembly shifted a few centimeters and jammed against a machine. The shop had to shut the cell down, chase a structural engineer, and end up building a freestanding pillar crane on its own foundation — the machine they should have specified in the first place. The crane wasn’t the mistake. The type was wrong for what it was mounted to.
That’s the trap with jib cranes. They look like the simplest lifting machine on the floor — a boom, a hoist, a place to bolt it — so buyers treat the choice as trivial. But “jib crane” covers at least four structurally different machines, each throwing a completely different set of forces into whatever holds it up. Pick the type that suits your building, your foundation, and your coverage pattern, and the crane serves a workstation reliably for twenty years. Pick the wrong one and you fight it — cracked anchors, a boom that won’t reach, or a foundation you have to tear out and rebuild.
This guide walks through the four main jib crane types, the load path each one drives into its support, the practical capacity and reach ranges, the duty class that decides service life, the mounting and foundation each demands, and the coverage and hook height they deliver — plus 2026 pricing so your budget survives the first supplier conversation.
What you’ll take away:
- The four main jib crane types — wall-mounted, pillar-mounted, articulating, and freestanding — and where each earns its place
- How each type loads its support, and why that decides what you can mount it to
- Practical capacity and boom reach ranges for each configuration
- How to match CMAA (A–F) and FEM/ISO (M3–M8) duty class to real usage
- The mounting and foundation demands that quietly rule types in or out
- How rotation, coverage area, and hook height differ between configurations
- 2026 price benchmarks with the real cost drivers
Part 1: The Four Main Jib Crane Types
Every jib crane shares one idea: a horizontal boom that carries a hoist and rotates around a vertical axis, covering an arc or circle of floor at a single workstation. That’s what separates a jib from a bridge or gantry crane — it serves a point, not a span. Beyond that shared idea, the four common types diverge sharply, and the difference is structural, not cosmetic.
Wall-Mounted Jib Crane
The boom bolts to a bracket fixed to a building wall or a line of columns, rotating through an arc — typically up to about 180 degrees — sweeping the floor in front of the wall. There’s no floor-mounted post, so nothing stands in the working area.
Where it earns its place: workstations along a wall or column line, where you want the floor completely clear and only need to cover the semicircle in front of the mounting surface. Assembly benches, machine-tending stations, and loading bays along a building edge suit wall-mounted jibs perfectly — provided the wall or column can carry the load.
Pillar-Mounted (Column-Mounted) Jib Crane
The boom rotates around a vertical pillar that’s bolted to its own foundation in the floor. Because the pillar carries the load down to a dedicated foundation rather than into a wall, this type can rotate a full 360 degrees, covering a complete circle around the post.
Where it earns its place: standalone workstations away from any wall, where you need full-circle coverage — feeding a machine from any angle, serving a work cell in open floor space, or transferring loads between two positions on opposite sides of the post. The pillar is the versatile, most common freestanding-style jib.
Articulating (Knuckle-Boom) Jib Crane
An articulating jib uses two boom sections joined by a pivot — a primary arm mounted to a wall or pillar, and a secondary arm that hinges off the end of the first. The two arms rotate independently, letting the hook reach around obstructions, into machine openings, and behind fixed equipment where a single straight boom simply can’t go.
Where it earns its place: tight, congested workstations where the load has to navigate around columns, into a machine enclosure, or through a doorway. The articulating design trades some rated capacity and reach for the ability to place a load precisely in a space a rigid boom can’t access.
Freestanding (Floor-Mounted) Jib Crane
A heavy-duty freestanding jib is a robust pillar type built for the top of the capacity and reach range, on a substantial engineered foundation. It stands entirely on its own — needing no building support at all — and delivers full 360-degree rotation with the longest booms and highest capacities in the jib family.
Where it earns its place: heavier, higher-duty standalone lifting where no suitable wall exists and the building structure can’t or shouldn’t carry crane loads. Foundries, heavy machine shops, and outdoor yards use freestanding jibs when they need serious capacity and full coverage independent of the building.
Quick Type Comparison
| Type | Mounts to | Rotation | Typical capacity | Best for |
|---|---|---|---|---|
| Wall-mounted | Wall / column | Up to ~180° | 0.125 – 5 t | Clear-floor workstations along a wall |
| Pillar-mounted | Own floor foundation | Up to 360° | 0.25 – 10 t | Standalone full-circle coverage |
| Articulating | Wall or pillar | 360° (dual arm) | 0.125 – 2 t | Reaching around obstructions |
| Freestanding (heavy) | Own engineered foundation | 360° | 1 – 20+ t | Heavy standalone duty, no building support |
Mini-takeaway: the type is a support-and-coverage decision before it’s a capacity one. Wall-mounted suits clear-floor arcs along a wall; pillar and freestanding suit full-circle standalone coverage; articulating suits reaching around obstacles. Settle the type first — everything downstream sits on top of it.
Part 2: Structural Load Paths — What Each Type Demands of Its Support
The reason the type matters so much is hidden in the load path. A jib crane doesn’t just hang weight off a boom; it converts that weight, acting at a distance from the pivot, into a bending moment that has to be resisted by whatever holds the crane up. Understanding where that moment goes explains why the machine shop’s wall crane tore itself loose.
The Common Principle: Load × Reach = Moment
When a hoist lifts a load at the end of a boom, the force on the support isn’t just the load’s weight pulling down. It’s the weight multiplied by the horizontal distance from the pivot — the overturning moment. A 500 kg load at 4 metres of reach applies the same 2,000 kg-metre moment whether the crane is wall-mounted or on a pillar. What changes is what has to resist that moment — and that’s the whole story.
Wall-Mounted Load Path
   WALL-MOUNTED — LOAD PATH

   WALL │
        │←── top bracket: PULL-OUT (tension)
        ├────────────────[boom]───────[load]
        │                               ↓
        │←── bottom bracket: PUSH-IN (compression)
        │
   Wall / column must resist the couple
Load path: hook → hoist → boom → top and bottom brackets → wall or column → building structure → foundation.
The moment resolves into a couple at the two brackets: the top bracket is pulled away from the wall (tension, trying to rip the anchors out), and the bottom bracket is pushed into the wall (compression). This is the punishing part — that top pull-out force is exactly what a lightweight wall can’t resist, and exactly what failed in the introduction. A wall-mounted jib is only as good as the wall’s ability to resist horizontal pull-out.
Pillar-Mounted Load Path
   PILLAR-MOUNTED — LOAD PATH

        [load]───────[boom]────┐
          ↓                    │
                          ┌────┴────┐
                          │ PILLAR  │ ← carries moment down
                          │         │
                        ══╧═════════╧══
                        FOUNDATION (resists overturning)
Load path: hook → hoist → boom → pillar (bending) → base plate and anchor bolts → foundation → soil.
The pillar carries the full overturning moment straight down its own length into the base plate, where the anchor bolts resist the moment as a tension-and-compression couple, and the foundation spreads it into the soil. Nothing touches the building. This is why a pillar crane can rotate a full circle — there’s no wall in the way — but it’s also why the foundation is critical: the entire overturning moment lands on it.
Articulating Load Path
An articulating jib carries the same load-times-reach moment, but the pivoting second arm means the reach — and therefore the moment — changes as the arm folds and extends. The support (wall or pillar) must be designed for the maximum moment at full extension, and the pivot joint itself carries concentrated load. The dual-hinge geometry is why articulating jibs are generally limited to lighter capacities: more joints mean more places for deflection and wear under a heavy moment.
Freestanding Load Path
The freestanding load path mirrors the pillar’s, scaled up: a larger pillar, a heavier base plate, more and larger anchor bolts, and a substantially bigger foundation block engineered to resist a much larger overturning moment without tipping or settling. Everything is sized for the moment, because the moment is the governing force.
Mini-takeaway: every jib turns load × reach into an overturning moment, and the type decides what resists it. Wall-mounted hands a pull-out couple to the wall; pillar and freestanding hand the whole moment to a foundation. Get the wheel-load equivalent here — the reaction forces — from your supplier before you commit to a mounting surface.
Part 3: Capacity and Boom Reach Ranges
With the type settled, the two numbers that size a jib are capacity and boom reach. They interact more tightly than on any other crane, because reach directly multiplies the moment the structure has to carry — so a longer boom at the same capacity is a much heavier structural demand.
Practical Ranges by Type
| Type | Practical capacity | Practical boom reach | Rotation |
|---|---|---|---|
| Wall-mounted | 0.125 – 5 t | 2 – 6 m | Up to ~180° |
| Pillar-mounted | 0.25 – 10 t | 2 – 8 m | Up to 360° |
| Articulating | 0.125 – 2 t | 2 – 5 m (combined arms) | 360° |
| Freestanding (heavy) | 1 – 20+ t | 3 – 10 m | 360° |
Why Reach Costs More Than Capacity
Here’s the point buyers miss: extending the boom is structurally expensive. Doubling the capacity doubles the moment, but doubling the reach also doubles the moment — and a longer boom adds its own dead-weight moment on top. A 2-tonne crane at 3 metres and a 1-tonne crane at 6 metres apply a similar moment to the structure, but the longer-reach crane needs a deeper boom section to control deflection and a stronger support to carry the same moment further out. Specify the reach you genuinely need, not the longest boom “just in case” — every extra metre compounds through the boom, the support, and the foundation.
Size Capacity to the Real Suspended Load
Capacity goes wrong the same way it does on every crane: buyers rate against the bare load and forget everything else on the hook. Your rated capacity has to cover:
- The heaviest load you’ll actually lift — not the average
- The hoist and trolley themselves (on a jib, the trolley runs out the boom and adds to the tip moment at maximum reach)
- The below-hook device and rigging — slings, shackles, any lifting beam
Add the whole suspended load, leave working margin (aim for around 80% of rated capacity in normal service), and round up to a standard capacity step. On a jib specifically, remember the trolley’s own weight travels to the boom tip — so it contributes to the maximum overturning moment, not just the lift.
Mini-takeaway: capacity and reach together set the moment, and reach is the expensive variable. Size capacity for the whole suspended load including the trolley, specify only the reach you need, and let the moment — not the tonnage alone — drive the structural conversation.
Part 4: Duty Class — The Number That Decides Service Life
If you take one thing from this guide, make it this: duty class, not capacity, determines how long a jib crane lasts. A jib at a busy workstation cycling several lifts a minute lives in a completely different world from one used a few times a shift — even at identical tonnage and reach. The difference shows up in the slew bearing, the hoist, and the boom connections, and it’s the specification buyers skip most often.
Duty class rates how hard the crane is engineered to work over its life. It combines two factors:
- Operating frequency — how many lift and slew cycles the crane performs per hour and per shift, and how long the hoist runs.
- Load spectrum — how heavy the average lift is relative to rated capacity. A jib mostly lifting light loads with the occasional heavy one lives an easier life than one running near capacity every cycle.
CMAA and FEM/ISO Classes
Jib cranes and their hoists are classified under the North American CMAA system (A–F) and the European/international FEM/ISO system (M3–M8). They measure the same thing using different frameworks, and they cross-reference closely.
| Service level | CMAA class | FEM/ISO | Typical jib usage |
|---|---|---|---|
| Standby / infrequent | A | M3 (1Bm) | Occasional maintenance lifts |
| Light | B | M4 (1Am) | Light workstation use, single shift |
| Moderate | C | M5 (2m) | Steady workstation lifting |
| Heavy | D | M6 (3m) | Frequent production lifting |
| Severe | E | M7 (4m) | Near-continuous cycling |
| Continuous severe | F | M8 (5m) | Around-the-clock production |
Placing Your Operation
Three questions settle the class for most buyers:
- How many lifts and slews per hour? A handful a shift points to CMAA A–B / M3–M4. Steady lifting through the shift is C / M5. Near-continuous cycling is D–F / M6–M8.
- How heavy relative to capacity? Mostly light with the odd heavy lift is easy duty. Consistently near rated capacity pushes the class up.
- How many shifts? A single-shift bench and a three-shift production cell moving the same load are worlds apart on duty. Running hours compound wear — especially on the slew bearing, which a fixed crane doesn’t even have.
Why This Is a Budget Decision
Under-specifying duty class is the most expensive jib mistake, and it doesn’t show on day one. It shows in year two, as the slew bearing develops play, the hoist wears out, and the boom connections loosen far ahead of schedule — and the downtime at that workstation costs more than the crane. Over-specifying costs you too: paying for a Class F jib to do genuine Class B bench work is capital you’ll never use.
The discipline that catches most bad “bargains”: when you compare quotes, normalize them to the same duty class. A cheaper jib at a lower duty rating isn’t a like-for-like comparison — it’s a different product that happens to share a tonnage and reach figure.
Mini-takeaway: capacity and reach get the jib onto the shortlist; duty class decides whether it survives your workstation. Match CMAA A–F or FEM/ISO M3–M8 to your busiest realistic usage, and if it’s uncertain, round up.
Part 5: Mounting Requirements and Foundation Demands
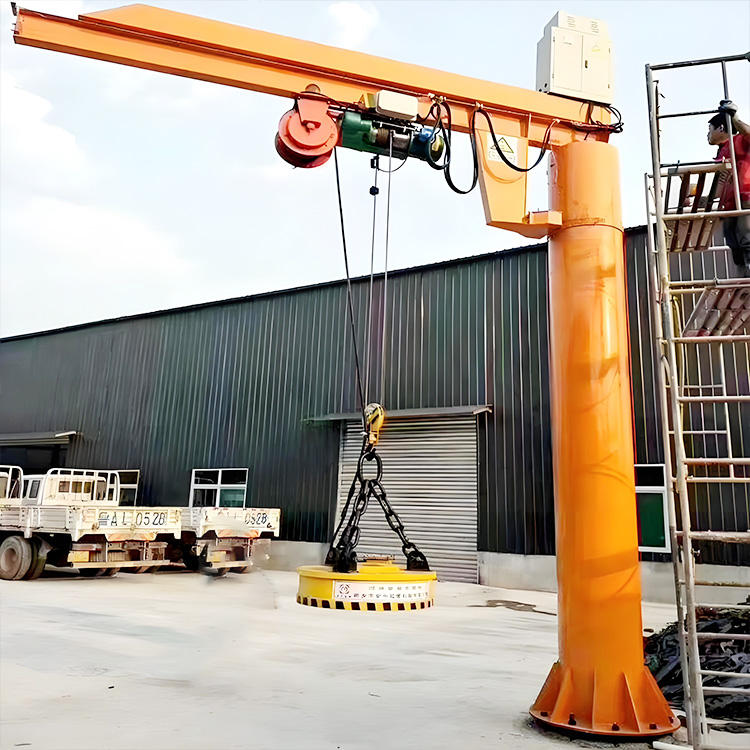
This is where the machine shop’s crane failed, and it’s the factor that most firmly rules a type in or out. A jib crane is only as good as the thing it’s mounted to — and the mounting demand differs completely between a wall-mounted jib and a foundation-mounted one.
Wall-Mounted: The Support Structure Must Resist Pull-Out
A wall-mounted jib hands its top bracket a horizontal pull-out force (Part 2), and the wall or column has to resist it without cracking, deflecting, or letting the anchors creep. That rules out most lightweight walls immediately:
- Reinforced concrete walls or columns can carry a wall-mounted jib — if verified for the specific bracket reactions.
- Steel building columns can carry one, often with a bracket bolted or welded to the column, again subject to a structural check of the column and its connection.
- Block, brick, or lightweight partition walls generally cannot resist the pull-out couple — the exact mistake from the introduction.
Get the maximum bracket reaction forces (top pull-out and bottom compression) from your supplier, and have a structural engineer confirm the wall or column can carry them before you commit. If the wall can’t, you don’t have a wall-mounted job — you have a pillar or freestanding job.
Pillar and Freestanding: The Foundation Carries Everything
A pillar or freestanding jib carries its entire overturning moment into a dedicated foundation, so the foundation is the whole game. It must:
- Resist overturning — the moment tries to tip the foundation block; its size and weight, plus the soil bearing, resist it.
- Resist the anchor-bolt tension — the moment lifts one side of the base plate, pulling the anchor bolts in tension. The bolts and their embedment depth must carry that pull-out.
- Limit rotation and settlement — a foundation that tilts even slightly lets the whole pillar lean, which throws the boom off level and makes loads drift when the crane rotates.
A jib foundation is typically a substantial reinforced concrete block, sized against a geotechnical bearing assessment, not a guess. The heavier the capacity and the longer the reach, the bigger the block — a heavy freestanding jib can need a foundation several metres square and deep. Get the base reactions from your supplier and hand them to a structural and geotechnical engineer before you pour.
Headroom and Building Interaction
Mounting also interacts with the building overhead. Wall-mounted and pillar jibs both need enough height for the boom, the hoist headroom beneath it, and the load — and a pillar jib’s height is often capped by the building’s clear height. Confirm the boom mounting height and the resulting hook height against your ceiling before specifying, the same discipline that governs any workstation lift.
Mini-takeaway: the mounting is a specification input, not a given. Verify a wall or column can resist the pull-out couple before choosing wall-mounted; engineer a foundation against overturning, bolt tension, and settlement for pillar and freestanding. If the support can’t carry the reactions, the type is wrong — change the type, don’t force the fit.
Part 6: Hook Height, Rotation and Coverage Area
Two jibs with identical capacity and reach can serve a workstation very differently, because rotation and coverage decide where the crane can place a load, and hook height decides how high. These are the details that determine whether the crane actually fits the workflow.
Rotation and Coverage
The coverage pattern follows directly from the type and its rotation:
- Wall-mounted (up to ~180°) sweeps a semicircle in front of the wall. Perfect when the workstation sits against a wall and everything the crane serves is in that half-circle — wasted if you need coverage behind the mounting line.
- Pillar and freestanding (up to 360°) sweep a full circle around the post, serving work on every side. This is the reason to accept a floor-mounted post: full-circle access no wall crane can match.
- Articulating (360°, dual arm) covers a circle and reaches around obstructions within it — the second arm folds to place a load behind a column or into a machine the straight-boom types can’t reach.
A practical note on rotation: check whether the type offers powered slew or relies on the operator pushing the boom by hand. Light jibs are usually hand-rotated; heavier and higher-duty jibs specify a motorized slew drive, which matters for both cycle speed and operator strain at a busy station.
Hook Height on a Jib
Hook height on a jib is set by the mounting height of the boom, minus the hoist headroom, minus the rigging and load beneath the hook. The classic error is the same as on any crane: specifying enough height for the load and forgetting the gear beneath it. Account for the full stack — hook, rigging, below-hook device, and load — and confirm two dimensions with your supplier:
- The boom mounting height available (capped by the building clear height for pillar and wall jibs)
- The lowest hook position the task needs
An articulating jib has a specific hook-height quirk: the pivoting arm means the effective hook position changes as the arm folds, so verify the usable hook height across the arm’s full range of motion, not just at full extension.
Mini-takeaway: capacity and reach get the jib onto the shortlist; rotation and coverage decide whether it reaches the work, and hook height decides whether it clears the load. Match the coverage pattern to your workstation layout — semicircle against a wall, full circle in open floor, articulating around obstructions.
Part 7: 2026 Price Reference for Jib Cranes
Use these as planning figures to build a defensible budget before you approach suppliers. Actual pricing varies with capacity, boom reach, duty class, rotation type (manual or powered slew), and — critically for pillar and freestanding types — the foundation, which is often a separate civil cost.
| Type & spec | Capacity / reach | 2026 price range (USD) |
|---|---|---|
| Wall-mounted jib, manual slew | 0.25 – 0.5 t / 2–3 m | $1,200 – $4,000 |
| Wall-mounted jib, heavier | 1 – 2 t / 3–5 m | $3,500 – $9,000 |
| Pillar-mounted jib, manual slew | 0.5 – 1 t / 3–4 m | $3,000 – $8,000 |
| Pillar-mounted jib, powered slew | 2 – 5 t / 4–6 m | $8,000 – $22,000 |
| Articulating jib | 0.25 – 1 t / 3–4 m | $5,000 – $16,000 |
| Freestanding heavy-duty jib | 5 – 10 t / 5–8 m | $18,000 – $55,000 |
| Freestanding heavy-duty jib | 10 – 20 t / 6–10 m | $45,000 – $120,000+ |
Cost and option drivers to budget for:
- Powered slew drive over manual rotation: adds meaningfully, worth it on high-duty or heavy jibs
- Longer boom reach: compounds cost through the boom, support, and foundation — every extra metre is more than a linear add
- Higher duty class (e.g., CMAA C to E): often +20 to 50%, reflecting a heavier slew bearing, upgraded hoist, and stronger connections
- Foundation (pillar and freestanding): a real, often-separate civil cost that can rival the crane on a heavy freestanding unit
- VFD hoist and slew control: smooth starts and stops that reduce shock and extend component life
- Marine or outdoor package: corrosion coating, weatherproof electrics — priced per environment
Procurement tip: the gap between an “equipment only” quote and an installed one is where jib budgets get ambushed — and on pillar and freestanding jibs, the foundation is the biggest hidden line. When you compare suppliers, normalize every quote to the same capacity, reach, duty class, rotation type, and civil scope. A headline price that looks 20% cheaper often reflects a lower duty class, a manual slew, or an excluded foundation — not a genuine saving.
Frequently Asked Questions
Q: What’s the difference between a wall-mounted and a pillar-mounted jib crane?
A: It comes down to what carries the load and how far the crane rotates. A wall-mounted jib bolts to a building wall or column and hands that structure a horizontal pull-out force at its top bracket, rotating through an arc up to about 180 degrees to sweep the floor in front of the wall — so it keeps the floor completely clear but only covers a semicircle. A pillar-mounted jib stands on its own floor foundation, carrying the whole overturning moment down into that foundation, which lets it rotate a full 360 degrees and cover a complete circle. Choose wall-mounted when a strong enough wall or column exists and semicircle coverage suits the workstation; choose pillar-mounted when you need full-circle access in open floor space, or when no wall can safely carry the pull-out forces.
Q: How do I know if my wall can carry a wall-mounted jib crane?
A: Get the maximum bracket reaction forces from your supplier — the top pull-out (tension) and bottom compression that the crane’s overturning moment resolves into — and have a structural engineer verify the wall or column against them before you order. Reinforced concrete walls and steel building columns can usually carry a wall-mounted jib subject to that check, but lightweight block, brick, or partition walls generally cannot resist the horizontal pull-out and will crack or let the anchors creep. If the wall can’t carry the reactions, you don’t have a wall-mounted application — you have a pillar or freestanding one, and forcing the wall-mounted fit is exactly how anchors tear loose under load.
Q: What duty class do I need for a jib crane?
A: Match it to how hard the crane will really work, using lifts and slews per hour, how heavy the average lift is relative to capacity, and how many shifts you run. Occasional maintenance lifting is CMAA Class A–B (FEM M3–M4). Steady workstation lifting through the shift is Class C (M5), which covers most production benches. Near-continuous cycling, especially across multiple shifts, is Class D–F (M6–M8). Under-rating the duty class is the most common cause of early jib failure — the slew bearing and hoist wear out ahead of schedule — so if usage is uncertain, round up rather than down. The slew bearing in particular is a wear point a fixed crane doesn’t have, and it’s sensitive to how often the crane rotates.
Q: Why does boom reach affect the price so much more than I’d expect?
A: Because reach multiplies the overturning moment the whole structure has to resist. A load acts at a distance from the pivot, and the moment equals the load times that distance — so doubling the reach doubles the moment even if the capacity stays the same, and the longer boom adds its own dead-weight moment on top. That larger moment forces a deeper boom section to control deflection, a stronger support or pillar, and a bigger foundation to resist overturning. The cost compounds through every one of those elements, which is why an extra metre of reach is far more than a linear price increase — and why specifying only the reach you genuinely need is one of the easiest ways to control a jib crane budget.