


Electric Hoist Brake Types Guide: Disc, Conical & Electromagnetic — How to Match Brake Specification to Duty and Load
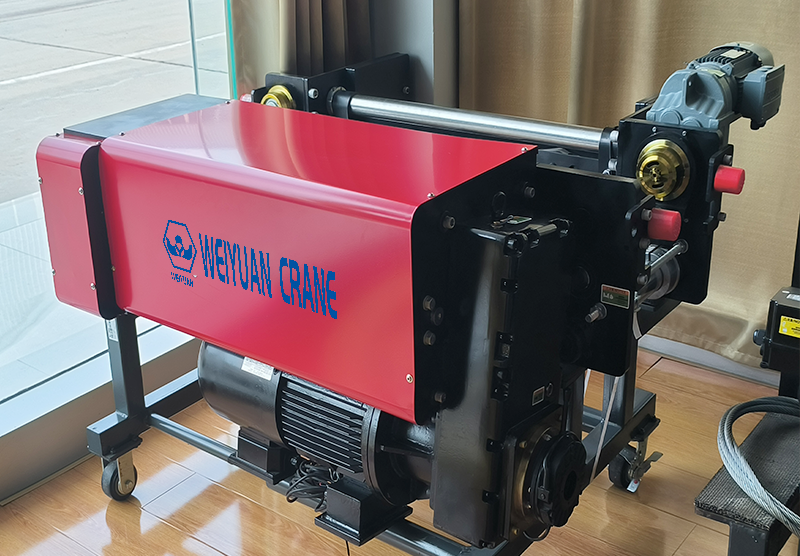
Introduction
The brake is the part that decides whether a suspended load stays in the air. Most buyers never give it a second thought. They confirm the capacity, settle the lifting speed, check the duty class — and then accept whatever brake the hoist ships with as standard.
That is a costly oversight. The brake is the one component that fails toward danger. A worn motor runs slow. A tired gearbox runs hot. A failing brake drops the load — and it gives little warning before it does. When the brake is wrong for the duty, the cost shows up as scrap, downtime, and safety incidents over the full life of the equipment.
Too light a brake for the duty: the lining wears fast under high cycle counts, the holding force fades, and the load begins to drift after each stop. Re-lining intervals shorten from years to months, and every re-line means the hoist is out of service.
Wrong brake type for the application: a brake that grabs hard creates load swing on every stop and shock-loads the chain or rope. A brake that releases roughly makes precise placement impossible. Either way, operators fight the equipment for the next fifteen years.
This guide explains what a hoist brake actually does, the three main brake types and where each fits, how duty class drives the brake specification, and how to inspect and schedule brake replacement so the brake never becomes the surprise that stops your line.
Part 1: What an Electric Hoist Brake Does
An electric hoist brake has one job: to hold the load when the motor is not driving, and to bring the load to a controlled stop when the operator releases the control.
The brake sits on the hoist motor shaft or the gear train. When power is applied, the brake releases and the motor lifts or lowers. The instant power is cut — by the operator, a limit switch, or a power failure — the brake engages automatically and holds the load. This fail-safe design is the heart of every compliant hoist brake: no power means the brake is on, so a power loss never drops the load.
A hoist brake must:
- Hold the rated load with margin — the braking torque must exceed the load torque by a defined safety factor, so the load never creeps.
- Engage automatically on power loss — the spring applies the brake; power releases it. A failure of the power supply locks the load in place.
- Stop the load within a controlled distance — too abrupt and it shock-loads the chain and swings the load; too slow and the load drifts past the target.
- Survive its cycle count — the lining must carry the heat and wear of every stop across the hoist’s full duty life without losing holding force.
Every brake carries a braking torque rating and a service rating. The braking torque must exceed the maximum load torque, and the service rating must match the duty class. A brake sized only for the lifting torque, with no margin for wear, loses its grip as the lining thins — which is exactly why the duty rating in Part 5 matters as much as the raw torque figure.
Part 2: Brake Type 1 — Disc Brake (Spring-Applied, Electrically Released)
How It Works
A disc brake clamps a friction disc between two plates. A spring pushes the plates together to grip the disc and hold the load. When power is applied to an electromagnetic coil, the magnetic force pulls the plates apart against the spring, releasing the disc so the motor can run.
Cut the power and the spring snaps the plates shut again — the load is held. This spring-applied, electrically-released design is fail-safe by nature, and it is the most common brake on modern electric chain and wire rope hoists.
When Disc Brakes Are Correct
General-purpose production lifting: the disc brake suits the broad middle of industrial applications — workshops, assembly, machine feeding, and warehouse handling at moderate to high cycle rates.
Moderate to high duty cycles: the flat friction faces shed heat well and wear evenly, so the disc brake holds up under the repeated stops of a busy production shift.
Applications needing a compact hoist: the disc brake packs a high braking torque into a small axial space, keeping the hoist body short — useful where headroom is tight.
Easy maintenance is a priority: the disc and lining are straightforward to inspect and replace, and the air gap is simple to check and adjust as the lining wears.
Limitations of Disc Brakes
Lining wear needs monitoring: the friction lining thins with every stop, and the release air gap grows as it does. Left unchecked, the gap eventually prevents clean release. Periodic gap adjustment is part of normal service.
On/off engagement on standard models: a basic disc brake engages fully the moment power is cut, which can create a small load swing on heavy loads — addressed by pairing it with VFD control for a controlled stop.
Heat under extreme cycle rates: at very high cycle counts the lining runs hot, which accelerates wear unless the brake is rated up for the duty.
2026 Price Reference (Disc Brake Unit / Service)
| Disc brake scope | Capacity range | 2026 price range (USD) |
|---|---|---|
| Replacement brake unit | 250 kg – 1 t hoist | $120 – $350 |
| Replacement brake unit | 1 t – 5 t hoist | $300 – $850 |
| Replacement brake unit | 5 t – 20 t hoist | $700 – $2,200 |
| Re-line / service kit (lining + spring) | any capacity | $60 – $400 |
Part 3: Brake Type 2 — Conical (Cone) Brake
How It Works
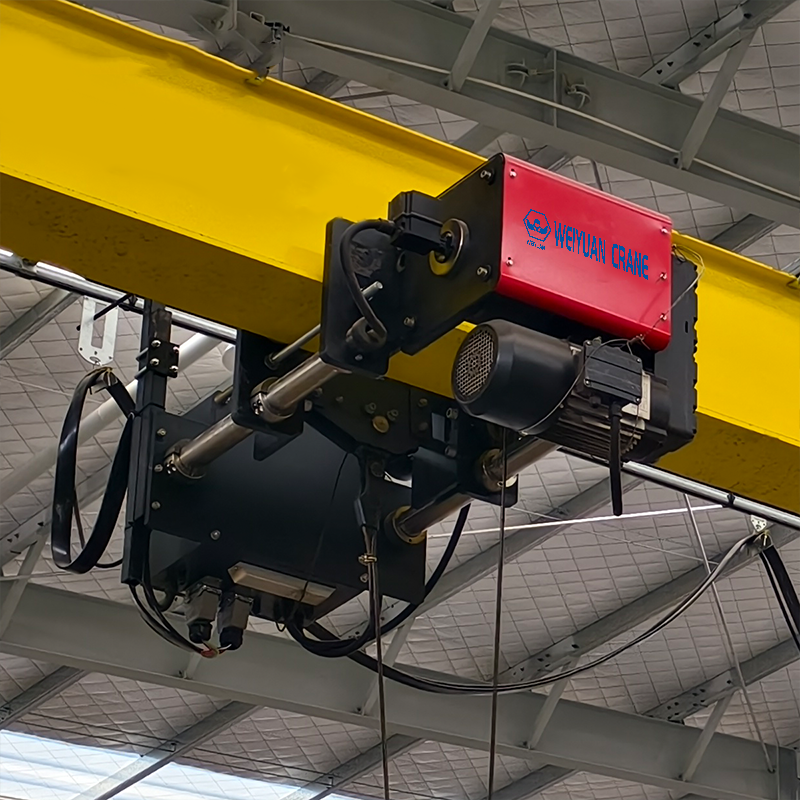
A conical brake builds the braking action into the motor itself. The motor rotor is mounted on a slight taper, and a spring pushes it axially into a matching cone-shaped friction surface in the motor housing. At rest, the spring forces the cone tight — the rotor is locked and the load is held.
When power is applied, the motor’s magnetic field pulls the rotor axially against the spring, sliding the cone clear of its seat and releasing the brake as the motor starts to turn. The same magnetic action that drives the motor also releases the brake — there is no separate brake coil. Cut the power, the spring re-seats the cone, and the load is held.
When Conical Brakes Are Correct
Compact, integrated hoist designs: because the brake is built into the motor, the conical brake adds almost no length to the hoist. It suits low-headroom hoists and tightly packaged units.
Smooth, gradual engagement: the cone seats progressively rather than snapping shut, so it stops the load gently with less shock to the chain and less swing — well suited to lifting where a soft stop matters.
Light to moderate duty lifting: the conical brake performs well in standard chain hoists at light to moderate cycle rates, the bulk of general workshop and maintenance lifting.
Fewer separate components: with the brake integrated into the motor, there are fewer standalone parts to fail, which simplifies the hoist.
Limitations of Conical Brakes
Wear ties brake and motor together: because the cone is part of the motor rotor, wear of the friction surface is bound up with the motor assembly, making service more involved than swapping a separate disc.
Less suited to very high duty: at very high cycle counts the integrated cone surface runs hard and wears faster, so heavy continuous duty favors a separate, larger brake.
Torque limited by motor size: the braking force depends on the motor’s magnetic pull and spring, so it cannot be sized up independently of the motor the way a separate brake can.
2026 Price Reference (Conical Brake Motor / Service)
| Conical brake scope | Capacity range | 2026 price range (USD) |
|---|---|---|
| Brake-motor friction kit | 250 kg – 1 t hoist | $90 – $300 |
| Brake-motor friction kit | 1 t – 5 t hoist | $260 – $750 |
| Replacement brake motor (complete) | 250 kg – 3 t hoist | $400 – $1,800 |
| Replacement brake motor (complete) | 3 t – 10 t hoist | $1,500 – $4,500 |
Part 4: Brake Type 3 — Electromagnetic Brake (Power-Off, Spring-Set)
How It Works
An electromagnetic brake uses a powered coil to release a spring-set friction brake. With no power, a spring presses an armature plate against a friction lining to hold the shaft — the load is locked. Energize the coil, and the magnetic field pulls the armature back against the spring, freeing the shaft so the motor can run.
This is the same fail-safe principle as the disc brake, but the electromagnetic brake is typically a distinct, independently mounted unit with its own coil — chosen where the brake must be sized, controlled, or maintained separately from the motor. It is the standard choice for larger wire rope hoists and for applications that demand a dedicated, robust holding brake.
When Electromagnetic Brakes Are Correct
Heavy and high-duty wire rope hoists: a separately sized electromagnetic brake delivers high holding torque for heavy loads and the relentless cycle counts of CMAA Class D and above.
Applications needing a dedicated holding brake: where the safety case calls for a brake independent of the motor — or a second brake for personnel or critical loads — the electromagnetic unit fits cleanly.
Precise control of release and set timing: the coil can be controlled to coordinate brake release with motor torque, giving a smooth, drift-free start and a clean, repeatable stop.
Long service life under heavy use: because the unit is sized for the duty independently of the motor, the lining and spring can be specified for a long re-line interval even at high cycle rates.
Limitations of Electromagnetic Brakes
Larger and heavier: a separate brake unit adds length and weight to the hoist compared with an integrated conical brake.
Higher cost: the dedicated coil, armature, and housing make it more expensive than a basic integrated brake.
Coil power and heat: the coil draws power continuously while released and generates heat, which must be managed in the design and the control circuit.
2026 Price Reference (Electromagnetic Brake Unit / Service)
| Electromagnetic brake scope | Capacity range | 2026 price range (USD) |
|---|---|---|
| Replacement brake unit | 1 t – 5 t hoist | $350 – $1,100 |
| Replacement brake unit | 5 t – 20 t hoist | $900 – $3,200 |
| Replacement brake unit | 20 t+ hoist | $2,800 – $8,000 |
| Re-line / coil service kit | any capacity | $120 – $900 |
Part 5: Brake Duty Rating and CMAA Duty Classification
Why Duty Class Decides the Brake, Not Just the Load
It is tempting to size a brake on holding torque alone — pick a brake that holds the rated load, and move on. That misses the point that destroys brakes early: the brake wears on every stop, and the number of stops, not the load size, governs how fast it wears out.
A hoist lifting a modest load two hundred times a shift puts far more wear into its brake than one lifting a heavier load ten times a shift. The cycle count drives the heat and the lining wear, and the duty class is how that demand is captured. A brake sized for the load but not for the duty fades, drifts, and needs re-lining in a fraction of its expected life.
CMAA Service Classes Applied to the Brake
CMAA service classes run from Class A (infrequent, light) through Class F (severe, continuous), based on load magnitude and the number of cycles over the hoist’s design life:
- Class A–B: infrequent or light-duty lifting — maintenance and standby hoists. A standard integrated brake suffices.
- Class C: moderate, regular use — typical workshop and light production hoists. Standard disc or conical brakes fit well.
- Class D: heavy production use — busy hoists cycling constantly through a shift. A robust disc or a separately sized electromagnetic brake is appropriate.
- Class E–F: severe, continuous duty — high-throughput and process hoists. A heavy-duty electromagnetic brake sized for the cycle count, often with a second brake on critical lifts.
Most production hoists land in Class C to D, and the brake must be rated to match — not merely to hold the load once.
The Braking Torque Margin
Holding torque must exceed the load torque by a safety factor set in the governing standard — commonly on the order of 1.5 to 1.75 times the rated load torque for a single brake. This margin does two things: it guarantees the load never creeps, and it leaves holding force in reserve as the lining wears between services.
Worked Example
Consider a 5-tonne wire rope hoist. The brake must hold the load torque with a 1.6 safety factor, and you are choosing between a brake rated for Class C and one rated for Class D.
- Holding requirement: both brakes provide at least 1.6 × the load torque, so both hold the 5-tonne load safely on day one.
- Duty requirement: at 40 lifts per shift, the Class C brake lining is within its rated cycle band and lasts the expected interval. Push the same hoist to 160 lifts per shift, and the Class C brake now absorbs four times the stopping heat and wear — its lining reaches the wear limit in roughly a quarter of the time.
- Result: the Class D brake, with a larger lining area and higher heat capacity, holds the identical load but carries the higher cycle count to its full service interval.
The lesson mirrors the rest of the hoist: classify the duty honestly by cycle count, then specify the brake’s duty rating, not just its holding torque. A brake chosen on torque alone can pass a single test lift and still wear out years early under the real cycle load.
Part 6: Brake Wear Inspection and Replacement Intervals
Finding the brake at its wear limit during a routine check should never be a crisis. With a simple inspection routine and wear records, brake service becomes a planned task with the right parts on hand — not an emergency that drops a load or strands the hoist.
What Wears and What to Measure
Three things change as a brake ages, and each has a measurable limit:
- Lining thickness: the friction lining thins with every stop. Measure it against the manufacturer’s minimum thickness; once it reaches the limit, the lining is replaced.
- Air gap (release gap): on disc and electromagnetic brakes, the gap between the armature and the coil grows as the lining wears. Beyond the maximum gap, the brake may not release cleanly. Measure and adjust the gap at each service.
- Holding performance: the surest field test is a controlled holding check — lift the rated load a short distance, stop, and confirm the load does not creep. Any measurable creep means the brake needs attention now.
Inspection Frequency by Duty
Match the inspection interval to the duty class and the standards that govern it (ASME B30.16 for hoists, with the brake examined as part of periodic inspection):
- Frequent (operator) check: before each shift, confirm the brake stops and holds the load with no creep and no unusual noise — a few seconds that catches a failing brake early.
- Periodic (qualified) inspection: measure lining thickness, air gap, and holding performance. Monthly for Class D and above, quarterly to annually for Class A–C, with harsher duty pushing toward the more frequent end.
- After any holding fault: if a load creeps or the brake feels different, inspect immediately rather than waiting for the next scheduled date.
Trend the Wear — Don’t Just Pass or Fail
A single measurement tells you the brake passes today. A series of measurements tells you how fast the lining is wearing — and that trend is what lets you plan. Recording lining thickness and air gap at each inspection reveals the wear rate, so you can order the re-line kit in advance and schedule the service into a planned shutdown rather than reacting after the brake fails.
Replacement Interval Reference
These are planning guides only; the real interval comes from your trend data and the manufacturer’s limits.
| Duty class | Typical use | Indicative brake re-line interval |
|---|---|---|
| Class A–B | Light / standby | 5 – 8 years |
| Class C | Moderate production | 3 – 5 years |
| Class D | Heavy production | 1.5 – 3 years |
| Class E–F | Severe / continuous | 6 months – 1.5 years |
Fix the Cause, Not Just the Lining
A brake that wears unusually fast is often a symptom, not the root problem. An over-tight air gap, a brake fighting an out-of-tune control stop, excessive cycle rate beyond the brake’s rating, or a load consistently above the assumed average all accelerate wear. When you re-line a brake, check why it wore — otherwise the new lining follows the old one to an early end.
Frequently Asked Questions
Q: How do I know if my hoist brake is wearing out before it fails?
A: Watch for the early signs and back them with measurement. The clearest field indicator is load creep — lift the rated load, stop, and check whether it drifts down at all; any creep means the holding force is fading. Other warning signs are a longer or less consistent stopping distance, unusual noise on engagement, or a brake that no longer releases cleanly. Confirm these by measuring the lining thickness and the air gap against the manufacturer’s limits at periodic inspection. The real value comes from trending those measurements over time, so you see the wear rate and can plan the re-line before the brake reaches its limit — rather than discovering it the moment a load will not hold.
Q: Which brake type should I choose for a high-cycle production hoist?
A: For genuinely high-cycle, heavy-duty service — CMAA Class D and above — a separately sized electromagnetic brake is usually the right choice, because its lining and heat capacity can be specified for the cycle count independently of the motor, giving a long re-line interval under relentless use. A robust disc brake rated up for the duty also serves well in the upper-moderate range and keeps the hoist compact. An integrated conical brake is best kept to light and moderate duty, where its smooth engagement and compact design shine. The deciding factor is always the cycle count, not the load alone — classify the duty honestly, then match the brake’s duty rating to it.
Q: Can I replace just the brake lining, or do I need a whole new brake?
A: In most cases you replace only the wear parts. For a disc brake, a re-line kit with a new friction lining and spring restores the brake, and the air gap is reset during the service. An electromagnetic brake similarly takes a lining and, if needed, a coil service kit. A conical brake is more involved because the friction surface is part of the motor rotor, so service can mean a friction kit or, in worse cases, a replacement brake motor. Replace the full brake unit only when the housing, armature, or coil is damaged rather than simply worn. Whichever the case, always confirm the cause of the wear before refitting, so the new parts last their full interval.