
How to Select the Right Bridge Crane for Your Facility’s Needs
Selecting a new overhead bridge crane is one of the most significant capital investments a facility can make. This decision goes far beyond simply choosing a piece of equipment; it involves a complex analysis of your workflow, structural engineering, and long-term operational goals. The right bridge crane integrates seamlessly into your production line, unlocking efficiency and enhancing safety. The wrong one becomes a costly bottleneck, a maintenance headache, or worse, a serious safety liability.
While the benefits of overhead lifting are clear, the process of specifying the perfect crane can be daunting. From calculating load capacities to understanding duty cycle classifications and navigating structural requirements, every detail matters. This in-depth guide provides a clear, step-by-step process to help you select the ideal bridge crane for your specific industrial needs, ensuring your investment delivers maximum value for years to come.
Step 1: Conduct a Thorough Needs Analysis
Before you can even look at crane specifications, you must first develop a deep understanding of what you need the crane to do. This initial analysis is the foundation of the entire selection process.
Define the Crane’s Primary Function
What is the core task this crane will perform?
- Production Cranes: Will it be in near-constant use, moving parts along an assembly line or feeding materials to a high-volume machine? These require high duty cycle ratings and robust components.
- Maintenance Cranes: Will it be used only occasionally for tasks like removing motors or servicing heavy equipment? These can be lighter-duty and more cost-effective.
- Warehouse Cranes: Will it be used for loading, unloading, and organizing heavy inventory like steel coils or paper rolls?
Calculate Your Required Capacity
The crane’s capacity, or Working Load Limit (WLL), is the most critical specification. To determine this, identify the absolute heaviest load the crane will ever be required to lift. Do not guess. Once you have this number, add a safety buffer of 20-25%. This buffer is non-negotiable and serves two purposes:
- It accounts for the weight of rigging: The stated capacity must cover the load itself plus the weight of any slings, spreader beams, magnets, or other below-the-hook devices.
- It ensures longevity: A crane that regularly operates at 75-80% of its maximum capacity will have a much longer service life than one constantly pushed to its 100% limit.
Map Out the Crane’s Work Envelope
You must define the three-dimensional space in which the crane will operate.
- Span: This is the horizontal distance between the runway rails, defining the width of the crane’s coverage.
- Lift Height (Hook Height): This is the distance from the floor to the hook in its highest position. Measure your lowest overhead obstruction (lights, sprinklers, etc.) and subtract the headroom required by the hoist and trolley to find your maximum available lift height.
- Runway Length: This defines how far the crane can travel down the length of your facility bay.
Step 2: Understand Duty Cycle and Service Classification
Simply knowing your crane’s capacity is not enough. You must also specify how hard it will work. The Crane Manufacturers Association of America (CMAA) provides service classifications to match cranes to their intended application intensity. Choosing a crane with an underrated duty cycle is one of the most common and costly mistakes.
- Class A (Standby/Infrequent Service): Used in places like powerhouses or motor rooms where precise handling at slow speeds is required for maintenance, not production.
- Class B (Light Service): For light maintenance and assembly operations with slow speeds and 2 to 5 lifts per hour.
- Class C (Moderate Service): The most common classification. For machine shops or general industrial use where the crane handles loads averaging 50% of its rated capacity, with 5 to 10 lifts per hour.
- Class D (Heavy Service): For high-volume applications like heavy machine shops, foundries, and steel warehouses where the crane is in constant use at or near its rated capacity.
- Class E (Severe Service): For specialty cranes handling heavy loads continuously in extreme environments, like a scrap yard or cement plant.
- Class F (Continuous Severe Service): For the most demanding applications with continuous, high-speed operation under severe conditions.
Be honest and realistic about your operational tempo. An inexpensive Class C crane will fail quickly if placed into a Class D application.
Step 3: Choose the Right Crane Configuration
With your needs defined, you can now select the physical configuration of the crane.
Single Girder vs. Double Girder
This is the most fundamental design choice.
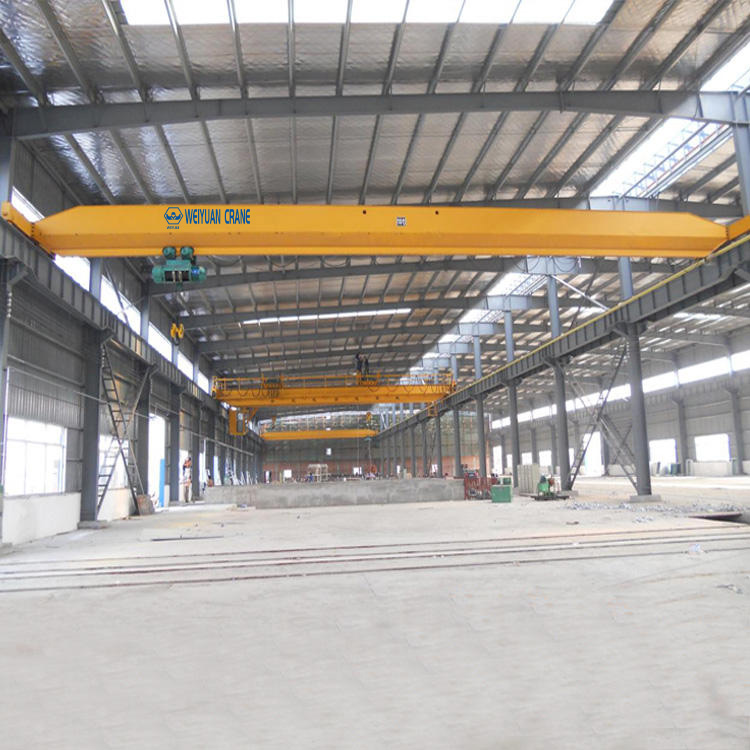
- Single Girder: Features one main girder, with the hoist trolley running on the bottom flange. They are lighter, more economical, and faster to install. They are the ideal choice for capacities up to 20 tons and for Class A through C service.
- Double Girder: Uses two parallel girders, with the hoist trolley running on top. This design is stronger, more rigid, and offers better hook height. It is the standard for capacities over 20 tons and for demanding Class D, E, and F service applications. Heavy indoor process cranes and some specialized indoor Gantry Cranes use this robust design.
Top Running vs. Under Running
This refers to how the crane’s end trucks move along the runway.
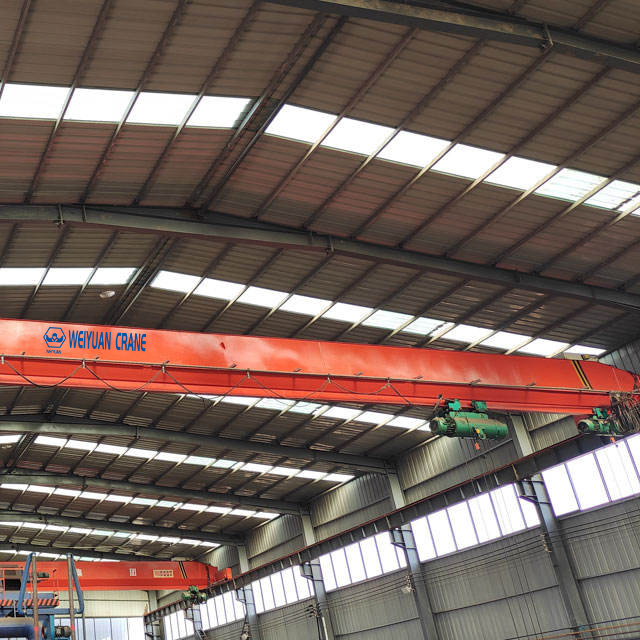
- Top Running: The crane wheels ride on top of a rail attached to the runway beam. This is the most common design and can handle the highest capacities.
- Under Running (or Underhung): The crane wheels hang from and ride on the bottom flange of the runway beam. This design is used when headroom is limited or when the building structure cannot support top-running runway columns. Capacities are generally lower than top-running systems.
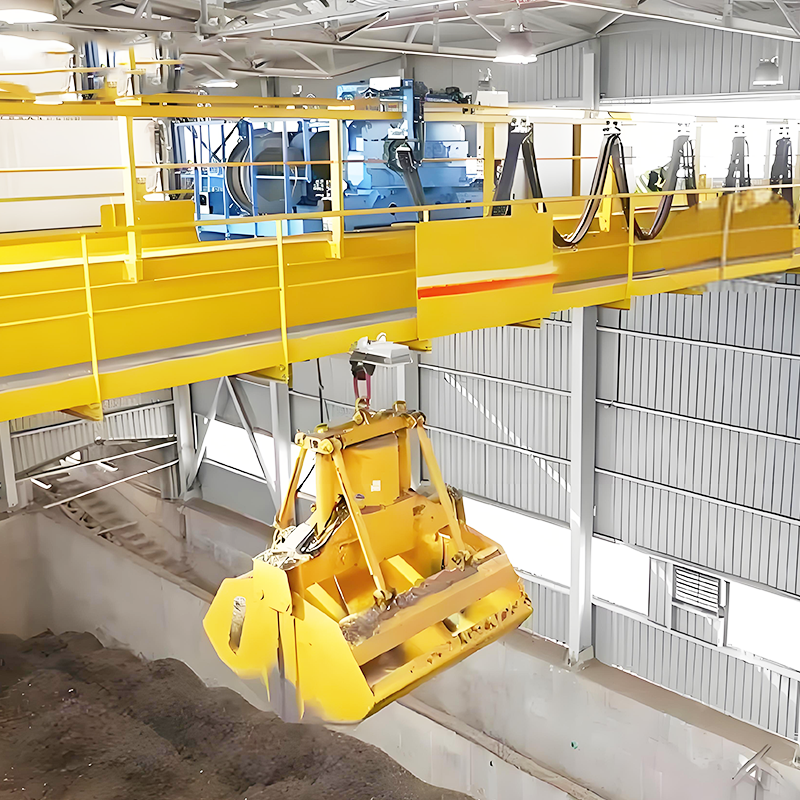
Weiyuan QZ Type Grab Crane for Steel Scrap | 30 Ton, Heavy-Duty, High-Efficiency
The Weiyuan QZ Type 30 Ton Grab Crane is engineered specifically for demanding steel scrap handling operations. Built on a heavy-duty double-girder platform with a high-strength orange peel grab, it delivers reliable performance and high efficiency in continuous scrap yard and foundry material handling environments. :contentReference
View Product / Get QuoteStep 4: Evaluate Your Building and Structural Requirements
A bridge crane exerts immense force on the building that supports it. You cannot install a crane without a thorough structural analysis performed by a licensed professional engineer.
The engineer will determine if your building’s columns and, most importantly, the concrete foundations beneath them, can safely support the loads imposed by the crane. These loads include not only the weight of the crane and its maximum load but also the dynamic forces created by acceleration, deceleration, and potential collisions. If the existing structure is inadequate, it will need to be reinforced, which can be a significant additional cost.
This is an area where you cannot cut corners. A structural failure is catastrophic.
Bridge Crane vs. Gantry Crane
If your building cannot support a runway system, or if you need lifting capabilities outdoors, a bridge crane is not the right solution. In these cases, you need to consider a Gantry Crane. Gantry Cranes are self-supporting structures that run on legs along ground-level tracks. They require no support from the building, making them perfect for shipyards, rail yards, and outdoor storage areas. While both are overhead lifting devices, their structural requirements are completely different. For outdoor heavy lifting, Gantry Cranes are almost always the superior choice.
Step 5: Specify Key Components and Technology
The performance and safety of your crane depend on its components.
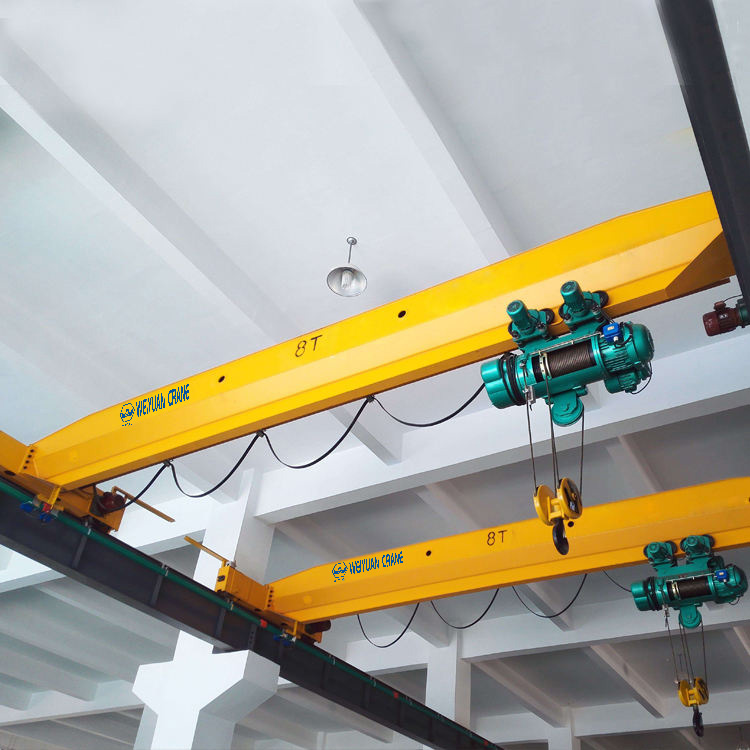
- Hoist: Will you need a fast, high-capacity wire rope hoist for production use, or a more compact and economical electric chain hoist for lighter maintenance tasks?
- Controls: The industry standard is now Variable Frequency Drives (VFDs). VFDs provide smooth, variable-speed control for all motions (lifting, trolley travel, and bridge travel). This eliminates load swing, allows for precise positioning, and reduces wear on the crane’s mechanical components. While older contactor controls are cheaper, the safety and performance benefits of VFDs provide a much higher return on investment.
- Control Interface: Will the operator use a wired pendant that hangs from the hoist, or a more flexible and safer wireless radio remote? Radio remotes allow the operator to choose the best vantage point, away from the load path. For high-production or hazardous environments, an enclosed operator cab may be necessary.
- Electrification: How will power be delivered to the crane and hoist? Common methods include flexible festoon systems (looped cables) or enclosed conductor bars. The choice depends on the crane’s speed, runway length, and operating environment.
Step 6: Plan for Safety, Installation, and Training
The final step is to plan the logistics of bringing your crane online.
- Safety Features: Ensure your crane is quoted with modern safety systems, including overload limiters, travel limit switches, warning lights and horns, and anti-collision devices if multiple cranes will be on the same runway.
- Installation and Commissioning: Crane installation should only be performed by qualified, certified crane technicians. The process involves erecting the runway, assembling the crane, and performing a rigorous load test (typically at 125% of rated capacity) to verify its structural integrity before it is put into service.
- Operator Training: Never assume your workers know how to operate a new crane safely. A comprehensive training program from the manufacturer or a third party is essential. Training should cover daily pre-operational inspections, proper rigging techniques, and safe operating procedures specific to your new crane.