


Jib Crane Boom Design, Reach & Deflection
Introduction
Two facilities order a 2-tonne jib crane with a 5-metre boom. One operator places loads onto a machine fixture on the first try, every time. The other fights a boom that droops at the tip, so the trolley rolls toward the end and every lift needs a second nudge to land right. Same capacity. Same reach. Different boom design — and the difference shows up in wasted seconds on every cycle and in loads that get placed hard instead of soft.
The boom is the working part of a jib crane. It sets how much the crane can actually lift at the point you need it, how far it swings, how level it stays under load, and how many years it runs before fatigue catches up. A boom specified on capacity alone — without checking reach, deflection, and duty — quietly costs you precision, cycle time, and service life.
This guide gives you a clear framework to specify the right boom. You will learn:
- How boom length and cross-section drive deflection — the sag that ruins precision.
- Why rated capacity drops at full reach, and how to size for the load where it actually matters.
- How single-cantilever and underhung box booms differ, and which suits your work.
- How duty class shapes boom fatigue life, plus the common failure modes to design out.
Part 1: Structural Differences — Cantilever vs Underhung Box Boom
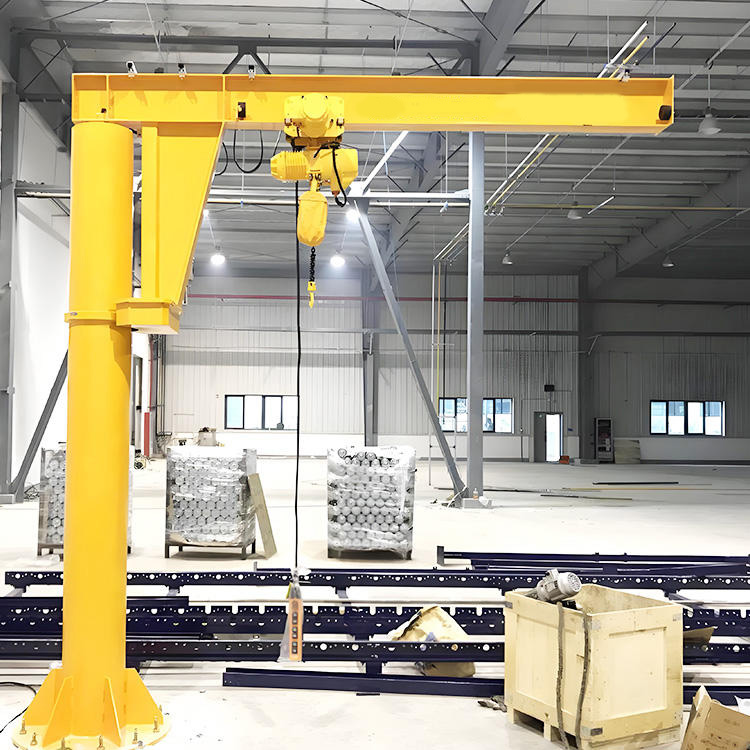
The boom is the horizontal arm that carries the hoist out from the pivot. How that arm is built decides its stiffness, its reach, and its cost. Two constructions dominate industrial jib cranes, and each suits a different band of duty.
Single-Cantilever Boom (I-Beam or Rolled Section)
A single-cantilever boom is one rolled steel section — usually a standard I-beam — fixed at the pivot and reaching out to the tip, with the hoist trolley running along its bottom flange.
- Construction: a single rolled profile, simple and economical.
- Capacity fit: light to moderate loads, typically up to about 3 tonnes.
- Stiffness: adequate for shorter booms; deflection grows quickly as length increases.
- Cost position: the lower-cost option, both to buy and to fabricate.
The strength of a cantilever boom is simplicity and price. Its limit is stiffness: a single beam sags more as it gets longer or carries more, which is why it fits shorter, lighter jib cranes best.
Underhung Box Boom (Fabricated Box Section)
An underhung box boom is a fabricated hollow box section — steel plate welded into a rectangular profile — with the hoist running along an internal or lower track. The closed box shape resists both bending and twisting far better than an open I-beam.
- Construction: a welded box section, stiffer and stronger for its weight.
- Capacity fit: moderate to heavy loads, comfortably into the higher tonnes.
- Stiffness: far lower deflection over the same length — the reason it suits long reach and precise work.
- Cost position: higher, reflecting the fabrication and extra material.
Key takeaway: the cantilever I-beam boom is cheap and simple for short, light duty; the box boom is stiffer and stronger for long reach, heavy loads, and precision. Match the construction to your reach and stiffness needs, not just to the tonnage on the nameplate.
Part 2: The Parameters That Decide Your Boom
The right boom is the one matched to your load, your reach, and how accurately you must place the load. Three parameters settle the specification. Run your application through all three before you compare quotes.
Parameter 1: Rated Capacity at Reach — Not Just at the Pivot
Here is the mistake that catches buyers out: a jib crane’s rated capacity is not constant along the boom. A “2-tonne” crane may safely carry 2 tonnes near the pivot but noticeably less at the full tip, because the load at the tip creates a far larger bending moment on the boom and its support.
- Specify capacity at maximum reach, where you will actually lift, not at the column.
- If your heaviest lift happens at the tip, size the boom and support for that combination — this is the governing case.
- So what? A crane rated on paper for your load, but only near the pivot, will be under-rated exactly where you need it most.
Parameter 2: Required Reach (Boom Length)
Reach sets the boom length, and boom length drives both deflection and cost.
- Short reach (up to ~3 m): a cantilever I-beam boom is economical and stiff enough.
- Moderate reach (3 to 6 m): the choice tips on load and precision; a box boom often earns its price.
- Long reach (over ~6 m): a box boom is usually the practical answer, because a cantilever beam long enough would sag too much or need to become impractically heavy.
Parameter 3: Precision (Allowable Deflection)
How accurately must the operator place the load? This parameter often decides the construction on its own.
- Rough placement (setting a part on a bench): modest deflection is tolerable; a cantilever boom is fine.
- Careful placement (landing a component on a machine fixture): low deflection matters, and a stiffer box boom keeps the trolley path level.
- Precision assembly or repeated exact positioning: specify the tightest deflection limit — a box boom is almost always required.
Key takeaway: short, light, rough-placement work points to a cantilever boom; long reach, heavier loads, or precise placement point to a box boom. When two or more parameters push the same way, the decision is made for you.
Part 3: Deflection — Why It Governs Precision, and Boom Failure Modes
A boom earns its keep by staying level under load and not failing over its service life. Deflection controls the first; fatigue and support design control the second. Understanding both is what separates a crane that places loads cleanly for twenty years from one that frustrates operators and cracks early.
What Deflection Is and Why It Matters
Deflection is how much the boom tip drops under load compared with its unloaded position. Every boom deflects a little — the question is how much, and whether it stays within a limit that keeps the crane usable.
Why it matters for precision: when the tip sags, the trolley sits on a downward slope and tends to roll toward the low end. The operator then has to hold the load against that drift and fight the boom to place it accurately. A stiff boom that barely deflects lets the load hang where the operator puts it.
Crane practice caps boom deflection at a fraction of the reach — commonly around reach ÷ 150 to reach ÷ 250 at rated load for jib cranes, tighter where precision is critical. A longer boom or a heavier load increases deflection, which is exactly why long-reach and precise applications need the stiffer box section.
Do this first: ask the manufacturer for the deflection at rated load at full reach, in millimetres — not just a “meets standard” statement. It is the number that predicts how the crane will feel to operate.
Common Boom Failure Modes
- Excessive deflection (droop): the boom is under-specified for its length or load, so the tip sags, the trolley drifts, and placement suffers. The fix is a stiffer section, not a bigger hoist.
- Fatigue cracking at the pivot connection: the highest bending stress sits where the boom meets the pivot. On high-cycle cranes, fatigue cracks start here first — usually at a weld toe. Catching them early keeps a repair small.
- Local buckling of the boom flange or web: an overload or an under-sized section can buckle the steel, especially on a cantilever I-beam loaded beyond its rating.
- Trolley-track wear and end-stop damage: the running surface the hoist travels on wears with use, and a missing or damaged end stop lets the trolley over-run the boom tip.
- Prevention specification: match the section to the reach and load with margin, confirm the deflection limit in writing, and detail the pivot connection for fatigue on any Class C or heavier crane.
Key takeaway: deflection is a precision problem, and fatigue at the pivot is a service-life problem. Both are designed out at the specification stage by choosing the right section and detailing the connection for the duty — not fixed later with a heavier hoist.
Part 4: How Duty Class Affects Boom Fatigue and Maintenance
The cost of a jib crane does not stop at purchase. How hard the crane works — its CMAA duty class, a rating of load severity and cycle count from light Class A–B up to heavy Class D — decides how fast the boom fatigues and how often you must inspect it.
Why Duty Class Drives Boom Life
A boom rarely fails from one overload. It fails from many load cycles, each flexing the steel at the pivot connection a little, until a fatigue crack forms and grows. The more lifts per shift, the sooner fatigue governs — so cycle count matters as much as load weight.
- Class A–B (light, occasional): low cycle count; standard boom detailing lasts for decades.
- Class C (moderate): more cycles; the pivot connection should be detailed for fatigue and inspected regularly.
- Class D (heavy, frequent): high cycle count; specify a box boom with a fatigue-rated pivot connection, and inspect the highest-stress welds on a tight schedule.
Specify below your real duty, and the boom cracks early exactly where you cannot see it. Specify correctly, and it runs the crane’s full life.
Maintenance Intervals by Duty Class
| Task | Class A–B (light) | Class C (moderate) | Class D (heavy) |
|---|---|---|---|
| Visual boom & weld inspection | Every 12 months | Every 6 months | Quarterly |
| Deflection check under known load | Every 2 years | Annually | Every 6 months |
| Pivot-connection weld crack check (NDT) | Every 3–5 years | Every 2 years | Annually |
| Trolley track & end-stop inspection | Annually | Every 6 months | Quarterly |
These align with general crane periodic-inspection practice under ASME B30, with harsher duty pushing every interval toward the more frequent end. Bring any check forward the moment a warning sign appears — a boom that no longer swings level, a rust streak weeping from the pivot weld, or new noise under load.
Key takeaway: the boom’s fatigue life is set at purchase by matching the section and pivot detail to the duty class, and protected in service by inspecting the pivot welds on a schedule. Both cost little; skipping either invites the most expensive failure a jib crane has.
Part 5: 2026 Price Reference
Use these indicative 2026 figures to budget the boom and its inspection before you request quotes. Prices vary with capacity, reach, cross-section, and duty class — but the relationships between them are what drive the cantilever-versus-box decision.
Boom by Construction and Reach (supplied, indicative)
| Boom type | Capacity / reach | Indicative 2026 price (USD) |
|---|---|---|
| Cantilever I-beam boom | 0.25 – 1 t, 2 – 4 m | $900 – $3,200 |
| Cantilever I-beam boom | 1 – 3 t, 3 – 5 m | $2,800 – $7,500 |
| Underhung box boom | 2 – 5 t, 4 – 7 m | $6,500 – $17,000 |
| Underhung box boom (heavy, long reach) | 5 – 10 t, 6 – 8 m | $15,000 – $38,000 |
Boom Inspection and Repair (indicative)
| Service | Scope | Indicative 2026 cost (USD) |
|---|---|---|
| Visual boom inspection | Condition check with report | $300 – $1,200 |
| Deflection measurement | Load test with level/laser | $600 – $2,500 |
| Pivot-weld NDT (crack testing) | Dye-penetrant / magnetic-particle | $800 – $3,500 |
| Pivot-connection weld repair | Grind out, re-weld, re-test | $1,500 – $6,000 |
Budget Notes for Procurement
- The box boom’s premium buys precision and life. For long reach or accurate placement, its higher price returns itself in cleaner cycles and a boom that does not fatigue early.
- Do not under-specify the section to win a lower quote. A cantilever boom pushed beyond its stiffness range sags and frustrates operators every shift — a cost that never appears on the quote.
- Budget pivot-weld inspection from day one. On Class C and heavier cranes, a small recurring NDT cost prevents the crane’s most expensive failure.
- Cost the downtime, not just the parts. A cracked pivot connection grounds the crane; catching it early keeps the fix to a planned weld repair.
Frequently Asked Questions
Q: Why can’t my “2-tonne” jib crane lift 2 tonnes at the end of the boom?
A: Because a jib crane’s rated capacity depends on where along the boom the load hangs, and the full tip is the hardest place to carry it. A load at the tip acts on the longest lever arm, creating the largest bending moment on the boom and the biggest overturning force on the pivot and support. Many jib cranes are rated at a specific reach — sometimes near the pivot, sometimes at full reach — so a “2-tonne” nameplate does not automatically mean 2 tonnes at the very end. The practical fix is to specify capacity at the reach where you will actually lift your heaviest load, and if that is at the tip, tell the supplier so the boom, pivot, and support are all sized for that governing case. Confirm the rated capacity at maximum reach in writing before you buy, and you avoid discovering the shortfall during the first heavy lift.
Q: How do I know if a boom is stiff enough for precise placement before I buy it?
A: Ask for one number: the boom’s deflection at rated load at full reach, stated in millimetres. Deflection is how far the tip drops under load, and it is what makes the trolley drift and forces the operator to fight the boom when landing a load. A “meets standard” statement is not enough on its own, because precise assembly work needs a tighter limit than rough placement. As a guide, jib boom deflection is commonly held to around reach ÷ 150 to reach ÷ 250 at rated load, with the tighter end reserved for precision tasks. If your work involves landing components on machine fixtures or repeated exact positioning, specify the tighter limit and expect a box-section boom, which is far stiffer than a cantilever I-beam over the same length. The millimetre figure is the single best predictor of how the crane will feel to operate.
Q: When is a cantilever I-beam boom good enough, and when do I need a box boom?
A: Match it to reach, load, and precision. A cantilever I-beam boom is genuinely good enough — and the more economical choice — for short reach (up to about 3 metres), light-to-moderate loads (up to roughly 3 tonnes), and rough placement where a little tip droop does not matter. Move to an underhung box boom when any of three things push harder: long reach beyond about 6 metres, where a single beam would sag too much or grow impractically heavy; heavier loads that a rolled section cannot carry stiffly; or precise placement, where low deflection keeps the trolley path level and the load lands where the operator puts it. Heavy, high-cycle duty (Class D) reinforces the case, because a box boom with a fatigue-rated pivot connection resists the cracking that repeated cycles cause. When two or more of these factors apply, specify the box boom — retrofitting stiffness later means replacing the boom.