


Electric Hoist Selection Guide: Chain vs Wire Rope.
Introduction
A packaging plant I visited had a 2-tonne electric hoist that failed every eight months like clockwork. The maintenance team kept replacing the motor, the brake, the chain — and kept being baffled. The hoist was rated for the loads it lifted. The wiring was fine. The installation was clean. On paper, nothing was wrong.
The problem was hiding in a number nobody on the buying team had asked about: the duty class. The hoist was a light-duty unit dropped onto a line that cycled it forty times an hour, two shifts a day. It could lift the weight, no question. It just couldn’t lift it that often for that long. Every eight months it wore itself out doing a job it was never built to do — and the plant kept paying to replace parts instead of fixing the real mistake.
That’s the trap with electric hoists. They look like a simple purchase. Pick a capacity, pick a lift height, place the order. But capacity only tells you how heavy one lift can be. It says nothing about how hard the hoist works, how it fits under your beam, or whether chain or wire rope is the right fit for your loads. Get those wrong and you buy a hoist that fails early, doesn’t fit, or costs far more to run than the cheaper alternative would have.
This is the first article in a three-part series on electric hoist procurement. Here we cover the decisions that shape the hoist before you compare a single price.
What you’ll take away:
- When to choose a chain hoist and when wire rope earns its higher cost
- How to size capacity for the real lift — including everything below the hook
- How lift height, headroom, and reeving quietly decide whether the hoist fits
- How to read FEM/ISO (M3–M8) and CMAA (A–F) duty classes and match them to your usage
- Why single vs. dual speed changes both safety and component life
- 2026 pricing so your budget survives the first supplier conversation
Part 1: Chain vs. Wire Rope — Two Different Tools
The first fork in the road is the lifting medium. An electric hoist raises its load on either a chain or a wire rope, and the two aren’t interchangeable. They suit different capacities, different lift heights, and different duty patterns. Picking the wrong one means overpaying or under-building.
Electric Chain Hoists
A chain hoist lifts on a calibrated alloy load chain that runs over a pocketed sprocket. It’s the compact, economical choice at the lighter end of the range.
Where it earns its place: capacities from roughly 60 kg up to about 5 tonnes (occasionally higher), with moderate lift heights and light-to-moderate duty. Workshops, assembly cells, maintenance bays, and machine-tending stations lean on chain hoists because they’re compact, affordable, easy to mount, and simple to service.
The trade-offs: chain gets heavy and awkward at long lift heights, and it’s slower than wire rope at higher speeds. Above about 5 tonnes or on tall lifts, chain stops making sense.
Electric Wire Rope Hoists
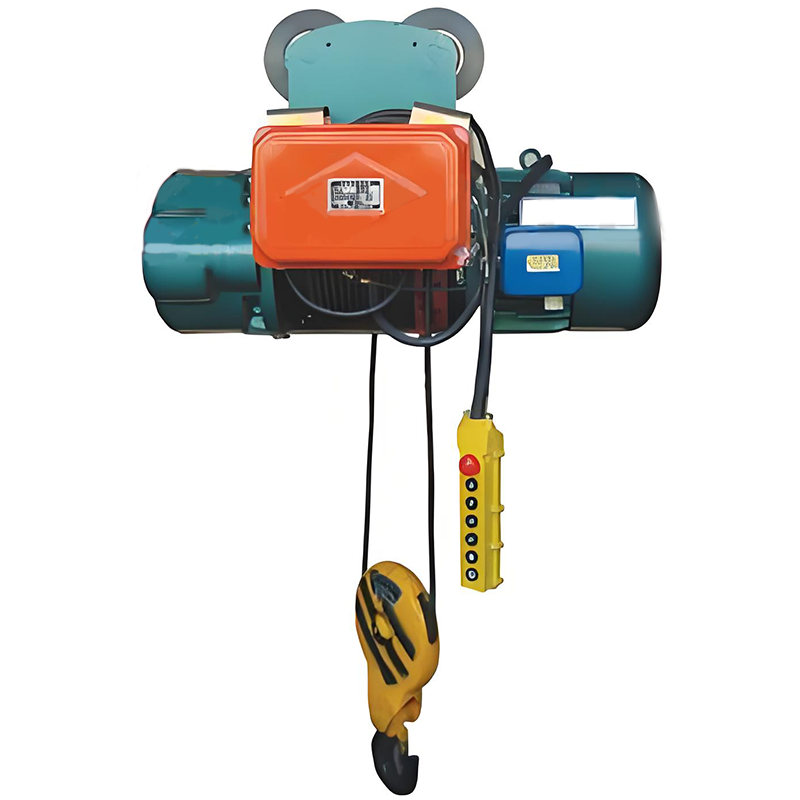
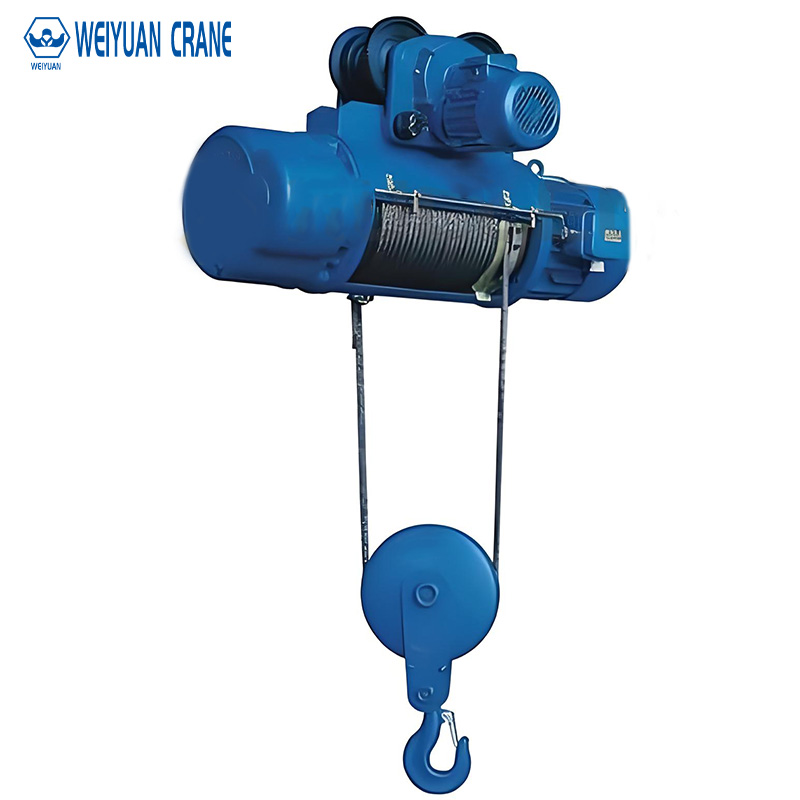
A wire rope hoist lifts on a steel rope spooled onto a grooved drum. It’s built for heavier loads, taller lifts, and harder duty.
Where it earns its place: capacities from around 1 tonne up to 100+ tonnes, long lift heights, high lifting speeds, and severe duty cycles. Steel fabrication, foundries, warehouses with tall racking, and any high-frequency production line lean on wire rope hoists for their speed and endurance.
The trade-offs: higher purchase cost, larger physical size, and more headroom consumed by the drum. On a light-duty 500 kg lift, a wire rope hoist is simply overkill.
The Quick Selection Logic
| Factor | Chain hoist | Wire rope hoist |
|---|---|---|
| Typical capacity | 60 kg – 5 t | 1 t – 100+ t |
| Lift height | Short to moderate | Moderate to tall |
| Lifting speed | Lower | Higher |
| Duty suitability | Light to moderate | Moderate to severe |
| Purchase cost | Lower | Higher |
| Physical footprint | Compact | Larger |
Mini takeaway: below 5 tonnes with moderate lifts and duty, a chain hoist almost always wins on cost and simplicity. Above 5 tonnes, or for tall lifts, high speeds, and heavy cycling, wire rope earns its premium. Nail this first — everything else sits on top of it.
Part 2: Sizing Capacity — Rate for the Real Lift
Capacity is where buyers go wrong most often, and it goes wrong in both directions. Under-rate the hoist and it fails or can’t do the job. Over-rate it and you’ve spent money on capacity that never gets used.
Rated Capacity Is the Whole Suspended Load
Here’s the error I see most: buyers spec capacity against the bare weight of the heaviest part, and forget everything else hanging on the hook. Your rated capacity has to cover the whole suspended load:
- The heaviest load you’ll actually lift
- The below-hook device — spreader beam, magnet, grab, C-hook, or vacuum lifter
- Any rigging, slings, and shackles in the load path
A spreader beam or lifting magnet can add tens of kilograms — sometimes several hundred on a large fixture. Leave it out and your “2-tonne hoist” is quietly under-rated for the 2-tonne load you bought it to handle. Add the below-hook weight, then add margin, and that’s your rated capacity.
Size for the Heaviest Lift, Not the Average
A related mistake: specifying for the typical load instead of the heaviest one. A line that mostly handles 800 kg parts but occasionally receives a 1,500 kg component needs a 1,600 kg or 2-tonne hoist — not an 800 kg unit that’s fine most of the time and dangerously overloaded the rest.
Build In Working Margin, Then Round Up
Don’t run a hoist at its exact rated capacity in normal service. A common guideline is to work it at no more than about 80% of rated capacity — which protects against the inevitable heavier-than-planned lift and extends component life.
Put the steps together:
- Add up the total suspended load: heaviest part + below-hook device + rigging.
- Divide by 0.8 to apply the working margin.
- Round up to the next standard capacity step (250, 500 kg, 1, 2, 3.2, 5, 10 tonnes, and so on).
Standard steps keep you on catalog components — lower cost, faster delivery, easier spares. An odd in-between figure means a custom quote and a longer wait.
Mini takeaway: capacity is the whole suspended load, sized for the heaviest lift, with margin, rounded to a standard step. Skip any of those and you overload the hoist on its core job.
Part 3: Lift Height, Headroom & Reeving — Will It Actually Fit?
Two hoists with identical capacity can behave very differently in your building, because lift height and headroom decide whether the hoist physically fits and reaches the load. Buyers who treat these as afterthoughts get caught out at installation.
Lift Height: Measure the Full Picture
Lift height is how far the hook travels from its lowest to highest point. Sounds simple, but the classic mistake is specifying enough height for the load and forgetting the gear beneath it. A 4-metre lift with a 1-metre spreader beam gives you only 3 metres of usable clearance for the load itself.
Account for the full stack — hook, rigging, below-hook device, and load — when you state your lift height. And confirm two related dimensions with your supplier:
- The mounting height available under your beam or crane
- The lowest hook position the task requires (including any below-floor or pit access)
Headroom: The Space the Hoist Itself Eats
Headroom is the vertical space the hoist and trolley consume between the beam and the hook at its highest point. Every millimetre of headroom is a millimetre of hook height you lose in the same building envelope.
This matters most in low-ceiling buildings. A low-headroom hoist cuts the consumed space substantially — often 150 to 200 mm versus a standard build — buying back usable lift height without touching the beam. The rule of thumb: if your hook-height calculation lands within about 300 mm of what the task demands, price a low-headroom hoist before you compromise on the lift.
Reeving: Why Some Hoists Halve Their Own Speed
Reeving is how the rope or chain is arranged between the hoist and the hook. A single-fall (1/1) arrangement runs the load on one line; a double-fall (2/1) runs it on two, sharing the load.
- Double-fall doubles the effective capacity and lifts more smoothly with less load sway — but halves the lift speed and consumes more headroom.
- Single-fall is faster and more compact — but limits capacity and can allow more sway on the load.
The trade-off is real: buyers chasing a fast cycle time sometimes specify single-fall and then discover the load sways too much for precise placement, or the capacity falls short. Match the reeving to what the job actually needs — speed, capacity, and stability all pull in different directions here.
Mini takeaway: capacity gets the hoist onto the shortlist; lift height, headroom, and reeving decide whether it fits and performs. Confirm all three with your supplier before you commit to a beam layout.
Part 4: Duty Class — The Number That Decides Hoist Life
If there’s one specification that separates a hoist that runs for years from one that fails early, it’s the duty class. And it’s the one buyers skip most often, because — as the packaging plant in the introduction learned — it doesn’t show up as a headline number the way tonnage does.
Duty class rates how hard a hoist is engineered to work over its life. It combines two factors:
- Operating frequency — how many lift cycles the hoist performs per hour, per shift, per day, and how long the motor runs.
- Load spectrum — how heavy the average lift is relative to the rated capacity. A hoist that mostly lifts light loads with the occasional heavy one lives an easier life than one running near capacity every cycle.
Two hoists with the same tonnage can sit in completely different duty classes — and cost very differently — because one is built to work all day and the other isn’t.
The Two Systems: FEM/ISO and CMAA
Electric hoists are usually classified under FEM/ISO (the European and international system, the more common one on hoists) and sometimes CMAA (the North American system). They measure the same thing — how hard the hoist works — using different frameworks, and they cross-reference closely.
| Service level | FEM/ISO class | CMAA class | Typical usage |
|---|---|---|---|
| Light / infrequent | M3 (1Bm) | A / B | Occasional lifts, long idle periods; maintenance, standby |
| Light to moderate | M4 (1Am) | B / C | Regular light lifting, single shift; light assembly |
| Moderate | M5 (2m) | C | Steady lifting through the shift; general workshops |
| Heavy | M6 (3m) | D | Frequent lifting at higher loads; heavy machine shops |
| Severe | M7 (4m) | E | Near-continuous operation at high load; foundries, bulk handling |
| Continuous severe | M8 (5m) | F | Around-the-clock cycling; steel mills, process lines |
How to Place Your Operation
Be honest about how the hoist will actually be used — not how you’d like to imagine it. Ask:
- How many lifts per hour, per shift? A handful points to M3–M4 / A–B. Steady lifting is M5 / C. Near-continuous cycling is M6–M8 / D–F.
- How heavy are the lifts relative to capacity? Mostly light with the odd heavy one is easier duty. Consistently near rated capacity pushes the class up.
- How many shifts? A single-shift workshop and a three-shift line moving the same load are worlds apart on duty. Running hours compound wear.
Why This Is a Budget Decision
Under-specifying duty class is the single most expensive hoist mistake — not on day one, but over the hoist’s life. A light-duty hoist pushed into heavy service chews through motors, brakes, and chain far ahead of schedule, and the unplanned downtime costs more than the hoist. That’s the packaging plant’s eight-month failure cycle, exactly.
Over-specifying costs you too: paying for an M7 hoist to do genuine M4 work is capital spent on endurance you’ll never use.
The procurement discipline that catches most bad “bargains”: when you compare quotes, normalize them to the same duty class. A cheaper hoist at a lower duty rating is not a like-for-like comparison — it’s a different product that happens to share a tonnage figure. This one check catches more failing “bargains” than any other.
Part 5: Single Speed vs. Dual Speed vs. VFD
Lifting speed isn’t just about cycle time — it’s about safety, placement accuracy, and component life. There are three broad control options, and the right one depends on how precisely you need to position loads.
Single Speed
The hoist lifts and lowers at one fixed speed. Simple, cheap, and fine for basic lifting where the load doesn’t need careful placement.
The catch: every start and stop is abrupt. That shock load swings the load, stresses the structure, and wears the brake and gearbox faster. On anything but the lightest, least frequent duty, single speed shows its limits quickly.
Dual Speed
The hoist offers a fast speed for travel and a slow speed for approach and placement — typically in a ratio around 4:1 or 6:1. The operator moves the load quickly, then switches to slow speed to set it down precisely.
Why it matters: the slow speed lets the operator “spot” the load accurately without the jerk of a single-speed stop. Dual speed is the sensible default for most production and assembly work — the extra cost is modest against the gain in control and reduced wear.
Variable-Frequency Drive (VFD)
A VFD gives infinitely variable, ramped speed control — smooth acceleration and deceleration with no shock. The load barely sways, placement is precise, and the gentle starts and stops directly extend the life of the motor, brake, gearbox, and chain or rope.
Where it earns its cost: precise positioning work, fragile or high-value loads, high-frequency duty where reduced shock loading pays back in longevity, and any application where load sway is a safety or quality problem.
Do this / not that:
- Do specify at least dual speed for any regular production lifting — single speed’s shock loading isn’t worth the small saving.
- Do specify a VFD where placement precision, load protection, or high duty justify it — it protects the expensive components around it.
- Don’t default to single speed just because it’s cheapest; the wear and sway usually cost more than you saved.
Mini takeaway: speed control is a longevity and safety decision, not just a convenience. Dual speed is the practical baseline; VFD is the upgrade that pays for itself on precise or heavy-duty work.
Part 6: 2026 Price Reference for Electric Hoists
Use these as planning figures to build a defensible budget before you approach suppliers. Actual pricing varies with capacity, lift height, duty class, control type, and mounting (fixed, manual trolley, or motorized trolley).
| Hoist type & spec | Capacity / lift | 2026 price range |
|---|---|---|
| Electric chain hoist, single speed | 250 kg – 1 t / 3–6 m | $500 – $2,000 |
| Electric chain hoist, dual speed | 1 – 2 t / 3–6 m | $1,200 – $4,500 |
| Electric chain hoist, dual speed + motorized trolley | 2 – 5 t / 6–9 m | $3,000 – $9,000 |
| Electric wire rope hoist, standard | 3 – 10 t / 6–12 m | $6,000 – $22,000 |
| Electric wire rope hoist, low-headroom / dual speed | 10 – 20 t / 9–15 m | $18,000 – $55,000 |
| Heavy wire rope hoist, severe duty (M6–M8) | 20 – 50 t / 12–18 m | $45,000 – $130,000+ |
Option and cost drivers to budget for:
- Dual speed over single speed: +10 to 20%
- Variable-frequency drive over dual speed: +15 to 30%
- Low-headroom build over standard: +10 to 25%, worth it only when the envelope demands it
- Higher duty class (e.g., M4 to M6): +20 to 50% depending on capacity
- Motorized trolley over fixed or push mounting: priced per application
- Below-hook devices (spreader beams, magnets, grabs): priced separately per application
Procurement tip: when you compare quotes, normalize them to the same capacity, lift height, duty class, control type, and mounting. A headline price that looks 20% cheaper often reflects a lower duty class, single-speed control, or a shorter lift — not a genuine saving. That single check is the difference between a real comparison and a costly one.
Frequently Asked Questions
Q: Should I choose an electric chain hoist or a wire rope hoist?
A: Let capacity, lift height, and duty decide. Choose a chain hoist for lighter loads (roughly up to 5 tonnes), shorter lifts, and light-to-moderate duty — it’s more compact, cheaper, and simpler to service, which suits most workshops and assembly cells. Choose a wire rope hoist for heavier loads (above 5 tonnes), tall lifts, higher speeds, or severe duty cycles — it costs more and takes more space, but it’s built for the endurance and speed that chain can’t match. Below 5 tonnes with moderate use, chain almost always wins on cost; above it, or for tall, fast, heavy work, wire rope earns its premium.
Q: How do I calculate the capacity I actually need?
A: Start with the heaviest single item you’ll lift, then add the weight of the below-hook device (spreader beam, magnet, grab, or C-hook) plus any rigging and slings. That’s your total suspended load. Divide by 0.8 to leave working margin (aim to run the hoist at around 80% of rated capacity), then round up to the next standard step — 250, 500 kg, 1, 2, 3.2, 5 tonnes and so on. The most common error is rating against the bare load and forgetting the below-hook gear, which quietly under-rates the hoist for the very job it was bought to do.
Q: What duty class do I need?
A: Match the class to how hard the hoist will really work, using lifts per hour, load spectrum, and number of shifts. Occasional, infrequent lifting is FEM/ISO M3–M4 (CMAA A–B). Steady lifting through the shift is M5 (CMAA C) — the range that covers most workshops. Near-continuous cycling at higher loads, especially across multiple shifts, is M6–M8 (CMAA D–F), typical of foundries, steel mills, and heavy production lines. Under-rating the duty class is the most common cause of early hoist failure, so if usage is uncertain, round up rather than down.
Q: Is a low-headroom hoist worth the extra cost?
A: Only when your building envelope demands it. A low-headroom hoist consumes less vertical space between the beam and the hook — often 150 to 200 mm less than a standard build — which buys back usable lift height without raising the beam. In a low-ceiling building where your hook-height calculation lands within about 300 mm of what the task needs, that recovered height can be the difference between reaching the load and coming up short. In a building with ample clearance, the premium isn’t worth it.
Q: Do I really need dual speed or a VFD, or is single speed fine?
A: Single speed is fine only for the lightest, least frequent lifting where placement doesn’t matter. For regular production and assembly work, dual speed is the practical baseline — its slow approach speed lets operators place loads precisely without the shock of a single-speed stop, and it reduces wear on the brake and gearbox. A VFD goes further, giving smooth ramped control that nearly eliminates load sway and extends component life, which makes it worth the cost for precise positioning, fragile or high-value loads, and high-duty applications. The shock loading and sway of single speed usually cost more in wear than the control upgrade would have.