


Electric Hoist Maintenance, Inspection & Safety
Introduction
A food processing plant ran a 1-tonne chain hoist on a packaging line for three years without a single logged inspection. The operators liked it — no downtime for checks, no paperwork. Then one afternoon the load chain snapped mid-lift and dropped a 900 kg tote onto the line below. Nobody was standing under it, which was luck, not planning. The line was down for five days.
When the failed chain came out, the cause was obvious to anyone who’d looked: the links were worn to threads on one side, stretched well past the manufacturer’s limit, and the limit switch that should have stopped an over-hoist had been dead for months. Every one of those faults was visible. A five-minute daily check would have caught the chain wear a year earlier. A monthly measurement would have flagged the stretch. Nobody was looking, so nobody knew.
That’s the pattern behind almost every serious hoist failure. The machine degrades slowly and visibly, and the plants that catch the signals early run their hoists for a full service life. The ones that treat a hoist as “install and forget” pay for it — in a dropped load, a failed audit, or a line stopped the exact week it can’t afford to stop.
This is the final article in our three-part electric hoist series. Part 1 covered selection. Part 2 covered installation and integration. Here we close the loop on the part that decides whether all that upfront work pays off: keeping the hoist reliable, compliant, and safe across its whole life.
What you’ll take away:
- A practical inspection schedule — daily to annual — you can hand straight to your team
- What ASME B30.2 and OSHA 1910.179 actually require of a powered hoist
- Clear rejection criteria for wire rope and load chain
- Safety device testing, a repair-vs-replace framework, and a 2026 maintenance cost reference
Part 1: The Inspection Schedule — Daily to Annual
The single best predictor of hoist uptime isn’t the brand on the nameplate. It’s whether an inspection schedule actually runs on time. Not an elaborate one — a consistent one. The best programs layer frequent, shallow checks over rarer, deeper inspections, so problems surface while they’re still cheap to fix.
Here’s a practical structure you can adapt to your hoist’s duty class. Higher duty (M6–M8 from Part 1) tightens every interval; light-duty hoists can stretch them.
Daily / Pre-Shift Checks
An operator handles these in a few minutes before the first lift. No tools — just eyes, ears, and a checklist:
- Test the up/down controls and the emergency stop before lifting
- Confirm the brake holds by raising a load slightly and pausing
- Listen for unusual noise, grinding, or slipping from the motor or gearbox
- Visually inspect the visible chain or rope for kinks, twists, or broken wires
- Verify the upper limit switch cuts the hoist at its set point
- Check the hook and safety latch for cracks, wear, spread, and free swivel
Log the result — even a five-second “all normal” entry. That log is your compliance trail in an audit and your first line of evidence if something goes wrong.
Weekly Checks
A technician spends 20 to 40 minutes on a closer pass:
- Inspect the full length of chain or rope for wear, corrosion, and diameter loss
- Check the load chain for stretch against a reference length
- Look for oil weeping around the gearbox
- Function-test the overload protection
- Inspect the pendant cable or festoon system for wear and strain relief
Monthly Checks
A deeper mechanical review, usually 1 to 3 hours:
- Measure chain diameter and pitch, or rope diameter, against the rejection threshold
- Inspect brake lining thickness and adjustment
- Check the suspension — hooks, lugs, and trolley connection — for looseness (ties back to Part 2’s install work)
- Lubricate the chain or rope per the manufacturer’s schedule
- Test all safety devices under load
- Verify the trolley (if fitted) tracks true and its limits function
Annual Comprehensive Inspection
The thorough examination — typically by an external qualified inspector, with a written report:
- Full mechanical inspection, including the brake, gearbox, and load-bearing parts
- Non-destructive examination (NDT) of the hook and other critical components where required
- Complete chain or rope assessment against rejection criteria
- Load test where regulation or a major repair requires it
- Motor insulation and electrical safety check
Mini-takeaway: Daily checks catch the obvious, weekly and monthly checks catch the developing, and the annual inspection catches the hidden — the worn chain and dead limit switch that dropped the tote in our opening. Skip any layer and you’re running on luck.
Part 2: What ASME B30.2 and OSHA 1910.179 Require
Two documents govern hoist inspection in most markets that reference US standards, and both apply to electric hoists. Knowing what they demand protects you legally, keeps your insurance valid, and — bluntly — keeps people safe.
OSHA 1910.179 is the federal regulation for overhead and gantry cranes in general industry, and its inspection and maintenance principles extend to the hoists that serve them. It’s the law, not a guideline. It sets operator responsibilities, inspection requirements, and load-test rules, and non-compliance is a citable violation with real financial consequences.
ASME B30.2 is the consensus safety standard OSHA leans on for the technical detail — inspection frequencies, component rejection criteria, and testing methods. For hoists specifically, many manufacturers also reference ASME B30.16 (overhead hoists) for the hoist unit itself. Together they define two inspection categories that map cleanly onto Part 1:
- Frequent inspections — daily to monthly, covering what operators and technicians check routinely
- Periodic inspections — one to twelve months, more thorough, documented, and covering the mechanism, wear parts, and safety devices
Here’s the connection procurement teams miss: the duty class you specified back in Part 1 directly sets the inspection workload.
| Service level | FEM/ISO class | Frequent inspection | Periodic inspection |
|---|---|---|---|
| Light / infrequent | M3–M4 | Daily to monthly | Yearly |
| Moderate | M5 | Daily to weekly | 6–12 months |
| Heavy | M6 | Each shift to weekly | 3–6 months |
| Severe / continuous | M7–M8 | Each shift | 1–3 months |
The ownership implication is direct: a higher-duty hoist costs more to own, not just to buy. Factor the recurring inspection burden into total cost, and you’ll see why a correctly matched duty class from Part 1 pays off for years.
Mini-takeaway: The standards set the floor, not the ceiling. Match your inspection frequency to your real duty class, and document everything — the paperwork is what turns “we maintain it” into something an auditor can verify.
Part 3: Load Chain and Wire Rope — Rejection Criteria
The chain or rope is the one component whose failure drops the load, so it earns the strictest scrutiny. The good news: it degrades visibly and predictably. A disciplined routine catches trouble with room to spare — the routine our food plant never ran.
Load Chain Rejection Criteria
Most electric hoists at the lighter end run a chain hoist, so this is the common case. Remove the load chain from service when you find any of these:
- Stretch — elongation beyond the manufacturer’s limit, measured over a defined number of links. Measure a set gauge length against the original and replace once it exceeds the stated percentage. Stretch signals overload or fatigue.
- Wear — link material worn below the minimum diameter, often on the bearing surfaces where links contact each other. This is the “worn to threads” fault from our opening.
- Cracks, nicks, or gouges on any link surface
- Twisted, bent, or seized links that won’t articulate freely
- Corrosion or heat damage — pitting, rust, or discoloration from heat or an arc
Measure chain wear monthly with a caliper across a defined gauge length, and log it. A steady decline tells you when replacement is coming, so you order on your schedule instead of during a panic shutdown.
Wire Rope Rejection Criteria (ASME B30.2)
For wire rope hoists, remove and replace the rope when you find any of these:
- Broken wires — a defined number of randomly distributed broken wires in one rope lay, or several concentrated in a single strand
- Diameter reduction from wear beyond the allowed percentage of nominal
- Corrosion — visible pitting or rust, with internal corrosion especially dangerous because it hides
- Structural distortion — kinking, crushing, bird-caging, or core protrusion
- Heat damage — discoloration from heat or an electric arc
Mini-takeaway: Never repair a load chain or rope — replace it. Splicing, shortening, or reusing a rejected chain is one of the most dangerous shortcuts on the floor. Keep the correct replacement in stock, matched to your specific hoist; the holding cost is trivial next to the downtime of waiting for a specified part during an unplanned failure.
Part 4: Brake and Gearbox Servicing
The brake and gearbox are the hardest-working parts of an electric hoist, and where deferred maintenance turns fastest into a safety event. A hoist brake that slips is not a maintenance annoyance — it’s a load that won’t hold.
Brake Servicing
The brake’s whole job is holding the load, so any degradation is serious:
- Measure lining thickness against the minimum and replace before it’s reached
- Check and adjust the air gap to the manufacturer’s spec
- Test brake holding under rated load, with zero measurable drift as the pass criterion
- Inspect the brake spring, actuator, and — on DC brakes — the rectifier for wear or fault
There is no acceptable amount of drift on a load brake. Any downward creep during a hold test takes the hoist out of service until it’s fixed.
Gearbox Servicing
The gearbox rewards attention and punishes neglect:
- Change the gearbox oil on the manufacturer’s schedule, and inspect the drained oil — metal particles are an early warning of internal wear
- Check for leaks around seals and the housing joint
- Listen for a change in noise or a rise in operating temperature, both early signs of bearing or gear wear
- Confirm the oil level between changes on higher-duty units
If your hoist runs a variable-frequency drive (specified back in Part 1), it’s reducing mechanical shock on every start and stop — which directly extends brake, gearbox, and chain life. Keep its cooling and connections clean; it’s protecting the expensive components around it.
Mini-takeaway: A slipping brake and a whining gearbox both announce themselves before they fail. Train the team to treat load drift and new noise as stop-work signals, not “keep an eye on it” items.
Part 5: Safety Devices — Test Them, Don’t Just Trust Them
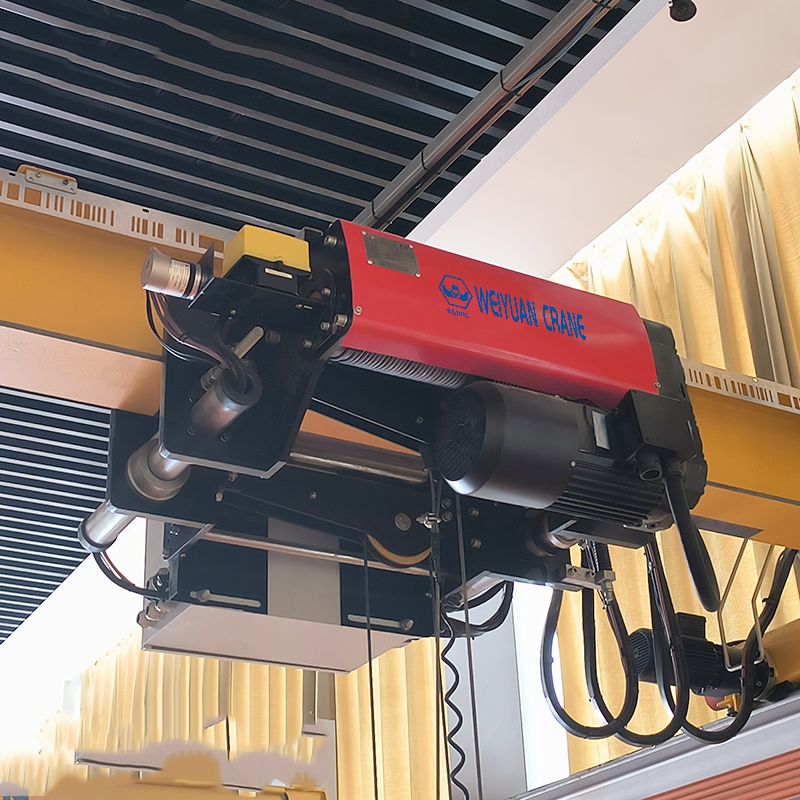
Safety devices fail silently. A limit switch that quit working doesn’t announce itself until the day it was supposed to stop an over-hoist and didn’t — exactly the dead switch behind our opening failure. The rule is simple: test every safety device on a schedule — don’t assume it works.
| Device | What it protects against | Test frequency |
|---|---|---|
| Emergency stop | Loss of control in any situation | Daily |
| Upper limit switch | Over-hoist — the hook running into the drum or block | Monthly, minimum |
| Lower limit switch | Over-lowering and rope/chain slack damage | Monthly |
| Overload protection | Lifting beyond rated capacity | Monthly |
| Slipping-clutch / friction device | Mechanical over-travel backup | Per manufacturer |
| Hook safety latch | Slings jumping the hook | Daily visual |
Three field notes that matter for hoists specifically. Test the upper limit switch without a load to verify it cuts power before the hook over-hoists. Confirm overload protection actually engages at its set point — a device that’s drifted out of calibration protects nothing. And on hoists with a slipping clutch, confirm it’s a backup to the limit switch, not a substitute — a clutch that engages routinely is a sign the limit switch has failed.
Document every test with date and result. That record is both your compliance evidence and your early warning that a device is drifting out of spec.
Mini-takeaway: The upper limit switch is the single most important safety device on a hoist, and the most commonly found dead during an incident investigation. Test it monthly, without a load, every time.
Part 6: Operator Training — The Cheapest Reliability Investment
The best-maintained hoist in the world fails fast in untrained hands. Operator error drives a large share of hoist incidents and accelerated wear — and it’s the cheapest problem on this list to fix.
A competent operator should be trained and assessed on:
- Pre-shift inspection and how to log it
- Load estimation, and never exceeding rated capacity
- Smooth control technique — avoiding the abrupt “inching” and shock loads that hammer the brake, gearbox, and chain
- Never side-pulling or dragging a load, which overloads the chain guide and twists the chain
- Recognizing warning signs (new noise, load drift, chain twist) and reporting them
- Correct hook and rigging use, and never using the load chain as a sling
- Emergency procedures and safe shutdown
Mini-takeaway: Budget for documented operator training and periodic re-assessment. It’s a small line item that cuts both incident risk and wear-driven maintenance cost. Many buyers underinvest here and pay for it in premature chain and brake replacement — the opposite of the cost efficiency they set out to achieve.
Part 7: Repair or Replace — Making the Call on Evidence
Every long-lived hoist eventually forces the repair-versus-replace question. The decision gets far easier when you split it by component instead of treating the hoist as one all-or-nothing asset.
Repair or Refurbish the Component
When the hoist frame, motor, and gearbox are sound, repair or replace the worn part — not the whole unit. Load chain, wire rope, brake linings, hooks, limit switches, and pendants are all serviceable or replaceable wear items. A worn chain or a slipping brake is a routine replacement, not a reason to scrap the hoist.
Replace the Whole Hoist When:
- The motor or gearbox has failed and the repair cost approaches a new unit’s price
- The hoist is obsolete and spare parts — chain, brake kits, contactors — are no longer available
- Cumulative repair costs over a short period start approaching the value of a new, correctly specified hoist
- The duty class was wrong from the start (the Part 1 mistake) and the unit keeps failing regardless of repairs
- Your operation has outgrown the hoist’s capacity or lift height
Here’s the discipline that makes this decision defensible to management and to a regulator: keep good records. A complete inspection and repair history — the paper trail this whole series builds — lets you make the call on evidence rather than guesswork. Operations that kept disciplined records decide with confidence. The ones that didn’t are gambling with a capital asset.
Mini-takeaway: Parts availability often decides the question before cost does. An out-of-production hoist you can’t get a brake kit for is already at end of life, however sound it looks — factor spares support into the decision.
Part 8: 2026 Cost Reference for Maintenance and Inspection
Use these as planning figures to build a realistic maintenance budget. Actual costs vary with hoist size, duty class, location, and whether work runs in-house or contracted.
| Program element | Scope | 2026 planning range |
|---|---|---|
| Annual thorough inspection | External qualified inspector + written report | $400 – $2,500 |
| NDT of hook and critical parts | Certified MT/PT inspection | $800 – $3,500 |
| Load chain replacement | Chain + labor | $400 – $2,500 |
| Wire rope replacement | Rope + labor | $600 – $4,500 |
| Brake service / reline | Lining, air-gap adjustment, hold test | $500 – $2,800 |
| Gearbox service / oil change | Oil, seals, inspection | $300 – $1,800 |
| Limit switch / contactor replacement | Part + labor | $200 – $1,200 |
| Load test | Test weights, rigging, certification | $800 – $4,000 |
| Preventive maintenance contract | Scheduled visits, lubrication, adjustments | $1,500 – $8,000 / year |
| Operator training | Certification + periodic re-assessment | $300 – $1,200 per operator |
Two budget realities for procurement teams:
- A preventive maintenance contract almost always costs less than reactive repair. A monthly chain measurement and a working limit switch would have prevented the food plant’s five-day shutdown — a few hundred dollars of routine attention against a five-figure loss. Planned spend is predictable; emergency spend never is.
- Deferred maintenance scales sharply. Catching chain stretch early sits at the bottom of these ranges. Ignoring it until the chain fails puts you at the top — replacement chain, the dropped load’s damage, and lost production combined.
Procurement tip: when you scope a maintenance contract, confirm exactly what’s included — inspections, consumables, callout response time, and parts. A cheap contract that excludes wear parts and emergency response isn’t a saving; it just moves the cost to your worst possible moment. Weigh response time as heavily as price. Uptime is what you’re actually buying.
Frequently Asked Questions
Q: How often does an electric hoist legally need inspection?
A: Under OSHA 1910.179 and ASME B30.2 (with B30.16 for the hoist unit), inspections split into frequent (daily to monthly) and periodic (one to twelve months), with the exact frequency set by the hoist’s duty class. A heavy, multi-shift hoist needs more frequent periodic inspection than an occasional-use one. At minimum, plan on operator daily checks, a documented monthly inspection, and a thorough annual inspection by a qualified person with a written report. Confirm the rules for your jurisdiction and facility type, as local requirements can be stricter.
Q: When must I replace a load chain, and can I ever repair one?
A: Replace the load chain — never repair it — the moment it hits any rejection criterion: stretch beyond the manufacturer’s limit measured over a gauge length, wear below the minimum link diameter, cracks or gouges, twisted or seized links, or corrosion and heat damage. Splicing, shortening, or reusing a rejected chain is one of the most dangerous shortcuts on the floor. Measure chain wear monthly and log it so you can order replacement on your schedule rather than during an unplanned failure. Keeping the correct chain in stock is cheap insurance against downtime.
Q: What’s the most important safety device to test on an electric hoist?
A: The upper limit switch. It stops the hoist before the hook over-hoists into the drum or block, and it’s the device most often found dead during an incident investigation — because it fails silently and nobody tests it. Test it monthly, without a load, and confirm it cuts power at its set point. Also test the overload protection engages at its set point and, on hoists with a slipping clutch, confirm the clutch is a backup rather than a substitute for a working limit switch. Document every test with date and result.
Q: How do I decide whether to repair or replace a hoist?
A: Split the decision by component. If the frame, motor, and gearbox are sound, worn items — chain, rope, brake linings, hooks, limit switches — are routine replacements, and repairing around a sound unit is far cheaper than a new hoist. Replace the whole unit when the motor or gearbox fails and repair approaches a new unit’s price, when spare parts are no longer available, when cumulative repair costs approach a new hoist’s value, when the original duty class was wrong and it keeps failing, or when you’ve outgrown the capacity. Parts availability often settles it first — an obsolete hoist you can’t get a brake kit for is already at end of life.
Q: Can I cut hoist maintenance costs without increasing risk?
A: Yes — mainly by shifting from reactive to preventive maintenance. Planned inspections and early wear-part replacement cost far less than emergency repairs plus the downtime around them. Two high-return moves: invest in operator training, since untrained operation drives a large share of wear and incidents; and run a disciplined monthly chain or rope measurement so you catch wear early and replace on your schedule. Matching the hoist’s duty class correctly at purchase, back in Part 1, also keeps the ongoing inspection burden proportionate rather than inflated.