


Gantry Crane Span & Hook Height
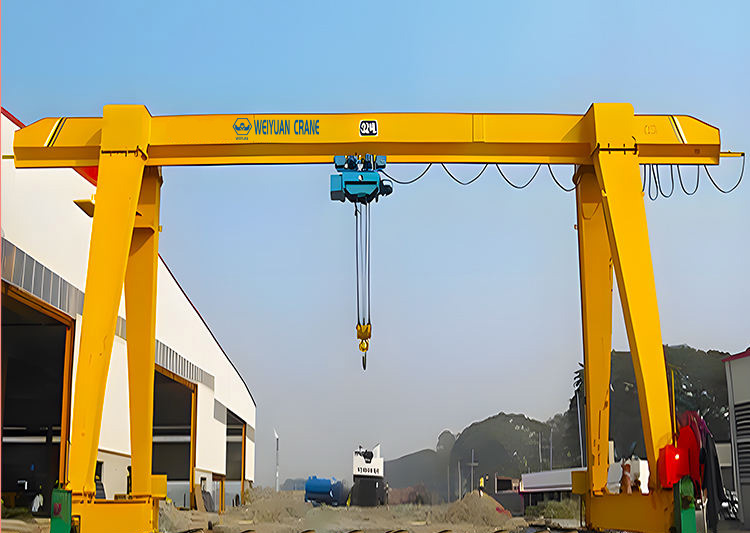
Introduction
A precast concrete plant I advised had done the hard part right. They’d specified a 20-tonne double-girder gantry crane, correctly duty-rated, sized on capacity for their heaviest mold. The order went in, the crane arrived, the rails went down. Then they tried to lift a mold off its casting bed onto a transport trailer parked in the aisle — the exact job the crane was bought for — and discovered the hook stopped a full 400 mm short of the trailer bed height. The load wouldn’t clear.
The problem wasn’t capacity. It was hook height, and nobody had calculated it properly. The buyer had taken the building’s clear height — a comfortable 8 metres — and assumed the hook would reach close to that. What they’d forgotten was everything that lives between the roof steel and the hook: the girder depth, the hoist’s own headroom, and the height the trolley needs to sit above the load. Stacked up, those consumed nearly 2 metres before the hook even started, and the “8-metre building” delivered barely 6 metres of usable lift.
Worse, they’d measured the span the same careless way — rail centre to rail centre, sized to the mold, with no thought for the clearance the end trucks and the trailer needed. The crane physically fit the building. It just couldn’t do the job. The plant spent the next three months and a five-figure sum raising the runway on packing plates and re-pouring one rail foundation to claw back the hook height they should have specified on day one.
Nobody had been reckless. Every number looked reasonable in isolation. But span and hook height aren’t single measurements — they’re stacks of dimensions that each eat into the working envelope, and the load always finds the shortfall. Get the calculation right before you order and the crane does exactly what you bought it for. Get it wrong and you’re packing plates under rails months later, paying several times what the right specification would have cost.
This is article 1 of a new three-part gantry crane series. Here we cover the geometry that decides whether a gantry actually reaches the work: how working span differs from structural span, how hook height is derived by subtracting every intermediate dimension from the building clear height, the end-approach and side-clearance rules that shape the envelope, and how a cantilever extends reach beyond the rails. We’ll work real numbers throughout, reference CMAA Specification No. 70, and close with a 2026 cost reference for the expensive business of fixing span or hook height after the crane is installed.
What you’ll take away:
- The difference between working span and structural span — and why buyers confuse them
- How to derive usable hook height by subtracting girder depth, hoist headroom, and runway/beam depth from clear height
- Minimum end approach and side clearance per CMAA Spec No. 70, and how they shrink the working envelope
- How a cantilever extends the working envelope beyond the rail line
- The common errors that leave hook height short or span too narrow
- Worked numeric examples you can adapt to your own building
- A 2026 cost reference for upgrading hook height or span after installation
Part 1: Working Span vs. Structural Span — The Distinction Buyers Miss
The first mistake in gantry geometry is treating “span” as one number. It isn’t. A gantry crane has a structural span — the fixed distance between the two rails — and a working span, the width of load travel you actually get to use. They’re related, but they’re not the same, and confusing them is how buyers end up unable to reach the edge of the very area the crane straddles.
Structural Span: Rail Centre to Rail Centre
Structural span is the distance between the centrelines of the two runway rails (or, on a semi-gantry, between the ground rail and the elevated runway). It’s the dimension that sizes the bridge girder, sets the wheel loads, and drives the foundation. When a supplier quotes “a 20-metre span,” this is the number they mean.
Structural span is a structural figure. Doubling it doesn’t double the girder — deflection rises far faster than the span, so a longer structural span forces a disproportionately deeper, heavier girder to stay within its deflection limit. That’s why every extra metre of structural span costs more than the last.
Working Span: What the Hook Can Actually Cover
Working span is the span of travel the hook achieves — and it’s always narrower than the structural span, because the trolley can’t drive its hook all the way to each rail. The end trucks, the trolley body, and the required end clearances all consume width at both ends of the bridge. The hook stops short of each rail by a distance called the end approach (Part 3).
   STRUCTURAL SPAN vs WORKING SPAN

   |<──────────── structural span (rail to rail) ────────────>|
   ▟                                                          ▙
   █   |<────────────  working span (hook travel)  ────────>|  █
   █   ├──ea──┤                                    ├──ea──┤    █
  ═╪═══════════════════════════════════════════════════════════╪═
   rail          ea = end approach at each end                rail
The relationship is simply:
Working span ≈ structural span − (end approach at rail A) − (end approach at rail B)
On a typical double-girder gantry, each end approach might be 0.6 to 1.2 metres, so a 20-metre structural span can deliver a working span closer to 17.5 to 18.5 metres. If your load has to reach the outer edge of the work area, you size the structural span to cover the working width plus both end approaches — not the working width alone.
Sizing the Structural Span Correctly
To turn a required working width into the structural span you order:
- Measure the full working width the hook must cover — the widest point of load travel.
- Add the end approach at each end (get the real figures from your supplier for your specific trolley and end truck).
- Add any side clearance to fixed obstructions or stored stacks (Part 3).
- The total is your structural span. Round to the supplier’s standard where practical.
Mini-takeaway: structural span is what you order and pay for; working span is what the hook delivers, always narrower by the two end approaches. Size the structural span from the required working width plus the approaches — never assume the hook reaches the rails.
Part 2: Deriving Hook Height — The Dimension Stack Nobody Adds Up
Hook height is where the precast plant came unstuck, and it’s the single most misunderstood dimension in a gantry specification. The building’s clear height is not your hook height. Usable hook height is what’s left after you subtract every piece of steel and every clearance that sits between the roof structure and the hook at its highest position. Miss one and you overstate your lift — usually by more than the load can spare.
The Dimensions That Eat Into Clear Height
Working from the top down, here’s the stack that sits between the building clear height and the hook:
- Runway beam / bracket depth — on a top-running gantry the bridge rides on runway rails carried on the beam and bracket; that beam depth sits above the bridge. (On a self-supporting gantry running on ground rails, this is replaced by the leg height allowance, but the girder-and-hoist stack below is identical.)
- Bridge girder depth — the main girder that spans the crane. On a double-girder gantry, the trolley rides on top, so the hook recovers this depth by pulling up between the girders; on a single-girder gantry the hoist hangs below, so the girder depth is lost from the lift.
- Hoist headroom (C-dimension) — the fixed vertical distance built into the hoist and trolley between the running surface and the hook at its highest point. This is a published figure for every hoist — and it’s the one buyers most often forget exists.
- Minimum clearances — a safety margin so the hook, trolley, and load never collide with the girder or the roof at the top of the lift.
The Hook Height Formula
   HOOK HEIGHT DIMENSION STACK

   ═══════════════════ building clear height (H)
   ▽ runway beam + bracket depth
   ▽ bridge girder depth (single girder only)
   ▽ hoist headroom  (C-dimension)
   ▽ safety clearance
   ─────────────────── ← highest hook position
   │
   │   usable hook height
   │
   ─────────────────── floor
Usable hook height = building clear height − runway/beam allowance − girder depth (single-girder) − hoist headroom − safety clearances
Then, separately, you check that the lowest hook position reaches where the load starts — the floor, the casting bed, the truck bed. Hook height isn’t just how high you lift; it’s the full travel between the lowest and highest hook positions.
Why Double-Girder Often Wins on Headroom
Counterintuitively, the bigger double-girder gantry frequently gives more usable hook height than a single-girder one in the same building. Because the trolley sits on top of and between the two girders, the hook pulls up into the girder depth rather than hanging below it — recovering the girder depth as usable lift. If hook height is your binding constraint, don’t assume the lighter single-girder crane is more compact; run the numbers on both.
Mini-takeaway: clear height is the starting point, not the answer. Subtract the runway/beam allowance, the girder depth (on a single-girder crane), the hoist headroom, and the safety clearances to get usable hook height — then confirm the lowest hook position reaches the load’s starting level. The hoist headroom is the dimension buyers forget; get it from the hoist datasheet, not a guess.
Part 3: End Approach and Side Clearance — CMAA Spec No. 70
Span and hook height set the outer box; end approach and side clearance decide how much of that box the hook can actually use. These are governed by CMAA Specification No. 70, which defines the minimum clearances a crane needs to run safely — and every one of them shrinks the working envelope from the structural dimensions you paid for.
End Approach — Why the Hook Can’t Reach the Rail
End approach is the minimum horizontal distance between the rail centreline and the hook’s centreline at the closest the trolley can travel toward that end. It exists because the trolley body, the end truck, and the required running clearances all occupy width — the hook simply can’t sit over the rail.
End approach is the dimension that turns structural span into the narrower working span (Part 1). It matters most when the load must reach right to the edge of the work area, or up to a wall or a fixed machine near a rail. If you need the hook to reach a specific point near one end, confirm the end approach before ordering — because a large end approach can leave the hook stranded short of the exact spot the crane was bought to serve.
Side Clearance — Keeping the Crane Off the Building and the Stacks
CMAA Spec No. 70 also sets minimum side clearances between the moving crane and any fixed obstruction — building columns, walls, stored material, adjacent cranes. The crane and its load sweep a volume as they travel, and that volume must never foul a fixed object.
   CLEARANCES THAT SHRINK THE ENVELOPE

   wall ║  side clearance    working envelope    side clearance  ║ stack
        ║◄──────────►|                        |◄──────────►|
        ║   ┌────────┴────────────────────────┴────────┐
        ║   │            usable hook travel             │
        ║   └───────────────────────────────────────────┘
   ea ──┤                                             ├── ea
Practical side-clearance rules from CMAA and common industrial practice:
- A minimum horizontal clearance (commonly around 50 mm / 2 inches, more where codes or the authority require it) between the widest part of the crane and any fixed structure along the runway.
- Adequate clearance above the crane to the roof structure and any services — the same principle applied vertically.
- Clearance to stored stacks and equipment at the load’s widest, not just the crane’s — a wide load on the hook sweeps a bigger volume than the bare trolley.
The Net Effect on the Working Envelope
Put the two together and the usable working envelope is meaningfully smaller than the structural box:
- Width is reduced by an end approach at each end.
- Height is reduced by the full dimension stack from Part 2.
- Reach toward walls and stacks is reduced by the side clearances.
Specify from the usable envelope you need, then work outward to the structural dimensions that deliver it — adding back every approach and clearance along the way. Sizing inward from the structural dimensions is exactly how buyers end up short.
Mini-takeaway: CMAA Spec No. 70’s end approach and side clearances are not optional trimmings — they carve real width and reach out of the structural envelope. Size the crane from the working envelope outward, adding the approaches and clearances, so the box you order delivers the box you need.
Part 4: Cantilever Reach — Extending the Envelope Beyond the Rail
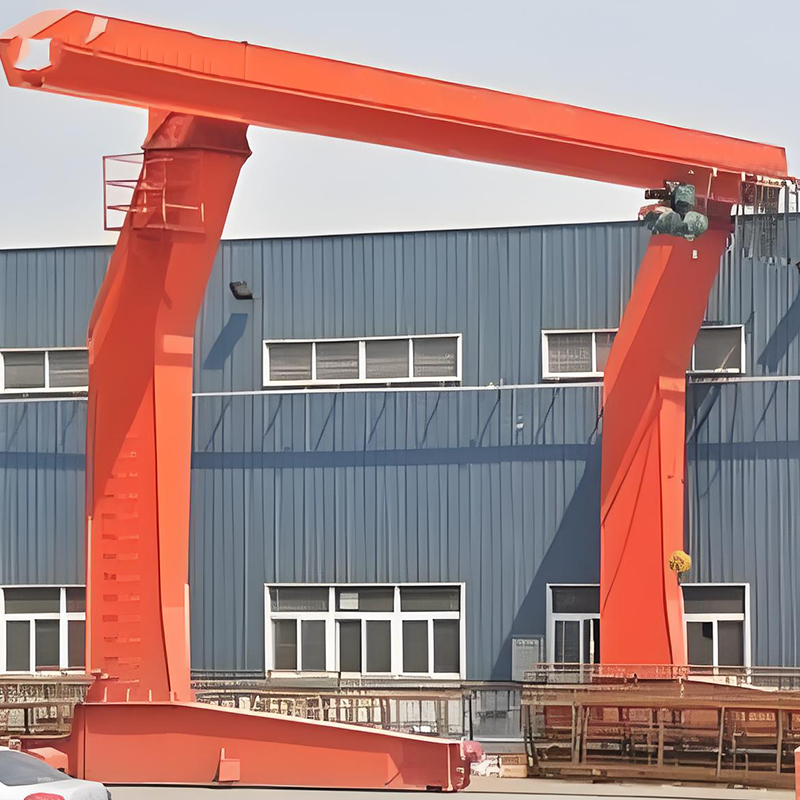
Sometimes the work sits outside the rails — a loading lane alongside the crane, a delivery bay, an outboard storage row the hook has to reach beyond the leg line. A straight gantry can’t help there; the hook lives between the rails. The answer is a cantilever — a section of bridge girder that extends past one or both legs, carrying the trolley out beyond the rail line.
How the Cantilever Extends Reach
On a cantilevered gantry, the girder runs past the end truck and leg, and the trolley can travel out onto that overhang. The hook then reaches a defined distance outboard of the rail — turning a crane that only serves the width between its rails into one that also loads a truck parked alongside.
   CANTILEVER EXTENDS THE ENVELOPE

        outboard reach          span between rails
        |◄─── C ───►|◄──────────────────────────►|
   [load on truck]──┬───────────────────────────┬──
                    ▟                           ▙
                    █                           █
                   ═╪═══════════════════════════╪═
                  rail                         rail
   Hook reaches C beyond the rail line, over the loading lane
The Cantilever Is a Design Input, Not an Add-On
A cantilevered load applies bending and an overturning effect the straight-span crane never sees — the load out on the overhang tries to tip the crane and adds bending to the girder beyond the leg. This means the cantilever must be engineered from the start:
- State the outboard reach and the load the cantilever must carry — these are design inputs, not afterthoughts.
- The end approach applies on the cantilever too — the hook stops short of the girder tip by an approach distance, so the usable outboard reach is a little less than the physical overhang. Confirm the usable figure.
- Both-sided cantilevers extend the envelope on each side but compound the structural demand — specify only the reach you genuinely use.
When a Cantilever Beats a Wider Span
If the work outside the rails is occasional — loading a lane a few times a shift — a cantilever is usually cheaper and cleaner than widening the whole structural span to swallow the lane between the rails. But if the outboard area needs heavy, constant coverage, reconsider whether the rail line itself should move. Match the tool to how the outboard zone is actually used.
Mini-takeaway: a cantilever pushes the working envelope beyond the rail so the hook can serve a lane or bay outside the leg line — but it’s a structural design input, priced on outboard reach and load, and its own end approach trims the usable reach. Specify the reach you need up front; it can’t be bolted on later.
Part 5: The Common Errors That Leave You Short
The precast plant’s shortfall wasn’t unusual — the same handful of geometry errors show up again and again, and every one is avoidable with a calculation before the order. Here are the ones that cost the most.
1. Treating clear height as hook height. The headline error. Subtracting nothing for girder depth, hoist headroom, and clearances overstates the lift by a metre or more. Always run the full dimension stack from Part 2.
2. Forgetting the hoist’s C-dimension. The hoist’s built-in headroom between the running surface and the top hook position is a real, published number — and the one most often left out. Pull it from the hoist datasheet and subtract it.
3. Sizing span to the load, not the working width plus approaches. Setting structural span to just cover the material leaves the hook unable to reach the edges once the end approaches are subtracted. Size from the working width plus both end approaches.
4. Ignoring the lowest hook position. Buyers check how high the hook lifts and forget how low it must reach — to a pit, a low casting bed, or below floor level. Confirm both ends of the hook’s travel.
5. Measuring for the bare load, not the rigging and below-hook gear. A spreader beam or lifting frame adds height beneath the hook, eating into the clearance at the top of the lift and the reach at the bottom. Include the full below-hook stack in the height calculation.
6. Overlooking side clearance to stacks and walls. A crane that clears the empty building may foul stored material or a wide load once in service. Check clearance to obstructions at the load’s widest, per CMAA Spec No. 70.
7. Treating the cantilever as an accessory. Deciding after installation that the hook needs to reach a lane outside the rails means re-engineering the girder — a cantilever is a design input, not a retrofit.
8. Skipping the end-approach check near a target point. When the crane must reach a specific spot near a rail — a fixed machine, a wall bay — a large end approach can leave the hook stranded short. Verify the approach against the target before ordering.
Mini-takeaway: almost every span-and-hook-height failure traces to a dimension left out of the stack — headroom, an approach, a clearance, the rigging, the lowest hook position. Add up every dimension, in both directions, before the order goes in.
Part 6: Worked Examples — Putting the Numbers Together
Numbers make the stacks concrete. Here are two worked examples — one hook height, one span — you can adapt to your own building. Treat the intermediate dimensions as illustrative; get the real figures for your specific crane from the supplier’s datasheet.
Example A: Usable Hook Height in an 8-Metre Building
A double-girder top-running gantry, 20 tonnes, in a building with 8.0 m clear height. The load starts on a 1.1 m casting bed and must lift onto a 1.3 m trailer bed.
   HOOK HEIGHT STACK (double girder)

   Building clear height              8.00 m
   − runway beam + bracket allowance  0.90 m
   − hoist headroom (C-dimension)     0.60 m   (hook rises between girders)
   − safety clearance                 0.15 m
   ─────────────────────────────────────────
   = highest hook position           6.35 m above floor
- Usable hook height (highest hook above floor): ~6.35 m.
- Now the job check: to place a load on a 1.3 m trailer bed, the hook (plus rigging) must reach above 1.3 m — comfortably satisfied at 6.35 m.
- But note the precast plant’s trap: had this been a single-girder crane, you’d also subtract the girder depth (say 0.7 m) because the hoist hangs below the girder — dropping the highest hook to ~5.65 m. Same building, 0.7 m less lift, purely from the girder configuration.
The lesson: the same 8-metre building yields 6.35 m or 5.65 m of usable hook height depending only on girder type. Neither is “8 metres.”
Example B: Structural Span from a Required Working Width
The same crane must cover a working width of 17.5 m — the hook has to reach from a casting bed on one side to a trailer lane on the other.
   SPAN BUILD-UP

   Required working width (hook travel)   17.50 m
   + end approach, rail A                  0.90 m
   + end approach, rail B                  0.90 m
   + side clearance allowance (each side)  0.10 m
   ────────────────────────────────────────────
   = required structural span            19.40 m  → order ~19.5–20 m
- Structural span to order: ~19.5 to 20 m to deliver 17.5 m of working span.
- Had the buyer ordered a 17.5 m structural span to “match” the 17.5 m working width, the hook would have fallen roughly 1.8 m short across the two end approaches — the exact span version of the precast plant’s hook-height mistake.
Example C: Adding a Cantilever for an Outboard Lane
Suppose a 2.0 m loading lane sits outside rail B. Rather than widen the structural span by 2 m (heavier girder, second rail moved, more foundation), add a cantilever:
- Physical cantilever overhang: 2.4 m beyond rail B.
- Less end approach on the cantilever: ~0.9 m.
- Usable outboard reach: ~1.5 m — enough to place a load over the near half of a 2.0 m lane, confirmed against where the trucks actually park.
If the lane needs full 2.0 m outboard coverage, extend the overhang accordingly and re-check the girder and overturning design — the reason the cantilever is a design input, not an add-on.
Mini-takeaway: work every dimension as a stack, in both directions. Hook height is clear height minus the descending stack; structural span is working width plus the approaches and clearances; cantilever reach is the overhang minus its own approach. Run your real numbers before the order — the arithmetic is cheap, the retrofit isn’t.
Part 7: 2026 Cost Reference for Upgrading Hook Height or Span After Installation
Here’s the point of getting the geometry right up front: fixing it afterward is disproportionately expensive. Use these as planning benchmarks for the retrofits buyers face when hook height or span comes up short — the bill the precast plant paid for skipping the calculation. Actual costs vary with crane size, span, site access, and how much civil work the fix triggers.
| Retrofit / correction | Scope | 2026 planning range (USD) |
|---|---|---|
| Raise runway on packing plates | Re-shim/re-level runway to gain modest hook height, per runway | $6,000 – $25,000 |
| Raise/rebuild one rail foundation | Re-pour or extend a foundation to lift a rail | $10,000 – $45,000 |
| Lower-headroom hoist swap | Replace hoist with a lower C-dimension unit to recover lift | $4,000 – $30,000 |
| Single- to double-girder rebuild | Reconfigure bridge to recover girder-depth hook height | $40,000 – $150,000+ |
| Widen structural span | New longer girder + move a rail line + foundation | $50,000 – $200,000+ |
| Add a cantilever after the fact | Re-engineer and extend girder for outboard reach | $15,000 – $60,000 |
| Structural re-check & drawings | Engineer’s reassessment for any of the above | $3,000 – $12,000 |
| Downtime (production loss) | Crane out of service during retrofit, per week | Highly site-specific — often the largest line |
Two budget realities worth flagging:
- The retrofit costs a multiple of the specification. Ordering the right hook height or span at the outset is a line on a datasheet. Fixing a shortfall after installation is civil work, new steel, re-engineering, and lost production combined — routinely several times what the correct specification would have added to the original order.
- Downtime usually dwarfs the hardware. For a crane serving a production line, the weeks it sits idle during a span or hook-height retrofit often cost more than every other line in this table put together. The precast plant’s three-month claw-back is the cautionary case.
Procurement tip: before you sign, require the supplier to state, in writing, the usable hook height (highest and lowest hook positions), the working span, both end approaches, and any cantilever’s usable outboard reach — not just the structural span and capacity. Normalize every quote to those usable figures. A crane that matches your capacity and structural span but falls short on usable hook height or working span isn’t a bargain — it’s a retrofit waiting to happen.
Frequently Asked Questions
Q: Why isn’t my building’s clear height the same as the crane’s hook height?
A: Because a stack of dimensions sits between the roof structure and the hook, and every one of them subtracts from your usable lift. From the clear height you deduct the runway beam and bracket allowance, the bridge girder depth (on a single-girder crane, where the hoist hangs below the girder), the hoist’s built-in headroom — the published C-dimension — and a safety clearance at the top of the lift. Together these commonly consume 1.5 to 2 metres, so an 8-metre building often delivers only around 6 to 6.5 metres of usable hook height. Always work the full stack, and separately confirm the lowest hook position reaches where the load starts.
Q: What’s the difference between structural span and working span?
A: Structural span is the fixed distance between the two rail centrelines — the number the supplier quotes and the figure that sizes the girder and foundation. Working span is the width the hook actually travels, and it’s always narrower, because the trolley can’t drive its hook all the way to each rail. The hook stops short by the end approach at each end, so working span is roughly the structural span minus both end approaches. If your load must reach the edges of the work area, size the structural span from the required working width plus both end approaches — never assume the hook reaches the rails.
Q: What is end approach, and why does it matter?
A: End approach is the minimum horizontal distance, per CMAA Spec No. 70, between a rail centreline and the hook centreline at the closest the trolley can travel toward that end. It exists because the trolley body, end truck, and running clearances occupy width the hook can’t. It matters because it’s the dimension that turns structural span into the narrower working span, and because it can leave the hook stranded short of a specific target near a rail — a fixed machine or a wall bay. If you need the hook to reach a precise point near one end, confirm the end approach for your specific trolley and end truck before you order.
Q: How does a cantilever change the working envelope?
A: A cantilever is a section of girder that extends past a leg, letting the trolley travel out beyond the rail line so the hook can reach a lane, bay, or storage row outside the rails. It extends the working envelope outboard — but it’s a structural design input, not an add-on, because the load out on the overhang applies extra bending and an overturning effect the crane must be engineered for. The cantilever also has its own end approach, so the usable outboard reach is a little less than the physical overhang. State the outboard reach and load up front; a cantilever can’t be retrofitted without re-engineering the girder.
Q: We got the capacity right but the hook won’t reach — what are our options and roughly what do they cost?
A: The fix depends on where the shortfall is. To recover modest hook height, raising the runway on packing plates ($6,000–$25,000) or swapping to a lower-headroom hoist ($4,000–$30,000) may be enough. A larger shortfall can require re-pouring a rail foundation ($10,000–$45,000) or, to recover girder-depth lift, rebuilding a single-girder crane as double-girder ($40,000–$150,000+). Widening a structural span is the most expensive — new girder, moved rail, and foundation ($50,000–$200,000+). In every case add an engineer’s re-check ($3,000–$12,000) and, usually the biggest cost, production downtime while the crane is out of service. Because these run to multiples of the original specification cost, the real answer is to calculate usable hook height and working span before ordering.