


Electric Hoist Installation & Integration Guide: Mounting, Trolleys, Power Supply & Controls
Introduction
A metal fabrication shop I consulted for bought a good hoist. A proper 5-tonne wire rope unit, correctly duty-rated, sized right for the loads — the specification work from Part 1 done well. Then they mounted it on a monorail beam they already had in the building, because it was there and it saved the cost of a new one.
The beam flange was 8 mm too narrow for the trolley wheels. Rather than order the right trolley or change the beam, the installer “adjusted” the wheel spacing on site with a grinder and a set of washers. The hoist ran. For about five months. Then the trolley started climbing the flange on one side, jammed mid-span with a 4-tonne load hanging over the floor, and took two days and a rented crane to recover. The beam was gouged, one trolley wheel was cracked, and the shop replaced the whole trolley assembly it had tried to save money on in the first place.
Nobody had done anything reckless, exactly. Every decision looked reasonable in the moment. But the installation strung together a chain of small compromises — wrong beam, forced trolley fit, bodged wheel spacing — and the load found the weakest link, as loads always do.
That’s the thing about electric hoist installation: the hoist itself can be perfect and the install can still ruin it. How it mounts, what it rolls on, how it gets its power, and how the operator controls it all decide whether that well-chosen hoist delivers its full service life or becomes a recurring problem hanging over your floor. And unlike the specification work, installation mistakes tend to be invisible until the day they aren’t.
This is Part 2 of our three-part electric hoist series. Part 1 covered selection — chain versus wire rope, capacity, duty class, and headroom. Here we move from the hoist you chose to the way it actually goes into your building: the mounting types, the beam-and-trolley match that so many installs get wrong, the electrical supply that has to reach a moving machine, the controls the operator uses, and the integration with crane bridges and monorail systems. Part 3 will close the series on maintenance, inspection, and keeping a well-installed hoist reliable across its life.
What you’ll take away:
- The four mounting types — fixed, push trolley, motorized trolley, monorail — and when each fits
- How to match beam flange width and profile to the trolley wheels so the hoist rolls true
- The electrical supply requirements — voltage, phase, and how power reaches a moving hoist
- Pendant versus radio control, and when each earns its place
- How a hoist integrates with a crane bridge or a monorail system
- The installation mistakes that cost the most — and how to head them off
- A 2026 cost reference so the installation scope doesn’t ambush your budget
Part 1: Mounting Types — How the Hoist Attaches and Moves
The first installation decision is how the hoist mounts and whether it travels. A hoist can hang from a single fixed point, roll along a beam by hand, roll under power, or run a whole monorail route through a facility. Each option suits a different job, and the choice shapes everything downstream — the beam you need, the power you run, and the controls you fit.
Fixed Mounting
The simplest arrangement: the hoist hangs from a single fixed point — a hook, a lug, or a bolted bracket — and doesn’t travel. It lifts straight up and down in one spot.
Where it earns its place: a single, repeated lift at one location. Loading a fixed machine, feeding a single press, lifting at one bay of a workbench. If the load always arrives and leaves in the same place, fixed mounting is the cheapest, most reliable choice — no trolley, no travel beam, no travel power.
Where it doesn’t: anywhere the load has to move horizontally. A fixed hoist can only lift and lower. The moment you need to carry the load along a line, you need a trolley.
Push (Manual) Trolley
The hoist hangs from a trolley that rolls along a beam flange, and the operator moves it by hand — pushing the load along the beam.
Where it earns its place: light loads and short travel where positioning is occasional and precision isn’t critical. Workshops and assembly cells use push trolleys because they’re cheap, need no travel motor or power, and let an operator nudge a light load along a beam with minimal effort.
Where it doesn’t: heavy loads (pushing a 3-tonne load by hand is neither easy nor safe), long travel distances, or high-frequency work where manual pushing wears out the operator and slows the cycle.
Motorized (Electric) Trolley
The hoist hangs from a powered trolley that drives itself along the beam, controlled from the same pendant or radio as the hoist.
Where it earns its place: heavier loads, longer travel, and higher-frequency work. Once loads climb past a tonne or two, or travel runs beyond a few metres, or the lift happens many times a shift, a motorized trolley pays for itself in speed, control, and operator strain saved. Dual-speed or VFD travel (the same logic as the hoist speed control from Part 1) gives smooth starts and precise spotting.
Where it doesn’t: the lightest, most occasional lifts, where the motor and its travel power aren’t worth the cost.
Monorail
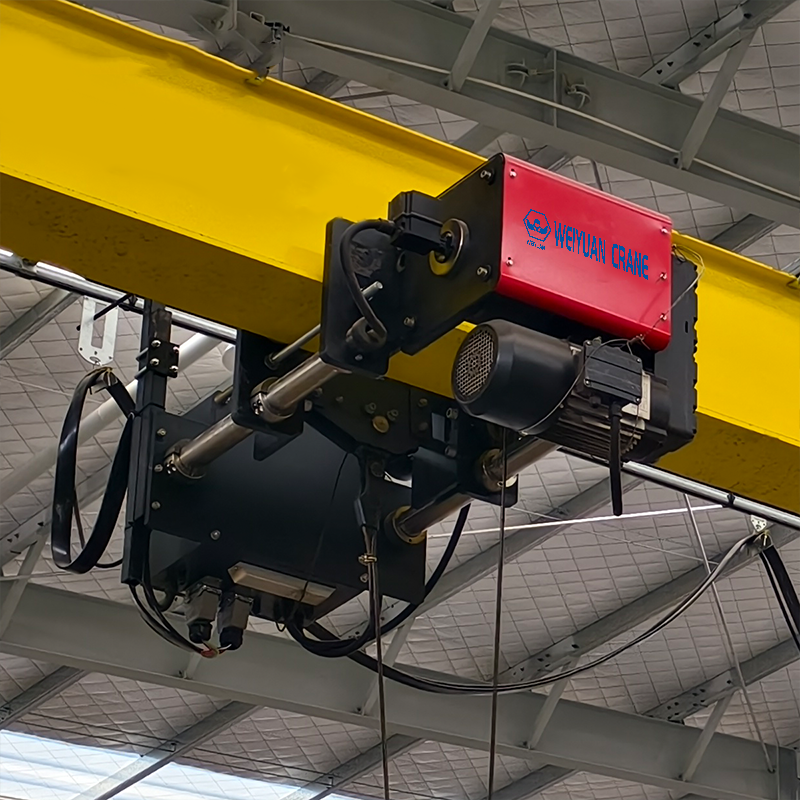
The hoist and its trolley run along a fixed track — often a full route through a facility, with curves, switches, and multiple work stations. The track is the layout.
Where it earns its place: repetitive material flow along a defined path — feeding a production line, moving parts between fixed stations, following a process route. A monorail turns a hoist into a transport system, not just a lifting point.
Where it doesn’t: lifting that doesn’t follow a fixed path, or where the load has to reach anywhere within an area rather than along a line — that’s a bridge crane’s job, covered in Part 5.
The Quick Selection Logic
| Question | Points to |
|---|---|
| Does the load always lift in one spot? | Fixed mounting |
| Light load, short travel, occasional positioning? | Push trolley |
| Heavier load, longer travel, frequent work? | Motorized trolley |
| Repetitive flow along a fixed route? | Monorail |
Settle the mounting type first. It decides the beam you need, whether you’re running travel power, and how the controls are laid out — every other installation choice sits on top of it.
Part 2: Beam and Rail Matching — Where So Many Installs Go Wrong
This is the part the fabrication shop in the introduction got wrong, and it’s one of the most common installation failures I see. A trolley doesn’t just “fit any beam.” The trolley wheels are shaped and spaced for a specific flange, and if the beam and trolley don’t match, the hoist either won’t run or will fail — usually at the worst possible moment.
Flange Width Is the First Match
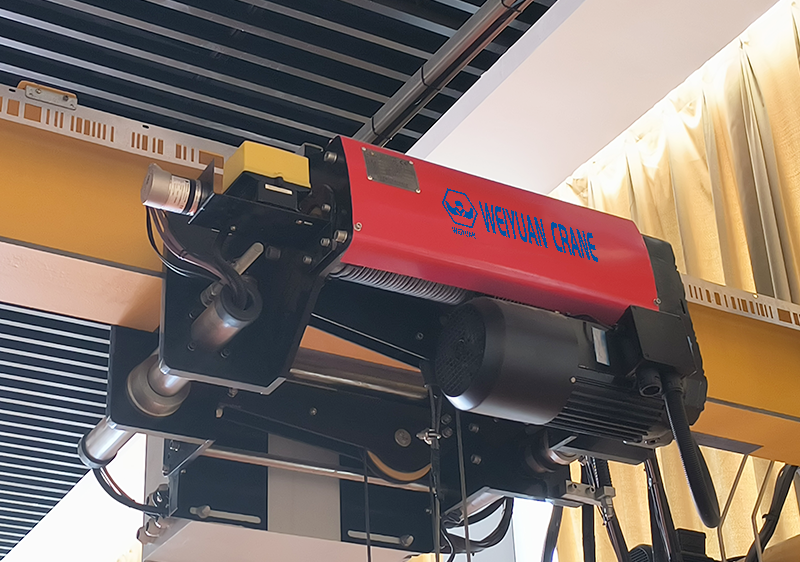
A trolley’s wheels ride on the top surface of the lower flange of an I-beam or monorail track. The trolley is built to span a specific flange width, and most trolleys offer an adjustable range — a set of spacer washers that let you tune the wheel spacing to the flange within a band.
Two things have to be true:
- The beam’s flange width must fall within the trolley’s adjustable range. Too wide and the trolley won’t fit; too narrow and the wheels sit loose and the trolley can climb or derail.
- The trolley must be adjusted to the actual measured flange, not the nominal size. Beams vary, and a trolley set to the wrong spacing runs crooked, wears its wheels, and — as the shop learned — can climb the flange and jam.
The fatal mistake is forcing a fit. Grinding wheels, stacking non-standard washers, or “making it work” on site is exactly how a trolley ends up derailing under load. If the beam doesn’t fall in the trolley’s range, you need a different trolley or a different beam — not a workaround.
Flange Thickness and Profile
Flange width isn’t the whole story. The flange thickness and its taper (many I-beam flanges are tapered, thicker at the web and thinner at the edge) affect how the wheel sits and rolls. Trolley wheels are often profiled — coned or tapered — to match a specific flange shape. A wheel profiled for a flat flange running on a steeply tapered one contacts on an edge instead of a face, concentrating load and wearing fast.
When you specify a trolley, give the supplier the beam’s full section: width, thickness, taper, and profile. “It’s an I-beam” isn’t enough.
Beam Strength and the Wheel Loads
The beam has to carry more than the hoist and load hanging still — it has to carry them moving, with the dynamic impact of lifting and the point loads the trolley wheels concentrate onto the flange. Reusing an existing beam, as the shop did, is fine only if the beam is verified to carry the wheel loads plus impact for the hoist you’re installing. A beam that was adequate for an old 2-tonne hoist may be badly under-strength for a new 5-tonne one.
Get the wheel load figures from your hoist and trolley supplier, and have a structural engineer confirm the beam — new or existing — can carry them. This is the beam-side equivalent of the wheel-load discipline that governs every crane install.
Beam Radius for Monorail Curves
Monorail systems with curves add one more constraint: the trolley has to negotiate the minimum bend radius of the track. A trolley built for straight running can bind or derail on a curve tighter than it’s rated for. When a monorail route includes curves or switches, confirm the trolley is rated for the track’s radius — and that the track radius suits the loads and travel speeds.
Here’s what to remember: the beam-trolley match is a specification, not an afterthought. Measure the real flange, match the trolley’s range and wheel profile to it, verify the beam carries the wheel loads, and never force a fit. The single most expensive installation habit is treating “any beam” as good enough.
Part 3: Electrical Supply — Getting Power to the Hoist
An electric hoist needs power, and — unless it’s fixed-mounted — it needs power delivered to a machine that moves. Getting the supply wrong causes two kinds of trouble: a hoist that won’t run correctly, and a power delivery system that fails as the hoist travels. Both are avoidable with a bit of upfront confirmation.
Voltage and Phase — Confirm Before You Order
The most basic, and surprisingly common, electrical mistake is a mismatch between the hoist and the facility supply. Electric hoists are built for a specific voltage and phase, and industrial supplies vary widely by region and facility:
- Voltage — a hoist wired for 400 V won’t run correctly on a 480 V supply, and vice versa.
- Phase — most industrial hoists above the smallest sizes are three-phase; a three-phase hoist can’t run on a single-phase supply.
- Frequency — 50 Hz versus 60 Hz affects motor speed and performance.
Confirm your facility’s exact supply — voltage, phase, and frequency — and match the hoist to it before you order. This sounds obvious, yet a hoist that arrives wired for the wrong supply means either a costly rewind or a control transformer added on site, and a delayed commissioning. Put the supply spec in the purchase order.
Control Voltage
There’s a distinction worth understanding: the hoist’s motor runs on the full supply voltage (often 400 or 480 V three-phase), but the control circuit — the pendant buttons, contactors, and safety devices — usually runs on a lower, safer voltage, commonly 24 V or 48 V, stepped down by a transformer inside the hoist. This keeps high voltage out of the operator’s hands at the pendant. Confirm the control voltage is specified; it’s standard on quality hoists but worth checking on a budget unit.
Delivering Power to a Moving Hoist
A fixed hoist takes a simple fixed connection. A traveling hoist — on a motorized trolley or monorail — needs power delivered continuously as it moves, and there are two main systems for that:
| System | How it works | Best for |
|---|---|---|
| Festoon (cable trolley) | A flat or round cable hangs in loops from small trolleys that slide along a track beside the beam, paying out and gathering as the hoist travels | Most workshop and moderate-length travel; simple, robust, easy to maintain |
| Conductor bar (busbar) | Insulated conductor bars run the length of the beam; a collector shoe on the hoist slides along them picking up power | Long travel, high-frequency, or multi-hoist runs where festoon cable would be cumbersome |
Festoon is the common, cost-effective choice for typical travel distances. The cable loops move with the hoist, and the system is simple to install and service — but on long runs the accumulating cable loops eat into travel length and can be vulnerable to snagging.
Conductor bar suits long runs, high-cycle duty, and situations where multiple hoists share a beam. It’s a cleaner solution over distance, though it costs more to install and needs the collector shoes maintained.
Whichever you choose, the power delivery system has to be matched to the travel length and specified as part of the installation — it’s not an accessory to bolt on later. A festoon system too short for the travel, or a conductor bar run that stops short of the beam end, leaves the hoist unable to reach where the job needs it.
Here’s what to remember: confirm voltage, phase, and frequency before ordering, and specify a power delivery system — festoon or conductor bar — matched to the travel length. Electrical mismatches and under-scoped power delivery are cheap to prevent and expensive to fix after the hoist is hung.
Part 4: Controls — Pendant vs. Radio
The control is the operator’s interface, and it shapes both safety and productivity. Two main options dominate electric hoist installations — a wired pendant and a radio remote — and the right one depends on how and where the operator needs to stand relative to the load.
Pendant Control
A pendant is a handheld button station hanging from the hoist on a cable, with buttons for up/down (and travel, if the hoist moves). It’s the traditional, reliable, low-cost choice.
Where it earns its place: most fixed and short-travel installations, where the operator works close to the hoist anyway. Pendants are simple, need no batteries, can’t be misplaced, and are cheap to replace. For a hoist that lifts in one spot or travels a short beam, a pendant is usually all you need.
The considerations: the pendant hangs from the hoist and travels with it, so the operator has to be near the load — which isn’t always where you want to stand for the best view or the greatest safety. And the pendant cable itself is a wear and snag point (managed with a festoon-style cable support on longer travel, the same idea as Part 3).
Radio (Wireless) Control
A radio remote lets the operator control the hoist from a distance, wirelessly, with no physical connection to the machine.
Where it earns its place: situations where standing near the load is awkward or unsafe — long-travel hoists where following the pendant means walking the whole run, lifts where the best sightline is away from the load, hot or hazardous areas, and multi-hoist operations where one operator manages several units. The operator picks the safest, clearest position and controls from there.
The considerations: radios need charged batteries and a spare, cost more than a pendant, and require attention to frequency management where several are used in one building so they don’t interfere. Quality units include safety interlocks so a lost signal stops the hoist rather than leaving it running.
Choosing Between Them
| Factor | Pendant | Radio |
|---|---|---|
| Cost | Lower | Higher |
| Operator position | Near the load | Anywhere with sightline |
| Best for travel | Fixed / short | Long / variable |
| Maintenance | Cable wear | Battery, frequency management |
| Sightline & safety | Limited to load area | Operator chooses best view |
Do this / not that:
- Do fit a radio where the operator’s safest, clearest position is away from the load, or where travel is long enough that following a pendant is impractical.
- Do keep a pendant as the default for fixed and short-travel hoists — it’s cheaper, simpler, and always to hand.
- Don’t default to a pendant on a long-travel hoist just to save cost; walking the run behind a hanging load is slow and often the less safe option.
Here’s what to remember: the control choice is a safety and productivity decision, not just a price one. Pendant for close, simple work; radio where distance, sightline, or hazard makes wireless the safer, faster option.
Part 5: Integration with Crane Bridges and Monorail Systems
An electric hoist rarely lives entirely on its own. Most often it’s the lifting element of a larger system — the hoist and trolley riding on a crane bridge, or running a monorail route. Integrating it correctly means the hoist, the trolley, and the structure it runs on all work as one coordinated system, not three parts bolted together and hoped for.
Hoist on a Crane Bridge
On an overhead or gantry crane, the hoist and its trolley travel across the bridge girder, and the bridge travels along the runway. The hoist provides the vertical lift; the trolley provides the cross-travel; the bridge provides the long-travel. Three motions, three sets of controls, one coordinated machine.
For this to work, the hoist and trolley have to be matched to the bridge:
- The trolley gauge must match the bridge girder — the same flange-matching discipline from Part 2, applied to the bridge’s trolley rail.
- The hoist capacity and the bridge capacity must agree. A hoist rated above the bridge’s design does the crane no good and is unsafe; a hoist under the bridge’s capacity wastes the crane’s potential.
- The controls must integrate all three motions — hoist, cross-travel, long-travel — into one pendant or radio, with the travel speeds and limits coordinated so the crane handles as a single unit.
- The power delivery must feed the hoist across the bridge (festoon or conductor bar along the girder) and feed the bridge along the runway.
When you buy a hoist to fit an existing bridge, treat the bridge’s trolley rail exactly as you’d treat any beam — measure it, match the trolley, and verify the capacity. A hoist that doesn’t match the bridge it rides on is the same failure mode as the fabrication shop’s monorail, just higher off the ground.
Hoist on a Monorail
On a monorail, the hoist trolley runs a fixed track through a facility — potentially with straight sections, curves, switches, and multiple drop points. Integration here is about the whole route working:
- The track profile must match the trolley wheels along the entire route (Part 2).
- Curves and switches must suit the trolley’s minimum radius and the travel speed.
- The power delivery — usually conductor bar on a longer monorail — must run the full route without gaps.
- Stops and buffers at the track ends and at work stations keep the hoist from over-running.
The Integration Principle
Whether it’s a bridge or a monorail, the principle is the same: the hoist, the trolley, the track or girder, the power delivery, and the controls are one system, and each part has to be specified against the others. The most common integration failure is buying one part — usually the hoist — in isolation, then discovering it doesn’t match the trolley rail, the power run, or the control scheme of the system it’s joining.
If you’re adding a hoist to an existing crane or monorail, document the full existing system before you order: the rail section, the capacity, the power delivery type, the control voltage, and the control scheme. Match the new hoist to all of it. If you’re buying the whole system new, specify it as a system from the start.
Here’s what to remember: a hoist on a bridge or monorail is part of a coordinated machine. Match the trolley to the rail, the capacity to the structure, the power delivery to the travel, and the controls to all the motions — or the mismatch will find you.
Part 6: The Installation Mistakes That Cost the Most
After enough hoist installations, the same failures show up again and again. None are exotic. All are avoidable. Here are the ones that do the most damage to a budget and a schedule.
1. Forcing a trolley onto the wrong beam. The fabrication shop’s mistake, and the most common one. Grinding wheels, stacking non-standard washers, or “making it work” on a beam outside the trolley’s range leads to a trolley that climbs the flange and derails under load. Measure the real flange, match the trolley to it, and never force a fit.
2. Reusing an existing beam without verifying it. An old beam that carried a lighter hoist may be badly under-strength for a new, heavier one. Get the wheel loads and have a structural engineer confirm the beam carries them plus dynamic impact — before you hang anything.
3. Ordering the wrong voltage or phase. A hoist wired for the wrong supply means a rewind, an added transformer, and a delayed commissioning. Confirm voltage, phase, and frequency and put them in the purchase order.
4. Under-scoping the power delivery. A festoon system too short for the travel, or a conductor bar that stops short of the beam end, leaves the hoist unable to reach where the job needs it. Match the power delivery to the full travel length.
5. Defaulting to a pendant on a long-travel hoist. Walking the whole run behind a hanging load to follow a pendant is slow and often less safe than a radio. Match the control to the travel and the sightline, not just the budget.
6. Buying a hoist in isolation to fit an existing system. Adding a hoist to a bridge or monorail without documenting the existing rail, capacity, power, and control scheme leads to a hoist that won’t integrate. Document the whole system first, then match the new part to all of it.
7. Skipping the commissioning check. A hoist that runs on day one isn’t the same as a hoist that’s been verified — trolley tracking checked, limits set, brake tested, controls confirmed, load test done where required. Skipping commissioning to save a day is how small install errors survive into service.
8. Treating installation as a schedule buffer. When a project runs late, the install is often where teams try to claw back time. It’s the wrong place. A rushed install strings together small compromises, and — as the shop learned — the load finds the weakest one.
Part 7: 2026 Cost Reference for Hoist Installation & Integration
Use these as planning figures. Installation and integration costs vary with mounting type, travel length, power delivery, controls, and site access. Always get a site-specific quote, but budget against these ranges so the install scope doesn’t ambush your project.
| Installation / integration element | Scope | 2026 planning range |
|---|---|---|
| Fixed-mount installation | Bracket, hang, connect, commission | $400 – $1,500 |
| Push trolley (supply + fit) | Manual trolley matched to beam | $300 – $1,200 |
| Motorized trolley (supply + fit) | Powered trolley, travel drive, controls | $1,500 – $6,000 |
| Festoon power system | Cable, trolleys, track (per travel run) | $1,000 – $6,000 |
| Conductor bar (busbar) system | Bars, collectors, per linear metre | $150 – $500 per metre |
| Pendant control | Handheld station + cable support | $150 – $800 |
| Radio control system | Transmitter, receiver, safety interlocks | $800 – $3,500 |
| Beam supply & install (monorail, per run) | Track, supports, connections | $200 – $900 per metre |
| Structural beam verification | Engineer’s check of existing/new beam | $1,000 – $4,000 |
| Commissioning & load test | Tracking, limits, brake, controls, proof load | $800 – $4,000 |
Two budget realities worth flagging:
- Power delivery and controls are real line items, not accessories. A festoon or conductor bar run and a radio control system together can add meaningfully to a traveling hoist install — budget them from the start rather than discovering them after the hoist price is set.
- Beam verification is cheap insurance. An engineer’s check of an existing or new beam costs a fraction of a derailed trolley recovery, a gouged beam, and a replaced trolley assembly — exactly the bill the fabrication shop paid for skipping it.
Procurement tip: when you compare installation quotes, confirm exactly what’s included — trolley, power delivery, controls, beam verification, and commissioning with a load test. A cheap number often excludes the power system, the structural check, or the commissioning, and those exclusions land back on your budget later. Normalize every quote to the same scope, and require commissioning documentation as a condition of acceptance.
Frequently Asked Questions
Q: How do I know if my existing beam will work for a new electric hoist?
A: Two checks decide it. First, the flange match: measure the actual flange width, thickness, and taper, and confirm they fall within the trolley’s adjustable range and suit its wheel profile — don’t rely on the nominal beam size or assume “any I-beam” will do. Second, the strength check: an old beam that carried a lighter hoist may be under-strength for a heavier new one, so get the wheel loads from your supplier and have a structural engineer confirm the beam carries them plus dynamic impact. If either check fails, you need a different beam or trolley — never a forced fit, which is the most common cause of trolley derailment under load.
Q: What mounting type should I choose for my electric hoist?
A: Let the load movement decide. Choose fixed mounting if the load always lifts in one spot — it’s the cheapest and most reliable with no trolley or travel power. Choose a push (manual) trolley for light loads and short, occasional travel where an operator can comfortably nudge the load by hand. Choose a motorized trolley once loads pass a tonne or two, travel runs beyond a few metres, or the work is frequent — the powered travel saves operator strain and speeds the cycle. Choose a monorail when material follows a fixed route through the facility. Settle this first, because it decides your beam, your power, and your controls.
Q: What electrical supply information do I need to confirm before ordering?
A: Three figures, confirmed against your facility’s actual supply: voltage (for example 400 V versus 480 V), phase (most industrial hoists above the smallest sizes are three-phase and can’t run single-phase), and frequency (50 Hz versus 60 Hz, which affects motor speed). Put all three in the purchase order, because a hoist wired for the wrong supply means a rewind or an added transformer and a delayed commissioning. Also confirm the control circuit runs on a safe low voltage — commonly 24 V or 48 V — which is standard on quality hoists but worth checking on a budget unit.
Q: Festoon or conductor bar — which power delivery system do I need?
A: It comes down to travel length and duty. Festoon (a cable hanging in loops from sliding trolleys) is the simple, cost-effective choice for most workshop and moderate-length travel — easy to install and service, though on long runs the accumulating loops eat travel length and can snag. Conductor bar (insulated bars with a sliding collector shoe) suits long travel, high-frequency cycling, and multi-hoist runs where festoon cable becomes cumbersome — it’s cleaner over distance but costs more to install and needs the collectors maintained. Match whichever you choose to the full travel length; an under-length system leaves the hoist unable to reach where the job needs it.
Q: When is a radio control worth the extra cost over a pendant?
A: When standing near the load is awkward, slow, or unsafe. A radio lets the operator pick the safest position with the clearest sightline and control from there — which matters on long-travel hoists (where following a pendant means walking the whole run), on lifts where the best view is away from the load, in hot or hazardous areas, and where one operator manages several hoists. A pendant remains the sensible, cheaper default for fixed and short-travel hoists where the operator works close to the load anyway. Choose on safety and productivity, not price alone — and on a long-travel hoist, the radio is often the safer option, not the luxury one.