


Gantry Crane Operation, Maintenance & Inspection: A Complete Engineering Guide
Introduction
A container yard I consulted for ran a 40-tonne rail-mounted gantry sixteen hours a day, six days a week. It was a good crane on a good foundation — the selection and structure work from Parts 1 and 2 done right. The yard superintendent was proud that it “never needed anything.” No downtime for inspections, no fuss. Then one Thursday, mid-lift, the travel brake on the drive-side wheels failed to release cleanly, the crane lurched, and a suspended box swung into a stack. Nobody was hurt. The yard lost nine days and a lot of trust with its biggest customer.
When the maintenance crew finally opened things up, the failure had been building for the better part of a year. The travel brake linings were worn to the backing plate. One storm anchor had seized in the open position, so the crane had been running with a safety device that couldn’t actually secure it. And the wheel flanges on the drive side had thinned past the rejection limit — visible to anyone who looked, and nobody had. The crane hadn’t failed suddenly. It had been announcing the failure for months, and the “never needs anything” culture meant nobody was listening.
That’s the pattern behind almost every serious gantry failure I’ve seen. These machines degrade slowly and visibly. The operations that catch the early signals run their gantries for the full twenty-year service life. The ones that treat a gantry as too big and too tough to need attention pay for it — in a dropped load, a failed audit, or a crane out of service the exact week the yard can’t spare it.
This is the final article in our three-part gantry crane series. Part 1 covered selection — types, girder configuration, span, capacity, duty class, and site conditions. Part 2 covered structure and foundation — girder and leg design, rail engineering, alignment tolerances, and wheel-rail mechanics. Here we close the loop on the part that decides whether all that upfront work pays off: keeping the crane running, compliant, and safe across its whole life.
What you’ll take away:
- A practical inspection schedule — daily to annual — you can hand straight to your team
- What OSHA 1910.179 and ASME B30.2 actually require, mapped to your duty class
- Clear rejection criteria for wheels and rail, the wear items unique to a traveling gantry
- Travel brake and hoist servicing, safety device testing including storm anchors, and NDT weld inspection
- A repair-vs-replace framework and a 2026 maintenance cost reference
Part 1: The Inspection Schedule — Daily to Annual
The single best predictor of gantry uptime isn’t the tonnage on the nameplate. It’s whether an inspection schedule actually runs on time. Not an elaborate one — a consistent one. The best programs layer frequent, shallow checks over rarer, deeper inspections, so problems surface while they’re still cheap to fix.
Here’s a practical structure you can adapt to your crane’s duty class. Higher duty (Class E–F / M7–M8 from Part 1) tightens every interval; light-duty gantries can stretch them.
Daily / Pre-Shift Checks
An operator handles these in about ten minutes before the first lift. No tools — just eyes, ears, and a checklist:
- Test the emergency stop and all directional controls — hoist, trolley, and long-travel — before any load
- Confirm the hoist brake holds by lifting a load slightly and pausing
- Confirm the travel brake stops and holds the crane on its rails
- Listen for new noise, grinding, or vibration from the hoist, trolley, and travel drives
- Visually inspect the visible wire rope or chain for kinks, broken wires, or bird-caging
- Check the hook and safety latch for cracks, wear, and free swivel
- Scan the rails ahead for debris, obstructions, or people in the travel path
- On outdoor cranes, confirm storm anchors or rail clamps are released before travel
Log the result — even a five-second “all normal” entry. That log is your compliance trail in an audit and your first evidence if something goes wrong.
Weekly Checks
A technician spends 30 to 60 minutes on a closer pass:
- Inspect wire rope along its full run for broken wires, corrosion, and diameter loss
- Walk the rails, checking for debris, spalling, loose clips, and gaps at joints
- Look for oil weeping around the hoist, trolley, and travel gearboxes
- Function-test overload protection and the travel limit switches
- Scan the travel wheels for visible flange wear or flat spots
- Check the festoon or conductor-bar power system for wear and strain
Monthly Checks
A deeper mechanical review, usually 2 to 4 hours:
- Measure wire rope diameter and compare against the rejection threshold
- Inspect hoist and travel brake lining thickness and adjust the air gap
- Measure wheel flange thickness with a go/no-go contour gauge
- Check leg-to-girder and structural connections for looseness (ties back to Part 2)
- Grease all points — travel drives, wheel bearings, slewing points — per the schedule
- Test every safety device under load, including storm anchors on outdoor cranes
- Re-check rail alignment against the Part 2 baseline where wear is suspected
Annual Comprehensive Inspection
The thorough examination — typically a full day, often by an external qualified inspector, with a written report:
- Full structural inspection of girders, legs, and connections, including critical welds
- Non-destructive testing (NDT) of load-path welds where required
- Complete wire rope or chain assessment against rejection criteria
- 125% rated load test where regulation or a major repair requires it
- Detailed brake, hoist, gearbox, and travel-drive inspection
- Runway alignment re-check against the Part 2 commissioning baseline
  [Gantry Preventive Maintenance Cycle]

  Daily / Pre-Shift      Weekly / Monthly         Annual Structural & NDT
  ├── E-stop + controls  ├── Rope diameter check  ├── Ultrasonic weld testing
  ├── Hoist brake hold   ├── Brake lining wear     ├── Wheel flange survey
  ├── Travel brake hold  ├── Wheel flange gauge     ├── Runway alignment re-check
  ├── Rope visual        ├── Safety device test     ├── 125% load test
  └── Rail path clear    └── Storm anchor test      └── Full structural report
Mini-takeaway: daily checks catch the obvious, weekly and monthly checks catch the developing, and the annual inspection catches the hidden — the worn brake linings and seized storm anchor that stopped the container yard. Skip any layer and you’re running on luck.
Part 2: What OSHA 1910.179 and ASME B30.2 Require
Two documents govern gantry crane inspection in most markets that reference US standards, and both apply to gantries. Knowing what they demand protects you legally, keeps your insurance valid, and — bluntly — keeps people safe.
OSHA 1910.179 is the federal regulation for overhead and gantry cranes in general industry. It’s the law, not a guideline. It sets operator responsibilities, inspection requirements, load-test rules, and maintenance obligations. Non-compliance is a citable violation with real financial and legal consequences.
ASME B30.2 is the consensus safety standard OSHA leans on for the technical detail — inspection frequencies, component rejection criteria, and testing methods. Together they define two inspection categories that map cleanly onto the schedule in Part 1:
- Frequent inspections — daily to monthly, depending on service class, covering what operators and technicians check routinely
- Periodic inspections — one to twelve months, more thorough, documented, and covering structure, wear components, and safety systems
Here’s the connection procurement and operations teams miss: the duty class you specified back in Part 1 directly sets the inspection workload. A Class F / M8 terminal gantry running around the clock needs far more frequent periodic inspection than a Class B / M4 yard crane.
| Service intensity | CMAA Class | FEM / ISO | Frequent inspection | Periodic inspection |
|---|---|---|---|---|
| Light / standby | A–B | M3–M4 | Daily to monthly | Yearly |
| Moderate | C | M5 | Daily to weekly | 6–12 months |
| Heavy | D | M6 | Daily to weekly | 3–6 months |
| Severe / continuous | E–F | M7–M8 | Each shift to weekly | 1–3 months |
The ownership implication is direct: a higher-duty gantry costs more to own, not just to buy. When you plan a maintenance budget, factor the recurring inspection burden into total cost — this is exactly where a correctly matched duty class from Part 1 pays off, because over-specifying duty inflates both the sticker price and the inspection bill for years.
Mini-takeaway: the standards set the floor, not the ceiling. Match your inspection frequency to your real duty class, and document everything — the paperwork is what turns “we maintain it” into something an auditor can verify.
Part 3: Wheel and Rail Wear — The Gantry-Specific Rejection Criteria
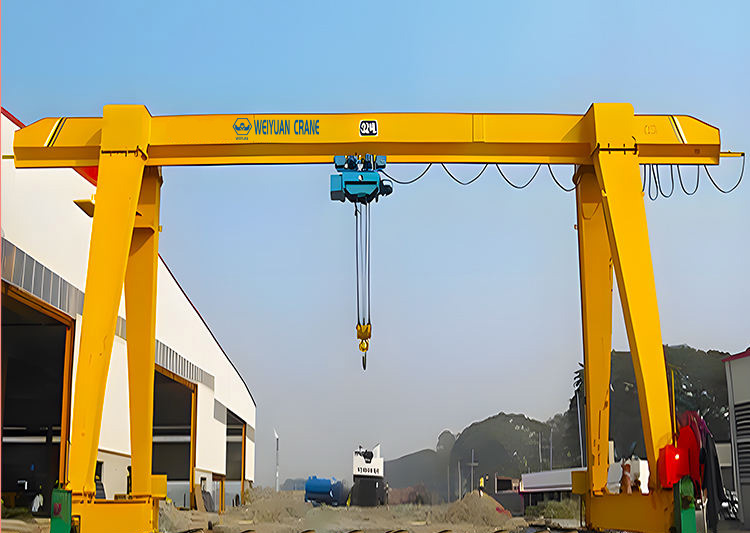
Here’s where gantry maintenance differs from a fixed overhead crane: the whole machine travels, and it travels on wheels running on rails at ground level, where debris, weather, and settlement all conspire against them. Wheels and rails are consumables, and how fast they wear depends heavily on whether the Part 2 alignment is holding. Managing this wear is the maintenance task most specific to a gantry — and the one the container yard neglected.
Wheel Rejection Criteria
Crane wheels wear on the tread (the rolling surface) and the flange (the guiding lip). Inspect for and act on:
- Flange thickness loss. Replace the wheel when flange thickness decreases by 10% or more of its original dimension, measured with a go/no-go contour gauge. This is the primary rejection criterion, and it’s the one that catches skewing early.
- Wedge-shaped flange wear. A flange worn thin on one side and full on the other is the fingerprint of a skewing crane — a direct symptom of runway misalignment (Part 2). Don’t just replace the wheel; find and fix the alignment cause, or the new wheel wears the same way.
- Tread wear and flat spots. Uneven tread wear or flat spots from the wheel sliding rather than rolling change the effective wheel diameter, which throws the travel drives out of sync across the crane.
- Spalling and cracking. Surface flaking or cracks on the tread signal fatigue or overload and take the wheel out of service.
Measure flange thickness monthly with a contour gauge and log it. A steady decline tells you when replacement is coming, so you order wheels on your schedule instead of during a nine-day shutdown.
Rail Rejection Criteria
The rail wears alongside the wheels, and a worn rail wears new wheels fast:
- Head wear and side wear. A rail head worn down or worn on the side (from flange contact) reduces the contact area and accelerates wheel wear in turn.
- Spalling. Flaking and cracking of the rail head — the failure that started the precast plant’s spiral in Part 2 — signals the rail was over-stressed or under-sized for the wheel loads.
- Loose clips and gaps at joints. A rail creeping under its clips or a widening joint gap throws the runway out of alignment and pounds the wheels.
Why This Compounds
Wheel and rail wear feed each other. A skewing crane wears its flanges into wedges; wedge-worn wheels track even more crookedly, which wears the rail sides, which worsens the skew. Left alone, a few millimeters of settlement becomes a full wheel-set replacement and a rail regrind — exactly the escalation Part 2 traced. Catching it early, while it’s still an alignment re-shim, is dramatically cheaper.
Mini-takeaway: the flange thickness gauge is your single most important gantry wear tool — measure it monthly. And when a wheel wears into a wedge, treat it as an alignment alarm, not just a wheel to swap. Fix the cause or pay for it again.
Part 4: Travel Brake and Hoist Servicing
A gantry has more brakes than a fixed crane — the hoist brake holds the load, and the travel brakes stop and hold the moving crane on its rails. Both are safety-critical, and the travel brake is the one that let the container yard’s crane lurch into a stack. Deferred brake maintenance turns fastest into an incident.
Travel Brake Servicing
The travel brakes stop the crane’s motion along the rails and hold it in place, and on an outdoor gantry they’re the first line of defense against wind-driven movement:
- Measure lining thickness against the minimum and replace before it’s reached — worn-to-the-backing-plate is a failure, not a warning
- Check and adjust the air-gap clearance to the manufacturer’s spec
- Test that the brake stops the crane within its design distance and holds it stationary on the rails, including on any grade
- Inspect the brake spring, actuator, and — on outdoor cranes — confirm the brake still holds against the rated wind-load condition
Hoist Brake Servicing
The hoist brake’s entire job is holding the load, so any degradation is serious:
- Measure lining thickness and replace before the minimum
- Check and adjust the air gap to spec
- Test brake holding under rated load, with zero measurable drift as the pass criterion — any downward creep takes the crane out of service until it’s fixed
- Inspect the spring, linkage, and actuator for wear or corrosion
Hoist, Trolley, and Travel Gearboxes
The gearboxes reward attention and punish neglect:
- Change gearbox oil on the manufacturer’s schedule, and inspect the drained oil — metal particles are an early warning of internal wear
- Check bearings for noise, heat, and play across the hoist, trolley, and travel drives
- Inspect gear teeth for wear, pitting, and chipping during oil changes
- Monitor motor temperature and current draw; a rising trend on a travel motor often means the crane is fighting a skew (Part 3), not that the motor is failing
If your gantry runs variable-frequency drives (specified back in Part 1), they reduce mechanical shock on every start and stop — extending brake, gearbox, wheel, and rope life. Keep their cooling and connections clean; they protect the expensive components around them.
Mini-takeaway: a gantry has load brakes and travel brakes, and both fail the same way — worn linings nobody measured. Put brake-lining thickness on the monthly checklist for every brake on the crane, and treat any hoist-brake drift or travel-brake slip as a stop-work signal.
Part 5: Safety Devices — Test Them, Don’t Just Trust Them
Safety devices fail silently. A limit switch that quit working doesn’t announce itself until the day it was supposed to stop an over-travel and didn’t. A storm anchor seized open — the container yard’s second hidden fault — protects nothing while looking perfectly fine. The rule is simple: test every safety device on a schedule — don’t assume it works.
| Device | What it protects against | Test frequency |
|---|---|---|
| Emergency stop | Loss of control in any situation | Daily |
| Upper/lower hoist limit switch | Hoist over-travel and rope damage | Monthly, minimum |
| Trolley travel limit switch | Trolley running off the girder | Monthly |
| Long-travel (end-of-rail) limit switch | Crane running off the end of the runway | Monthly |
| Travel buffers / end stops | Impact if a limit switch fails | Monthly visual |
| Overload protection | Lifting beyond rated capacity | Monthly |
| Anti-collision (shared runway) | Two gantries striking each other | Monthly |
| Storm anchors / rail clamps (outdoor) | Wind driving the crane along the rails | Monthly + before storms |
| Hook safety latch | Slings jumping the hook | Daily visual |
A few field notes that matter for gantries specifically. Test the upper limit switch without a load to verify it cuts hoist power before over-travel. Confirm the end-of-rail limit switches stop the crane before it reaches the buffers — the buffers are the backup, not the primary stop, and a crane relying on buffers is a crane with a failed limit switch. Confirm overload protection actually engages at its set point; a device drifted out of calibration protects nothing.
And on any outdoor gantry, treat storm anchors and rail clamps as the critical devices they are. A gantry is a large sail. Uncontrolled, high wind can drive an unsecured crane along its rails and off the end — a well-documented cause of catastrophic gantry accidents. Test that the anchors deploy and hold, that the seized-open failure the container yard suffered can’t happen unnoticed, and build “secure the crane” into the shutdown procedure and any incoming-storm protocol.
Document every test with date and result. That record is both your compliance evidence and your early warning that a device is drifting out of spec.
Mini-takeaway: the end-of-rail limit switch and the storm anchor are the two safety devices most specific to a gantry and most often found dead after an incident. Test them monthly, test the anchors again before any storm, and never let a crane run on its buffers or its brakes alone.
Part 6: NDT Weld Inspection — Catching Cracks You Can’t See
Structural fatigue is the failure mode that gives the least visible warning and carries the worst consequence. A gantry’s girders, legs, and connections carry cyclic bending and racking loads every travel cycle (Part 2), and a hairline crack in a critical weld can propagate for months before it’s visible — by which point it’s dangerous. This is why the annual inspection includes non-destructive testing (NDT).
The two methods most used on cranes:
- Magnetic particle testing (MT) — for ferromagnetic steel welds and forgings. A magnetic field and iron particles reveal surface and near-surface cracks. Fast, reliable, and the workhorse for gantry structural welds.
- Dye-penetrant testing (PT) — a colored dye drawn into surface-breaking cracks by capillary action. Works on any non-porous material and needs no power, useful for field inspection outdoors.
Where NDT matters most on a gantry:
- Girder-to-leg connections — the joints that carry the full bridge reaction into the legs and take the racking forces every travel cycle
- Girder tension-flange welds — where cyclic bending stress concentrates at mid-span
- Leg-to-end-carriage (bogie) connections — high-stress joints feeding load into the wheels
- Primary hook forgings — the single most critical load-path component
The practical point: NDT is a specialized service requiring certified personnel, and it’s easy to leave out of a maintenance quote to make the number look smaller. Confirm it’s included in your annual inspection scope, and require the results documented against a baseline — ideally captured at commissioning. Those baseline records are what let a later inspection tell a new crack from a stable indication that’s been there since day one.
Mini-takeaway: the girder-to-leg and leg-to-bogie welds are where a traveling gantry fatigues, because they carry the racking loads a fixed crane never sees. Put them at the top of the annual NDT scope, and keep baseline records so you can tell change from noise.
Part 7: Operator Training — The Cheapest Reliability Investment
The best-maintained gantry in the world fails fast in untrained hands. Operator error drives a large share of gantry incidents and accelerated wear — and it’s the cheapest problem on this list to fix.
A competent gantry operator should be trained and assessed on:
- Pre-shift inspection and how to log it
- Load estimation, and never exceeding rated capacity — including the below-hook gear from Part 1
- Smooth control technique — avoiding the abrupt starts and stops that swing the load, hammer the structure, and skew the wheels
- Never dragging or side-pulling a load, which forces the crane to skew and grinds the flanges
- Recognizing the warning signs — new noise, a screech during travel, metallic shavings on the rail, a crane that’s harder to keep tracking straight — and reporting them
- Correct hook and rigging use
- Securing the crane at shutdown — storm anchors deployed, especially outdoors
- Emergency procedures and safe shutdown
Mini-takeaway: budget for documented operator training and periodic re-assessment. It’s a small line item that cuts both incident risk and wear-driven maintenance cost — and an operator trained to spot a skew early is a free early-warning system for the alignment problems from Part 2.
Part 8: Repair or Replace — Making the Call on Evidence
Every long-lived gantry eventually forces the repair-versus-replace question. The decision gets far easier when you split it by component instead of treating the crane as one all-or-nothing asset.
Repair or Refurbish the Subsystem
When the girders and legs are structurally sound, repair or replace the worn subsystem — not the whole crane. Wheels, wire rope, hoist, travel brakes, travel drives, controls, and festoon or conductor-bar systems are all serviceable or replaceable. If the primary structure passes inspection and NDT, refurbishing the mechanical and electrical systems around a sound frame is almost always cheaper than a new crane — and it skips the lead time of specifying, fabricating, and installing a replacement (Parts 1 and 2). A worn wheel-set or a relined travel brake is routine maintenance, not a reason to scrap a gantry.
Replace the Whole Crane When:
- The girders or legs show fatigue cracks beyond acceptance criteria, or permanent deflection from overload
- The foundation or rail system has failed in a way that can’t be economically restored
- Obsolescence makes controls or drives unsupportable, and adapting modern replacements demands extensive rework
- Cumulative repair costs start approaching the value of a new, correctly specified crane
- Your operation has outgrown the crane’s capacity, span, or duty class
Here’s the discipline that makes this decision defensible to management and to a regulator: keep good records. A complete inspection and repair history — the paper trail this whole series builds — lets you make the call on evidence rather than guesswork. Operations that kept disciplined records decide with confidence. The ones that didn’t are gambling with a capital asset.
Mini-takeaway: the girders and legs decide it. Sound structure means the gantry is almost always worth refurbishing around; a cracked or fatigued frame is where replacement starts to win. Parts availability often settles it before cost does — an obsolete crane you can’t get drives or contactors for is already near end of life.
Part 9: 2026 Cost Reference for Maintenance and Inspection
Use these as planning figures to build a realistic annual maintenance budget. Actual costs vary with crane size, duty class, span, location, and whether work runs in-house or contracted.
| Program element | Scope | 2026 planning range (USD) |
|---|---|---|
| Annual thorough inspection | External qualified inspector + written report | $2,500 – $9,000 |
| NDT of critical welds (per campaign) | Certified MT/PT on girder, leg, and bogie welds | $3,000 – $15,000 |
| Wire rope replacement | Rope + labor (varies with length and capacity) | $1,500 – $12,000 |
| Wheel-set replacement (per set) | Wheels + labor + re-alignment | $5,000 – $30,000 |
| Travel brake service / reline | Linings, air-gap adjustment, hold test | $1,200 – $6,000 |
| Hoist brake service / reline | Linings, adjustment, drift test | $1,000 – $5,000 |
| Rail regrind or replacement | Late-stage fix after wear/spalling | $15,000 – $70,000+ |
| Storm anchor / rail clamp service (outdoor) | Inspection, freeing, actuator repair | $1,000 – $5,000 |
| 125% load test | Test weights, rigging, certification | $3,000 – $15,000 |
| Preventive maintenance contract | Scheduled visits, lubrication, adjustments | $8,000 – $40,000 / year |
| Operator training | Certification + periodic re-assessment | $500 – $2,000 per operator |
Two budget realities for operations teams:
- A preventive maintenance contract almost always costs less than reactive repair. The container yard’s nine-day shutdown, plus a wheel-set, a brake reline, and a storm-anchor repair, cost far more than the routine monthly attention that would have caught all three. Planned spend is predictable; emergency spend never is.
- Deferred maintenance scales sharply on gantries. A monthly flange-thickness check and a brake-lining measurement sit at the bottom of these ranges. Ignoring them until the wheels are wedged, the rail is spalled, and the brake is on its backing plate puts you at the top — often several failures cascading at once, plus the lost production around them.
Procurement tip: when you scope a maintenance contract, confirm exactly what’s included — inspections, NDT, consumables, wheel and rail work, storm-anchor service on outdoor cranes, callout response time, and parts. A cheap contract that excludes wear parts and emergency response isn’t a saving; it just moves the cost to your worst possible moment. Weigh response time as heavily as price. Uptime is what you’re actually buying.
Frequently Asked Questions
Q: How often does a gantry crane legally need inspection?
A: Under OSHA 1910.179 and ASME B30.2, inspections split into frequent (daily to monthly) and periodic (one to twelve months), with the exact frequency set by the crane’s CMAA class (or FEM/ISO group). A Class E–F / M7–M8 terminal gantry running around the clock needs far more frequent periodic inspection than a Class B / M4 yard crane. At minimum, plan on operator daily checks, a documented monthly inspection, and a thorough annual inspection by a qualified person with a written report. Confirm the rules for your jurisdiction and facility type, as local requirements can be stricter — and outdoor cranes add storm-anchor checks before any high-wind event.
Q: When do I need to replace gantry crane wheels?
A: The primary rejection criterion is flange thickness: replace the wheel when the flange has worn by 10% or more of its original dimension, measured monthly with a go/no-go contour gauge. Also replace for flat spots, uneven tread wear that changes the effective wheel diameter, or spalling and cracking on the tread. Just as important as replacing the wheel is diagnosing why it wore — a wedge-shaped flange means the crane is skewing, which points to a runway alignment problem from Part 2. Fix the alignment cause, or the new wheel wears into the same wedge.
Q: What safety devices are unique to a gantry crane, and how do I test them?
A: Beyond the hoist limit switches and overload protection common to all cranes, a gantry adds end-of-rail (long-travel) limit switches, travel buffers, and — on outdoor cranes — storm anchors or rail clamps. Test the end-of-rail limit switches monthly to confirm they stop the crane before it reaches the buffers; the buffers are a backup, and a crane hitting them means a failed limit switch. Test storm anchors monthly and again before any incoming storm, because a gantry is a large sail and uncontrolled wind can drive an unsecured crane off the end of its rails — a documented cause of catastrophic accidents. A storm anchor seized open looks fine but protects nothing, so test that it actually deploys and holds.
Q: What’s the difference between servicing a hoist brake and a travel brake?
A: Both need the same routine — measure lining thickness against the minimum, adjust the air gap, and test holding — but they protect against different failures. The hoist brake holds the suspended load, and the pass criterion is zero measurable drift; any downward creep takes the crane out of service. The travel brake stops and holds the moving crane on its rails, and on an outdoor gantry it also resists wind-driven movement, so it’s tested by confirming the crane stops within its design distance and stays put, including on any grade and against the rated wind condition. A gantry has both, and both belong on the monthly brake-lining checklist — the travel brake is the one operations teams most often forget.
Q: How do I decide whether to repair or replace an aging gantry crane?
A: It comes down to the girders and legs. If the primary structure passes inspection and NDT — no fatigue cracks beyond acceptance, no permanent deflection — you can refurbish the mechanical and electrical systems (wheels, rope, hoist, travel brakes, drives, controls) around a sound frame for far less than a new crane, and avoid the fabrication and installation lead time. Replace the whole gantry when the structure itself is cracked or fatigued, when the foundation or rail system has failed beyond economic repair, when obsol