


KBK Crane Installation Guide: Suspension, Alignment, and Commissioning
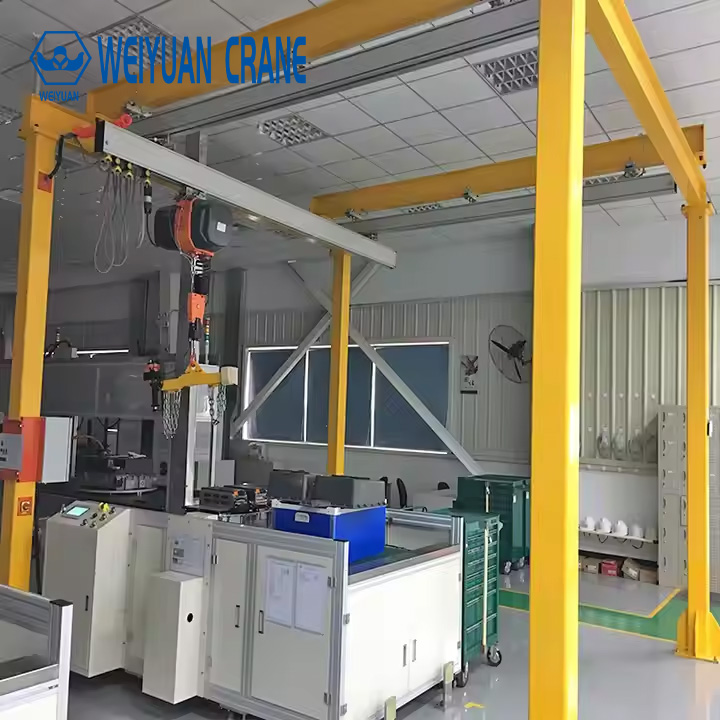
Published by: Weiyuan Crane Engineering Team | Last Updated: September 2026 | Reading Time: 9 min
Introduction
KBK crane installation looks straightforward compared to a bridge or gantry crane project — bolt-together components, no foundation, no runway construction. That simplicity is exactly why one detail gets overlooked more often than it should: every suspension bracket point transfers load into the roof or support frame above it, and a single under-rated or misaligned bracket point can compromise the whole system’s smooth, low-friction operation, even if every other component is installed correctly.
This guide walks through the installation process for a KBK crane system, from roof verification through commissioning, so plant engineers and maintenance teams know what a correct installation actually involves.
This is article 3 of 3 in the Weiyuan Crane KBK crane series. If you’re still choosing which system to buy, our KBK crane types and components guide (article 1) and buying guide (article 2) cover that groundwork first. Here is what you’ll learn in this one:
- Pre-installation checks unique to a suspended, bolt-together system
- The installation sequence from bracket points through track and hoist
- Electrical and control setup basics
- Load testing and commissioning steps before the system enters service
Before Installation: Roof and Structural Checks
Verify Every Suspension Bracket Point
Confirm the roof structure or support frame is rated to carry the suspended load at each individual bracket location per the manufacturer’s spacing and load data for your chosen track profile — not just an overall average across the layout. A KBK crane’s load is distributed across multiple discrete points, and each one needs independent verification.
Confirm Bracket Spacing Matches the Track Profile
Bracket spacing that’s too wide for the selected profile can cause excessive track deflection under load, affecting both the trolley’s smooth travel and the system’s structural margin — confirm spacing against the manufacturer’s specification for your specific profile before installation begins.
Survey the Planned Track Route
Walk the planned track route — monorail path, suspension crane rectangle, or full grid network — confirming no existing equipment, ductwork, or other overhead obstructions will conflict with the track or its suspension points.
Confirm Power Supply for Electric Hoist Options
If an electric chain hoist is part of the system, confirm voltage, phase, and frequency match the hoist’s nameplate rating before any electrical connection work begins.
Takeaway: Verifying every individual suspension bracket point’s load rating, not just an overall average, is the check most specific to KBK crane installation — get this confirmed by survey before any bracket goes in.
Installation Sequence
Step 1: Install Suspension Brackets
Suspension brackets are installed at each verified point along the planned track route, per the manufacturer’s spacing and torque specifications for the chosen track profile.
Step 2: Suspend and Align the Track Sections
Track sections are suspended from the brackets and connected end to end via the bolt-together connectors, with alignment checked along the full run to confirm a straight, level path (or a correctly radiused curve, where the layout includes one).
Step 3: Install Switches and Junctions
Where the layout includes branch points or a full-grid network, switch and junction sections are installed and aligned per the manufacturer’s specification, confirmed to transfer trolleys smoothly between track paths.
Step 4: Install Trolleys and Confirm Free Travel
Trolleys are installed into the track and run through the full planned route with no load, confirming smooth, low-friction travel throughout — including through any curves, switches, or junctions — before proceeding.
Step 5: Mount the Hoist
The hoist — manual, air-balanced, or electric chain — is mounted to the hoist trolley, following the same installation-quality checks used for any hoist: correct chain orientation and torque on all structural fasteners.
Step 6: Complete Electrical Connections (Electric Hoist Systems)
For systems using an electric chain hoist, connect main power and any festoon power supply along the track, then wire the pendant or remote control, confirming up/down direction matches actual hoist motion before proceeding.
Step 7: Install End Stops
End stops are installed and secured at the limits of each track run, preventing trolleys from running off the end during operation.
Takeaway: Bracket installation and track alignment come first, then switches and junctions where applicable, then trolleys (verified for free travel before any load), then hoist and electrical systems, with end stops as the final safety check.
Electrical and Control Setup Notes
- Grounding: for systems with an electric hoist, confirm proper grounding of the hoist and control station before energizing.
- Overload protection: verify the hoist’s overload protection is active and correctly calibrated to the system’s rated capacity.
- Festoon system alignment: confirm the festoon power supply cable runs cleanly along the track without binding or excessive slack as the trolley travels.
- Emergency stop: confirm the emergency stop function halts all hoist and trolley motion immediately, before any load testing begins.
Takeaway: For electric-hoist KBK systems, grounding, overload protection, and emergency stop function are the checks that must be confirmed working correctly before any load is placed on the system.
Load Testing and Commissioning
No-Load Function Test
Run the trolley and hoist through the full planned route with no load, confirming smooth travel through every section, curve, switch, and junction, and correct function at all end stops.
Rated-Load Test Across the Full Route
Test the system at its full rated capacity at multiple points along the route — not just one location — confirming consistent, low-friction travel and correct hoist brake holding when the control is released or the hand-push is stopped.
Suspension Point Verification
Under rated load, visually confirm no unexpected deflection or movement at the suspension bracket points — this is the KBK-specific equivalent of a wheel-load check on a bridge or gantry crane.
Documentation
Record the commissioning results — load test outcomes, bracket point verification, and any adjustments made — as part of the facility’s equipment maintenance record.
Takeaway: A KBK crane system isn’t ready for production use until it has passed a no-load function test across the full route and a rated-load test with suspension point verification at multiple locations — all documented as a maintenance baseline.
Frequently Asked Questions
Q: What’s the most important pre-installation check for a KBK crane? Verifying that the roof structure or support frame is rated to carry the suspended load at each individual bracket point — not just an overall average across the layout. Because a KBK crane’s load is distributed across multiple discrete suspension points, every one needs independent verification.
Q: How is KBK crane installation different from a bridge or gantry crane installation? A KBK crane’s installation centers on verifying multiple individual suspension bracket points along a roof or support frame, rather than a single runway or foundation. There’s no ground-level foundation or fixed runway beam involved — the entire load path runs through the bracket points into the overhead structure.
Q: What causes a KBK trolley to feel rough or bind while traveling? Most commonly, incorrect bracket spacing causing track deflection, or misalignment at a track connection joint or switch — this is why confirming smooth, no-load travel through the full route (Step 4 of the installation sequence) before mounting the hoist is an important checkpoint.
Q: Can a KBK crane be installed on any existing roof structure? No — this requires confirming the roof’s load rating at each specific bracket point against the manufacturer’s spacing and load data for your chosen track profile. Not all roof structures are suitable without reinforcement, regardless of how substantial they look.
Q: How often should an installed KBK crane be re-tested after commissioning? This depends on duty cycle and local regulatory requirements, but periodic re-inspection — typically annually at minimum for industrial use — is standard practice, along with a visual check of suspension bracket points and track alignment at more frequent intervals given the system’s continuous operation.
Q: What documentation should we keep after installation? Commissioning test results (no-load and rated-load tests across the full route), suspension bracket point verification, and the roof or support-frame structural rating confirmation — this record supports both compliance requirements and future maintenance or reconfiguration planning.